Sites and settings
Sites and settings is an administrative hub where you can configure functionality, features, integrations, and plugins. This section covers everything from creating new sites, to reference materials on each setting, to individual configurations that you may find useful as you manage your organization.
Content hierarchy
Branding a dynamic, enterprise-grade website requires consistency. For example, each page may have a nearly identical header and footer or a consistent layout where similar elements of a web page are consistent across its content.
Brightspot implements site-wide consistency using the following content hierarchy:
Global > Site > Section > Asset
- Global—The highest level in the content hierarchy. Settings at this level are shared by all sites unless explicitly overridden at the site level.
- Site—The second level down in the content hierarchy. Each site inherits global settings, but you can override settings per site.
- Section—The third level down in the hierarchy. Each section inherits site settings, but you can override settings per section.
- Asset—The lowest level in the content hierarchy. Each asset inherits section settings, if associated to a section. Otherwise, each asset inherits site settings. You can override settings per asset.
When Brightspot assembles content for display in a web browser, it searches the hierarchy to determine what content, layout, and color scheme to use. It first collects all the settings at the global level, then checks if any of those settings are changed at the site level, then the section level, and finally the asset level.
To maximize consistency and minimize the maintenance of your publications, configure your branding and layout as high as possible in the content hierarchy.
Global-level settings
The Global site has many settings that serve two purposes: configuring Brightspot and providing defaults for lower levels in the content hierarchy.
The tables in the topic below define the fields you find at the Global level. Many fields are at the Global level only; however, some fields also exist at the Site level (for which there is a note in the field description denoting such).
In these cases, the fields are tied to hierarchy. If such a field is set at the Global level, it cascades down to all sites, and all sites therefore inherit the setting. If you want a setting like this to only apply to certain sites, you must configure it at the Site level.
For a list of settings that do not exist at the Global level but do exist at the site level, see Site-level settings. These two topics were designed to be used together to supply information about most Sites & Settings fields in a standard implementation of Brightspot.
The following settings apply to most versions of Brightspot; however, your version may have different settings.
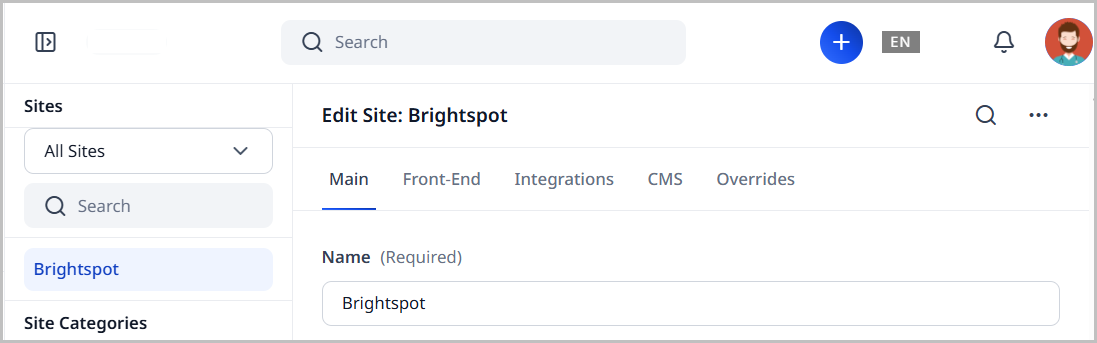
Main tab
| Field | Description |
|---|---|
| Name | Enter the site's name. The site's name appears in several widgets throughout .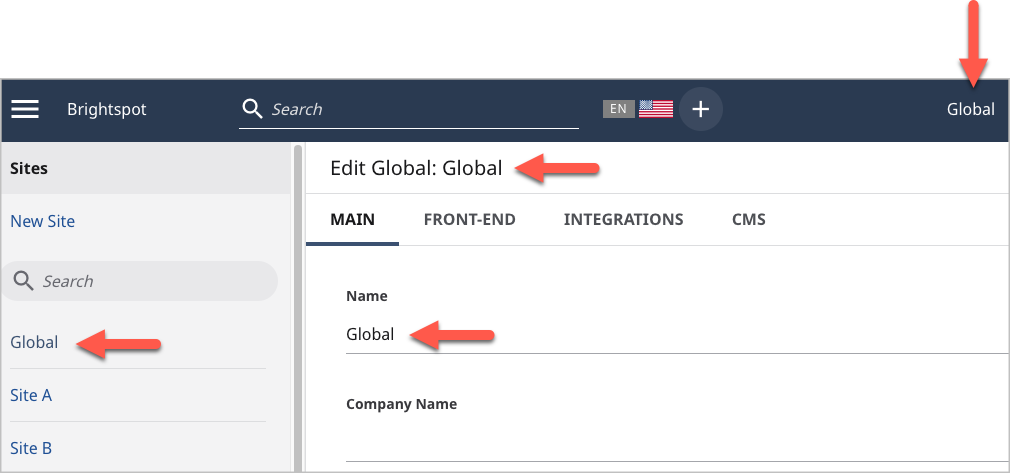 This field is also available at the site level. This field is also available at the site level. |
| Company Name | Enter your company's name. If you do not specify an image in the Company Logo field, displays your company's name in the header next to the navigation menu. If both Company Name and Company Logo are blank, Brightspot is displayed next to the navigation menu. This field is only available at the Global level. This field is only available at the Global level. |
| Company Logo | Enter your company's logo. displays the logo in the header next to the navigation menu. This field is only available at the Global level. |
| Background Image | Add a background image for the login page. If set to None, a standard image appears. 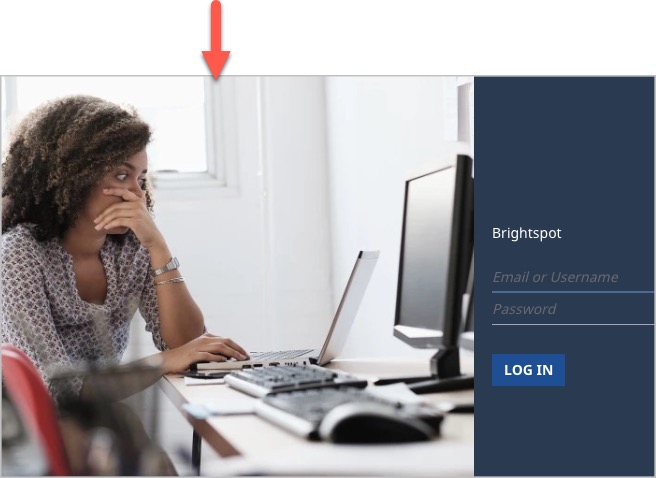 This field is only available at the Global level. This field is only available at the Global level. |
| Environment | Enter the name of your . The environment name appears in black ribbon in the header. This field is only available at the Global level. This field is only available at the Global level. |
| Default Role | Enter a default role for new users. When you create a new user, does the following:
For information about creating roles and users, see Users and roles. This field is only available at the Global level. |
| Default Preview URL | Enter the default base portion of a URL used to preview content. This field is usually necessary when previewing content in a headless environment. (If you are previewing content in a traditional environment, leave this field blank.) If not specified, uses the Default Tool URL. This field is only available at the Global level. |
| Default Tool URL | Enter the URL editors use to log in to . also uses this URL when sending notifications that include links, such as emails or text messages. (Do not append /cms to this field.)This field is only available at the Global level. |
| Authenticators | Select the service for authenticating editors attempting to log in to .
|
| Basic HTTP Authentication | Configure an HTTP authentication challenge that an editor must pass to log in to , similar to the following:
 This field is also available at the site level. This field is also available at the site level. |
| Theme | Select the default theme for all sites. You can override this setting at the site level. For more information about themes, see Theme management. This field is also available at the site level. |
Front-End tab
| Field | Description |
|---|---|
| Dynamic List Module Cache Seconds | Enter the number of seconds waits before updating the assets in a dynamic list. This field is also available at the site level. |
| Logos & Icons (cluster) | |
| Logo | Select a new image to serve as the logo that displays on this asset. For information about creating a logo, see Image Logo. |
| News Publisher Logo | Renders a site logo that complies with width and height restrictions for AMP. This field is also available at the site level. |
| Default Promo Image | Select an image that Brightspot displays as the default image when an asset is set in a promo module. This field is also available at the site level. |
| Favicon | Site's favicon appearing in browsers and some mobile apps. Use .png or .jpg files. This field is also available at the site level. |
| Favicon Ico | Site's favicon appearing in browsers and some mobile apps. Use .ico files. This field is also available at the site level. |
| Layout (cluster) | |
| Language Menu | Configure a menu containing a list of languages and associated links. Visitors select from this menu to view the site in different languages. This field is also available at the site level. This field is also available at the site level. |
| Hat | Select an existing hat or create a new one. For information about creating a hat, see Creating a hat. This field is also available at the site level. |
| Navigation | Select an existing navigation or create a new one. For more information about creating a navigation, see Creating a navigation. This field is also available at the site level. |
| Banner | Add a banner across the top of a page to display an alert or important message, either indefinitely or for a specified period of time. For details, see Applying a breaking news banner. This field is also available at the site level. |
| Footer | Select an existing footer or create a new one. For more information about creating a footer, see Creating a footer. This field is also available at the site level. |
| Above | Configure content appearing in the Above block on all pages across all sites. For more information, see Layout structure. This field is also available at the site level. |
| Aside | Configure content appearing in the Aside block on all pages across all sites. For more information, see Layout structure. This field is also available at the site level. |
| Below | Configure content appearing in the Below block on all pages across all sites. For more information, see Layout structure. This field is also available at the site level. |
| Search Page | Configure a page that lists results when a visitor searches for content. For information about creating a search page, see Search results. This field is also available at the site level. |
| Type Specific Overrides (cluster) | |
| Type Specific Overrides | Configure logos, icons, and layouts applicable to specific content types. Configurations in these fields override settings in the Logos & Icons and Layouts clusters. This field is also available at the site level. |
| Action Bar (cluster) | |
| Default Action Bar | Configure the site's default action bar. Appears on all of the site's assets unless overridden for a content type. For information about creating an action bar, see Creating an action bar. This field is also available at the site level. |
| Type Specific Overrides | Configure action bars applicable to specific content types for a site. Overrides Default Action Bar. For information about creating an action bar, see Creating an action bar. This field is also available at the site level. |
| Commenting (cluster) | |
| Commenting Services | Configure a commenting services, such as Coral and Disqus, through which visitors can post comments to a site's assets. This field is also available at the site level. |
| Entitlements (cluster) | |
| Entitlement Service | Configure a service that manages entitlements to your site's assets. This field is also available at the site level. |
| Error (cluster) | |
| Error Handlers | List of HTTP error or status codes and associated pages that visitors receive. For more information, see Configuring error responses. This field is also available at the site level. |
| Form CAPTCHA (cluster) | |
| Provider | Configuration for adding a reCAPTCHA control on forms. For more information, see Google reCAPTCHA. This field is also available at the site level. |
| Injection (cluster) | |
| Disable All Injection | Toggle on to disable ads being injected in an asset such as an article or a listicle. This field is also available at the site level. |
| Injection Profiles | Configuration that decides how and where the advertisements are placed in an asset. This field is also available at the site level. |
| JSON-LD (cluster) | |
| Organization | Configure how the data of your organization is presented. For details, see Configuring JSON-LD generation. This field is also available at the site level. |
| Localization (cluster) | |
| Locale Provider | Select the level in the content hierarchy that provides the requested language for an asset.
For example, a visitor wants to view a page of soccer scores at http://example.com/soccer_es. If Locale Provider is—
This field is also available at the site level. |
| Disable Front-End Localization | If toggled on, prevents front-end pages from including localization requests configured in Locale Provider. This field is only available at the Global level. |
| Open Graph (cluster) | |
| Default Open Graph Image | Select the image to appear in social networks when an asset is shared. For details, see Open Graph protocol. This field is also available at the site level. |
| Permalinks (cluster) | |
| Permalink Rule Overrides | Configures how generates permalinks for a content type. For each content type, you can configure one of the following rules:
For each rule, you can specify how resolves duplicate permalinks in the Auto Increment list.
This field is also available at the site level. |
| Podcast Providers (cluster) | |
| Providers | Configure podcast providers and their associated domain names. This field is also available at the site level. |
| Read Time (cluster) | |
| Disable Read Time in Byline | Toggle on to remove a displayed 'Read Time' from the byline of supported content types. This field is also available at the site level. |
| RSS Feed (cluster) | |
| RSS Validation Disabled Types | Select content types for which RSS validation is disabled. This field is also available at the site level. |
| Disable RSS Validation | If toggled on, disables RSS validation for all content types. This field is also available at the site level. |
| RSS Settings (cluster) | |
| Disable Feed | If toggled on—
This field is also available at the site level. |
| Copyright | Enter the copyright notice appearing in the feed's copyright tag, which not all RSS readers display. This field is also available at the site level. |
| Default To Atom Auto Detect | If toggled on, the feed is a discoverable Atom feed. If toggled off, the feed is a discoverable RSS feed. This field is also available at the site level. |
| Type Specific Feed Overrides | Configure feeds for specific content types. For homepages, pages, sections, and tags, you can configure the following:
The settings in this field override Disable Feed. This field is also available at the site level. |
| SEO (cluster) | |
| robots.txt | Compose lines to include in the site's robots.txt file.For detailed information about what you can include in this file, see Robots.txt Specifications. This field is also available at the site level. |
| Social (cluster) | |
| Bluesky Username | Enter the username associated with the author's Bluesky account.This field is also available at the site level. |
| Facebook Username | Enter the username associated with the author's Facebook account. This field is also available at the site level. |
| Instagram Username | Enter the username associated with the author's Instagram account. This field is also available at the site level. |
| LinkedIn Entity | Select one of the following options:
This field is also available at the site level. |
| Pinterest Username | Enter the username associated with the author's Pinterest account. This field is also available at the site level. |
| TikTok Username | Enter the username associated with the author's TikTok account. This field is also available at the site level. |
| Tumblr Username | Enter the username associated with the author's Tumblr account. This field is also available at the site level. |
| X (Twitter) Username | Enter the username associated with the author's X (Twitter) account. This field is also available at the site level. |
| YouTube Entity | Select one of the following options:
This field is also available at the site level. |
| Sponsored Content (cluster) | |
| Sponsored Content Meaning Link | Configure the default link for sponsored content. When clicking on a sponsored-content link, the visitor sees this page. You can override this link at the asset level. This field is also available at the site level. |
| Sponsor Display Text | The text that is displayed in an advertisement or promotional material to indicate that it is sponsored by a particular company or organization. This text is often used to differentiate sponsored content from organic content and to give credit to the sponsor. For details, see Setting introductory sponsor display text for a site. This field is also available at the site level. |
| Tag Manager (cluster) | |
| Tag Manager | Select Google Tag Manager from the list, which enables marketing tags on your site. For details, see Google tag manager. This field is also available at the site level. |
| Advanced (cluster) | |
| Time Zone | Select the time zone used to compute the published time as reported in some tags. For example, your Brightspot server is in New York, and you publish an asset at 9:00 AM. In addition, you set this field to Europe/London. In this case, renders <meta property="article:published_time" content="2021-03-29T14:00:00.000">, indicating the asset was published at 2:00 PM.This field is also available at the site level. |
| Browser Config | Compose the browserconfig file delivered to clients from this site.For information about how to compose this file, see Browser configuration schema reference. This field is also available at the site level. |
| Web App Manifest | Configure the web app manifest delivered to clients from this site. For information about how to compose this file, see Web app manifests. This field is also available at the site level. |
| Custom Scripts and Styles | Configure HTML elements added to the <head> element, in addition to what is configured in the site's theme. You can send different elements by filtering on HTTP method, URL pattern, and content type. For information about configuring response headers, see Working with custom <head> elements.This field is also available at the site level. |
| Custom Response Headers | Configure response headers sent to clients in addition to what is configured for the server and . You can send different response headers by filtering on HTTP method, URL pattern, and content type. For information about configuring response headers, see Working with response headers. This field is also available at the site level. |
| Body Elements | Add custom Javascript and HTML resources to certain pages. This field is also available at the site level. |
| Disable Smart Quotes | If toggled off, straight single and double quotes in the content edit form appear as curly quotes in published pages. This field is only available at the Global level. |
| Strip Query String From Directory Redirects | A client's request for a resource may trigger a redirect to a different directory. Toggle on this field if you want to strip the query string from the request before the server performs the redirect. This field is also available at the site level. |
CMS tab
| Field | Description |
|---|---|
| Adobe Analytics (cluster) | |
| Page Metrics To Display | Configure which specific metrics users see displayed in reports on the dashboard. For details, see Populating asset level analytics widget with adobe analytics data. This field is also available at the site level. |
| After-Save Events (cluster) | |
| After Save Events Configuration | Configure actions performs after saving an asset, such as submitting the asset to Apple News. For additional information, see Configuring after-save events in Apple News. This field is also available at the site level. |
| Analytics (cluster) | |
| Task Host | Enter the name or address of the host running the task for monitoring analytics accumulated by . This field is only available at the Global level. |
| Page Views Supplier | Select the provider of page view data.
|
| Disable Analytics HTML Tag Writer | If toggled on, disables the JavaScript that collects page view data. Data remains uncollected until the script is re-enabled. This field is only available at the Global level. |
| Assignment Desk (cluster) | |
| Content Types | Select the content types for which an editorial assignment can be managed. This field is also available at the site level. |
| Default Assignment Type | Select the default assignment type. When you create a new assignment, Brightspot uses this value as the initial assignment type. (You can select a different assignment type when you actually create an assignment.) Editors can filter assignments by assignment type. This field is also available at the site level. |
| Broadcast (cluster) | |
| Global Only | Toggle on to enable editors to see the broadcast message you designate only when working in the global site. For details, see Creating a broadcast message. This field is only available at the Global level. |
| Broadcast Message | Configure a message appearing on top of the header. This field is also available at the site level. This field is also available at the site level. |
| Broadcast Expiration | Select the date and time when broadcast message expires. If blank, broadcast message has no expiration. This field is also available at the site level. |
| Calendars (cluster) | |
| Task Host | Some Brightspot configurations include the Task Host field. This field represents the IP address or name of the host running background tasks. This field is only available at the Global level. |
| External Calendar Sync Frequency | How often to run event sync (in minutes) for every external calendar. By default, it will run every minute. For details, see Configuring external calendar processing. This field is only available at the Global level. |
| Content Discovery (cluster) | |
| Disable Site Owner Search Filter | If toggled on, suppresses the miscellaneous sites filter in the search panel. Searches retrieve assets from all sites.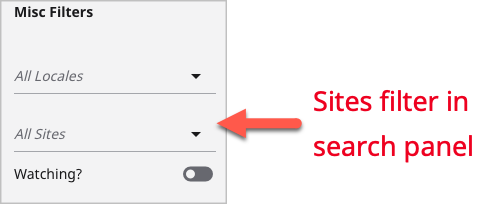 This field is only available at the Global level. This field is only available at the Global level. |
| Disable Site Owner Query Restriction | If toggled on, suppresses the site filter in dashboard widgets (such as Recent Activity), and the widget displays assets from all sites.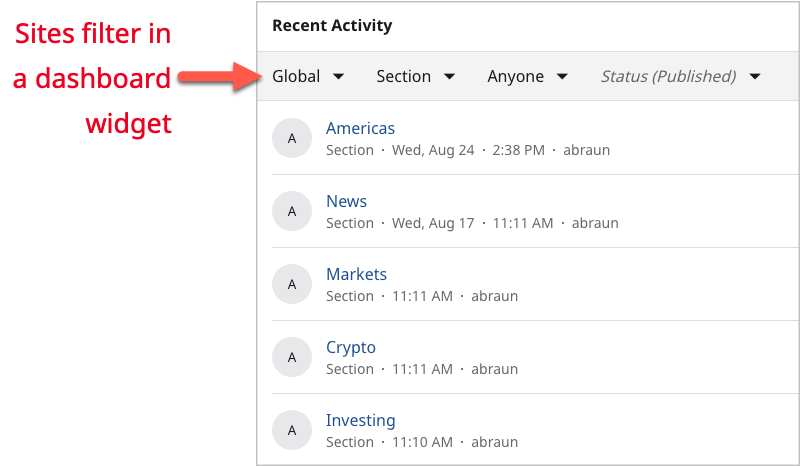 This field is only available at the Global level. This field is only available at the Global level. |
| Content Reporting (cluster) | |
| Task Host | This field represents the IP address or name of the host running background tasks. This field is only available at the Global level. |
| DAM Document Data Extraction Settings (cluster) | |
| Extractor Services | Configure the service for extracting content from a binary file, such as text from a PDF or an image from a thumbnail. This field is only available at the Global level. |
| Dashboard (cluster) | |
| Default Dashboard | Configure the default dashboard for all roles and users. Users, roles, and sites with a default dashboard of None inherit this dashboard.For detailed information, see Dashboards. This field is only available at the Global level. |
| Resources | Configure a default list of resources for the Resources widget. For detailed information, see Configuring the Resources widget. This field is also available at the site level. |
| Quick Start Settings | Configure a list of content types and assets appearing in the Quick Start widget. For detailed information, see Adding, removing, or "favoriting" items in your Quick Start widget. This field is also available at the site level. |
| Hunspell (cluster) | |
| Dictionaries | Create a list of dictionaries containing correctly spelled words. For detailed information, see Creating an auxiliary dictionary. This field is only available at the Global level. |
| Locales (cluster) | |
| Custom Locales | Add language-region-script-variant locales not included in the standard IANA listing. Entries in this field appear in the Available Locales field in the Localization and Translation clusters. For a listing of all possible elements for configuring a locale, see IANA's Language Subtag Registry. This field is only available at the Global level. |
| Localization (cluster) | |
| Disable Search Result Field | If toggled on, suppresses the Locales field in search results.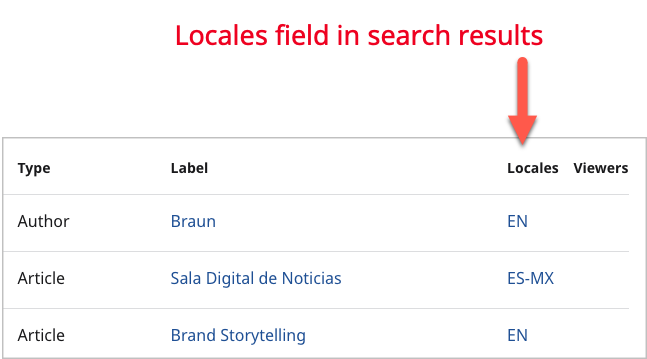 This field is only available at the Global level. This field is only available at the Global level. |
| Disable Localization Search Filter | If toggled on, suppresses the miscellaneous locales filter in the search panel. Searches retrieve assets from all locales.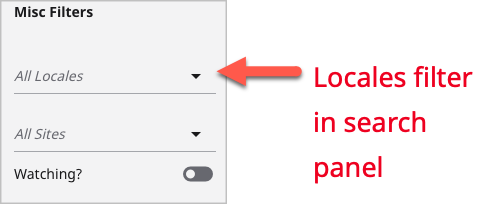 This field is only available at the Global level. This field is only available at the Global level. |
| Enable Localization Badge Display | Displays locale badges in the following places to indicate the locale when creating new assets:
This field defaults to the first locale set in the current site. This field is only available at the Global level. |
| Available Locales | Locales into which assets in this site can be translated. For information about translating assets, see Sending an asset for translation. This field is also available at the site level. |
| Notifications (cluster) | |
| System Notifications | Configure notifications that sends to a listserv email, Slack group, or SMS address. Editors subscribing to those services can listen for the notifications. For example, you can configure to send a notification to the Slack channel #publications every time an editor clicks Publish. All editors subscribed to that slack channel see the notification.This field is only available at the Global level. |
| Automatic User Subscriptions | Configure notifications to which users are automatically subscribed. Editors can opt out of these subscriptions. For more information, see Automatic subscriptions. This field is only available at the Global level. |
| Action Settings | Control actionable notifications by setting the following options:
This field is only available at the Global level. |
| Email Settings | Configure settings for sending emails from .
This field is only available at the Global level. |
| SMS Settings | Configure settings for sending text messages from .
|
| Preview (cluster) | |
| Closed by Default | If toggled on, the preview pane is closed by default. (For mobile devices, preview pane is always closed by default regardless of this setting.) This field is also available at the site level. |
| Preview Devices | Configure a list of devices available in the preview pane. If blank, all devices are available. This field is also available at the site level. |
| Preview Types | Previews generated by external applications, such as a GraphQL server. This field is also available at the site level. |
| Shared Preview Link Expiration (Days) | Enter the number of days after which a shared preview expires. See also Setting the preview link expiration at the global site level and Setting the preview link expiration at the individual site level. This field is also available at the site level. |
| Quick View (cluster) | |
| Quick View Settings | Set the content types and display fields that will be visible in Quick View. These settings only override inherited settings per content type. User settings inherit from Site, which inherit from Global. If multiple settings for the same content type are defined on a single level, only the first will be used. For details, see Configuring Quick View at the site level. This field is also available at the site level. |
| Read Only Access (cluster) | |
| Read Only Across Sites | zThis field is only available at the Global level. |
| Disable Site Swap Prompt | If toggled off, editors are prompted to swap sites to edit an asset owned by another site. For example, an editor working on Site A created an asset. If this field is—
 This field is only available at the Global level. This field is only available at the Global level. |
| RTE (cluster) | |
| Default Text Overlay CSS | Compose default CSS statements for text overlaid on graphics. For example, color: white; sets the overlaid text in white.This field is only available at the Global level. |
| Create Paragraph On Enter | If toggled on, pressing Enter in the rich-text editor adds an empty paragraph before starting the new one. This field is only available at the Global level. This field is only available at the Global level. |
| Create Comment From Highlight | If toggled on, editors can select text and click comment to create a comment from the selected text. This field is only available at the Global level. |
| Security (cluster) | |
| Two-Factor Authentication Required | If toggled on, two-factor authentication is required for editors to log in to . For additional information, see Two-factor authentication. This field is only available at the Global level. |
| Shelf (cluster) | |
| Enable Shelf | Enables The Shelf on the content edit page for assets. For details, see Working with The Shelf. This field is also available at the site level. |
| Type Settings | Select both the content types that will include The Shelf on the content edit page as well as the content types that can be dragged and dropped from The Shelf onto the content types. For details, see Working with The Shelf. This field is also available at the site level. |
| Shelf Default Source | Specify the source of items in The Shelf per content type. For details, see Working with The Shelf. This field is also available at the site level. |
| Site Copier (cluster) | |
| Disallow Site Copy | If toggled on, administrators cannot copy sites. For additional information, see Copying a site. This field is only available at the Global level. |
| Copy Threshold | Enter the maximal number of assets copies from the original site to the new site. This field is only available at the Global level. |
| Style Groups (cluster) | |
| Curated Style Groups | Configure groups of module styles that editors can apply to multiple assets. For additional information, see Applying a module style. This field is also available at the site level. |
| Suggestions (cluster) | |
| Number Of Suggestions | Enter the number of suggestions appearing in a drop-down list. This field is only available at the Global level. |
| Show Suggested Owner Content Only | If toggled on, suggestions are taken from content associated with the current asset's site. This field is only available at the Global level. |
| Suggestion Provider | Configure one of the available providers that returns suggestions. This field is only available at the Global level. |
| Timed Companion Content (cluster) | |
| Enable Timed Companion Content | Companion content is an asset associated with a video or audio. Brightspot cues the visitor to view the companion content at a specific time during the media's playback. For more information, see Creating companion content. This field is also available at the site level. |
| Translation (cluster) | |
| Available Locales | Select locales to which a site's content is translated. This field is also available at the site level. |
| Locale Groups | Configure groups of locales. If you translate your content to multiple locales, it may be easier to manage them as a group. This field is also available at the site level. |
| Default Service Settings | Configure the default settings for a translation service. You can override these settings for individual translation jobs. (You can also configure default service settings for individual content types.) This field is also available at the site level. |
| Type Settings | Configure the default settings for individual content types.
This field is also available at the site level. |
| UI (cluster) | |
| Common Times | Configure static times for general usage, such as setting a daily column deadline to 3:30 PM. You can have these times appear in . This field is only available at the Global level. |
| Recent Revisions Banner Expiration | Enter the number of hours after which an unpublished revision no longer appears in the Recent Revisions Banner. |
| Revision Name Required | Requires that the revision creator gives a name to each revision of an asset. For details, see Naming revisions. This field is only available at the Global level. |
| Disable Search Term Highlighting | If toggled on, the search term in search results is not highlighted in yellow. |
| Enable Calendar Search Result View | If toggled on, the search panel includes a calendar view. This view is useful for viewing scheduled events associated with a search term. This field is only available at the Global level. This field is only available at the Global level. |
| List Gallery Default View | If toggled on, the default view for a gallery's items in the content edit form is list. If toggled off, the default view is gallery. This field is only available at the Global level. This field is only available at the Global level. |
| Localization Bundles | Configure localization bundles to manage translated text strings and resources for different languages. This field is only available at the Global level. |
| Enable Enhanced SEO UI | If toggled on, adds the following fields to the content edit form's SEO tab: Focus Keyword, Focus Keyword Density, and Disable SEO Recommendations. This field is also available at the site level. |
| Retain Search Settings | Set to Retain all settings for each content type by default. Select one of the following from the list:
|
| Enable Bulk Scheduling | Enables the bulk scheduling feature. For details, see Bulk actions. This field is also available at the site level. |
| Widgets Watching Filter | Enables the Watching filter to appear in the search panel results. For details, see Watch. This field is also available at the site level. |
| Enable Guides | If toggled on, editors can view and edit production guides for content types and their fields. For more information, see Accessing production guides. This field is also available at the site level. |
| Enable Pre Publish Actions | If toggled on, provides cues for updating an asset's fields (such as promo overrides) before actually publishing the asset. For more information, see Pre-publishing actions. This field is also available at the site level. |
| Enable Post Publish Actions | If toggled on, provides suggestions for placing assets after they are published. For more information, see Post-publishing actions. This field is also available at the site level. |
| Enable Preview to Edit | Preview to edit allows you to edit assets directly from the preview pane. Select from:
This field is also available at the site level. |
| Open Post Publish Actions Automatically | If toggled on, displays the widget for post-publish actions after the asset is first published. If toggled off, editors can still access post-publish actions by clicking more_horiz > Post Publish Actions. For more information, see Post-publishing actions. This field is also available at the site level. |
| Conversation Types | Configure a list of content types for which the conversation widget is available in the content edit page. If blank, conversation is available for all content types. For more information, see Collaboration. This field is only available at the Global level. |
| Preset Theme | Select one of the themes to use for . If you select Custom, you can configure the following colors for individual UI elements:
This field is also available at the site level. |
| Appearance | Select the appearance for . Light—The standard appearance. Dark— Dark mode. Follow OS—The default appearance mode of the operating system being used. This field is also available at the site level. |
| Enable Boxed Output | If toggled on, places a border around fields. This field is also available at the site level. |
| Enable Compact | If toggled on, displays the content edit form with smaller labels and fields, so more of it appears in your screen without scrolling. This field is also available at the site level. |
| Enable Compact Rails | If toggled on, displays widgets in the right and left rails with smaller labels and fields, so more of them appear in your screen without scrolling. This field is also available at the site level. |
| Enable High Contrast | If toggled on, displays in a high-contrast mode, improving accessibility and ideal when working outside or with strong ambient light. This field is also available at the site level. |
| Header Background | Sets the header's background color. This field is also available at the site level. |
| User Access (cluster) | |
| User Access Widget | Enable to enable the Users widget, which allow users to determine who has access to their drafts. For details, see Enabling the users widget. This field is also available at the site level. |
| Watch (cluster) | |
| Auto Watch User On Publish | Enable if you want a user, after publishing an asset, to automatically be added to the list of the asset's watchers. This field is also available at the site level. |
| Auto Watch User On Update | Enable if you want a user, after updating an asset, to automatically be added to the list of the asset's watchers. This field is also available at the site level. |
| Advanced (cluster) | |
| Extra CSS | Compose additional lines of CSS code that impact the GUI. For example, the statement label \{text-decoration: underline;\} underlines all field labels in the GUI.This field is only available at the Global level. |
| Extra Java Script | Compose lines of JavaScript code that run every time you load a page in . For example, the statement alert('Good morning!'); displays an alert message every time you load the dashboard, content edit form, or any other page.This field is only available at the Global level. |
| Disable Configurable Search Filters | If toggled off, editors can move the search panel's common filters to a collapsible list. This field is only available at the Global level. |
| Trailing Slash Configuration | Select the method for appending or removing a trailing slash from a URL.
This field is only available at the Global level. |
| Show Models Without Handlebars In Theme | Toggle on to hide content types in that are not supported by the current site's theme. This field is also available at the site level. |
| Default Task Host | Default host on which various background tasks run. assumes all background tasks are running on this host unless you specify a different one for a particular task. For some tasks you can configure different hosts. (For example, some integrations can have a separate task host.) This field is only available at the Global level. |
| Excluded Classes | Allows you to specifically prevent certain CSS classes from being applied to particular elements or sections of a webpage. This field is also available at the site level. |
Integrations tab
| Field | Description |
|---|---|
| Integrations | A field that is required as part of the configuration of many advertising and analytics integrations. For details, see This field is also available at the site level. |
| Disable Third Party Parameter Value | Store a parameter value that can be used to disable third-party integrations (like Google Analytics or Facebook scripts) on a page. The value should be at least five characters long. This field can also be used to measure the performance of a site without third-party JavaScript libraries or other functionality, or used to debug issues by helping determine the source of an issue. This field is also available at the site level. |
| Adobe Analytics (cluster) | |
| Enabled | Toggle on to enable the Adobe Analytics integration. For details, see Adding the Adobe Analytics integration. This field is only available at the Global level. |
| Task Host | Enter a host name or IP address of the server or cluster of servers that manages background tasks This field is only available at the Global level. |
| API Settings | Enter values from Adobe Analytics to configure the integration. For details, see Configuring a site to retrieve Adobe Analytics data. This field is also available at the site level. |
| Site-Default Report Suite | The report suite that will be used to calculate the site contents' indexes for dynamic sorting. This field is also available at the site level. |
| Adobe Stock (cluster) | |
| Adobe Stock API client | Create or select the Adobe Stock API client that will be used in the integration. For details, see Configuring the Adobe Stock integration. This field is also available at the site level. |
| AI (cluster) | |
| Create with AI Enabled | Toggle on to enable Create with AI functionality, which allows editors to query your configured AI client to generate content ideas such as headlines and body text. For details, see Brightspot's generative AI integrations. This field is also available at the site level. |
| Create with AI Client | Create or select the Create with AI client that will be used in the integration. For details, see Creating a new Create with AI client. This field is also available at the site level. |
| Ask AI Enabled | Toggle on to enable the Ask AI functionality, which allows your configured AI client to query your CMS content to summarize and list the existing content you already have on a given topic. For details, see Creating a new Ask AI client. This field is also available at the site level. |
| Ask AI Client | Create or select the Ask AI client that will be used in the integration. For details, see Creating a new Ask AI client. This field is also available at the site level. |
| Generated Content Detectors | This feature sets a similarity threshold to determine if content should be flagged as AI-generated. When content is created using the Create with AI feature, the system compares the original AI-generated text with any subsequent edits. If the edited text differs from the original AI text by more than the threshold (e.g., 75%), the system will no longer flag it as AI-generated content. This field is also available at the site level. |
| Analytics (cluster) | |
| Automatic Analytics JavaScript Injection? | Toggle on to enable automatic injection of JavaScript code for website analytics tracking. This field is also available at the site level. |
| Search Sources | Traffic sources (domain names like google.com) of the search channel. When left blank, defaults to "google.com," "bing.com," and "yahoo.com." This field is also available at the site level. |
| Social Sources | Traffic sources (domain names like facebook.com) of the social channel. When left blank, defaults to "t.co," "facebook.com," "linkedin.com," and "youtube.com." This field is also available at the site level. |
| Apple News (cluster) | |
| Enabled | Toggle on to determine that content published in Brightspot can be automatically distributed to Apple News channels. For details, see Enabling the Apple News integration at the global level. This field is also available at the site level. |
| Distribution Job Enabled | Toggle on to enable automated distribution of content to the Apple News platform. This field is only available at the Global level. |
| Task Host | Enter a host name or IP address of the server or cluster of servers that manages background tasks. This field is only available at the Global level. |
| Generator Identifier | Sets a plain text identifier for the article payloads sent to Apple News. This helps distinguish from where the article was sent. By default, this value is Brightspot, but you can override it. |
| Associated Press (cluster) | |
| Associated Press API Client | Create or select the Associated Press API client that will be used for this integration. For details, see Configuring the AP Images integration. This field is also available at the site level. |
| AWS Comprehend (cluster) | |
| Credentials | Enter credentials related to the AWS Comprehend integration. For details, see Configuring the Comprehend integration. This field is only available at the Global level. |
| Region | Enter a region unless already configured on your Brightspot server. For details, see Configuring the Comprehend integration. This field is only available at the Global level. |
| Language | Select the language of the text that will be sent to AWS Comprehend. This field is only available at the Global level. |
| Minimum Key Phrase Confidence | Enter a confidence rating (0.0–1.0) required to accept a key phrase. For details, see Configuring the Comprehend integration. This field is only available at the Global level. |
| Minimum Entity Confidence | Enter a confidence rating (0.0–1.0) required to accept an entity. For details, see Configuring the Comprehend integration. This field is only available at the Global level. |
| AWS SES (cluster) | |
| Enable Bounce and Complaint Notification Service | Used to enable the monitoring of bounces and complaints for AWS SES. When enabled, the service will handle notifications for email bounces and complaints. This field is only available at the Global level. |
| Bounce Notification SQS Queue Name | Specifies the name of the SQS queue that will receive bounce notifications from AWS SES. The placeholder provides a fallback queue name if none is specified. This field is only available at the Global level. |
| Complaint Notification SQS Queue Name | Specifies the name of the SQS queue that will receive complaint notifications from AWS SES. The placeholder provides a fallback queue name if none is specified. This field is only available at the Global level. |
| AWS SQS (cluster) | |
| Region | Used to specify the AWS SQS region that the queues exist within. This field is only available at the Global level. |
| AWS Transcribe (cluster) | |
| Enable Transcribe Service | Toggle on to enable AWS Transcribe. For details, see Amazon Transcribe. This field is only available at the Global level. |
| Credentials | Enter credentials related to the AWS Transcribe integration. For details, see Amazon Transcribe. This field is only available at the Global level. |
| Region | Enter the region to use when making requests to this AWS service. For details, see Amazon Transcribe. This field is only available at the Global level. |
| SQS Queue Name | Enter your Amazon SQS queue name that you have obtained from your AWS console. For details, see Amazon Transcribe. This field is only available at the Global level. |
| Transcribe Settings | Select an existing transcription setting, or create a new setting. For details, see Amazon Transcribe. This field is also available at the site level. |
| AWS Translation (cluster) | |
| Credentials | Enter the login credentials that Brightspot sends to Amazon Translate when initiating a translation job. For details, see Amazon Translate. This field is only available at the Global level. |
| Region | Enter the region to use when making requests to this AWS service. For details, see Amazon Translate. This field is only available at the Global level. |
| Input Bucket | Enter the AWS bucket to which Brightspot submits translation jobs. For details, see Amazon Translate. This field is only available at the Global level. |
| Output Bucket | Enter the AWS bucket from which Brightspot retrieves completed translations. For details, see Amazon Translate. This field is only available at the Global level. |
| Translation Role Arn | Enter the AWS role that has access to the input and output buckets as well as the translation service. For details, see Amazon Translate. This field is only available at the Global level. |
| Disable Translation Update Task | Toggle on to prevent Brightspot from querying AWS Translate about the progress of active translations. For details, see Amazon Translate. This field is only available at the Global level. |
| All Async Processing | Toggle on to have Brightspot submit translation jobs asynchronously. For details, see Amazon Translate. This field is only available at the Global level. |
| Task Host | Enter the IP address or name of the host managing translation jobs. For details, see Amazon Translate. This field is only available at the Global level. |
| Brightcove (cluster) | |
| Global Import Frequency | How often to run playlist import (in minutes) for every global or non-global account. For details, see Configuring the Brightcove integration. This field is only available at the Global level. |
| Settings | Configure settings related to the Brightcove integration. For details, see Configuring the Brightcove integration. This field is also available at the site level. |
| Facebook (cluster) | |
| Facebook App Access Token | Enter your Facebook app ID and access token. For more details, see Configuring the Facebook integration. This field is only available at the Global level. |
| Facebook Settings | Enter your Facebook app ID and determine whether or not it is disabled. For details, see Configuring the Facebook integration. This field is also available at the site level. |
| Getty (cluster) | |
| Download Full Images | Enabling this option will have the Getty Image Import use the Image Download API, potentially incurring charges from Getty and counting towards any download limits. For details, see Configuring the Getty Images integration. This field is also available at the site level. |
| Getty API Client | Create or select the Getty API client that will be used for this integration. For details, see Configuring the Getty Images integration. This field is also available at the site level. |
| Google (cluster) | |
| Google Server API Key | Enter your Google Server API key retrieved from your Google Drive account. For details, see Configuring the Google Drive integration. This field is only available at the Global level. |
| Task Host | The task host required for Google Analytics 4 reports to run. This field is only available at the Global level. |
| Drive Client ID | Enter the Drive client ID retrieved from your Google Drive account. This field requires that you also add a redirect URI in the Google Developer console. For details, see Configuring the Google Drive integration. This field is only available at the Global level. |
| Drive Client Secret | Enter the Drive client secret retrieved from your Google Drive account. For details, see Configuring the Google Drive integration. This field is only available at the Global level. |
| Google Analytics 4 (cluster) | |
| Credentials | Enter the credentials necessary for Brightspot to access and interact with your Google Analytics 4 (GA4) property. For details, see Configuring a site to retrieve Google Analytics 4 data. This field is also available at the site level. |
| Property ID | Enter the ID of the property that was generated in your Google Analytics account as described in Google's property documentation. For details, see Configuring a site to retrieve Google Analytics 4 data. This field is also available at the site level. |
| Import Time Zone | Set the time zone for your data import. This setting must match the time zone of the same property as specified in the Property ID field above. For details, see Configuring a site to retrieve Google Analytics 4 data. This field is also available at the site level. |
| Page Report Enabled | Toggling on this setting allows the import of page views data at the per-page level. This field is also available at the site level. |
| Metrics To Display | Select the metrics to display in the Analytics widget on the content edit page. If none are selected, all will be displayed. This field is also available at the site level. |
| Site Reports | Specify the type of reports to generate about traffic to your site. For details, see Configuring a site to retrieve Google Analytics 4 data. This field is also available at the site level. |
| Custom Events | Custom events that Brightspot retrieves and displays either at the page level or at the site level. For details, see Configuring a site to retrieve Google Analytics 4 data. This field is also available at the site level. |
| Custom Events To Display | Custom events that Brightspot retrieves and displays either at the page level or at the site level. For details, see Configuring a site to retrieve Google Analytics 4 data. This field is also available at the site level. |
| Enable Google Analytics Import | Toggle on to turn on the Google Analytics 4 integration. For details, see Configuring a site to retrieve Google Analytics 4 data. This field is only available at the Global level. |
| Product Report Enabled | Controls whether product-related data is tracked and reported to your Google Analytics 4 property. For details, see Configuring product reports for your Shopify products. This field is also available at the site level. |
| Product Metrics To Display | Select metrics to display in the GA Product Data tab on a product's content edit page. If none are selected, all metrics are displayed. For details, see Configuring product reports for your Shopify products. This field is also available at the site level. |
| Product Analytics Timeframe | The option selected below will be used to customize product analytics dynamic lists. If nothing is selected, it will default to 7 days. For details, see Configuring product reports for your Shopify products. This field is also available at the site level. |
| Import Schedule | Configure the import schedule for Google Analytics 4 data. To avoid impacting system performance, construct your schedules to run no more than once an hour. For details, see Configuring Analytics ingestion intervals with the schedule builder. This field is only available at the Global level. |
| Historical Days To Import | The number of days in the past to import data. This field is only available at the Global level. |
| Google Calendar (cluster) | |
| Calendar Service | Create or select an existing calender service to integrate with Brightspot. For details, see either Configuring the Google Calendar integration or Configuring the Outlook calendar integration. This field is only available at the Global level. |
| Notification Tool URL Prefix | An auto-generated URL used for constructing notification links within Google Calendar events. This field is only available at the Global level. |
| Hubspot (cluster) | |
| Accounts | Create or select an existing Hubspot account for use in this integration. For details, see Adding a Hubspot account. This field is also available at the site level. |
| Global Import Frequency | Defines how often data is imported from HubSpot into the Brightspot system. For details, see Setting the global import frequency for Hubspot forms. This field is only available at the Global level. |
| Image Recognition (cluster) | |
| Provider | Choose from the list which service provider(s) to use for image recognition. For details, see Amazon Rekognition. This field is only available at the Global level. |
| JS Report (cluster) | |
| Endpoint | Specify the endpoint to be used in the JSReport integration. For details, see JSReport. This field is only available at the Global level. |
| Username | Specify the username of the account to be used in the JSReport integration. For details, see JSReport. This field is only available at the Global level. |
| Password | Specify the password of the account to be used in the JSReport integration. For details, see JSReport. This field is only available at the Global level. |
| JW Player (cluster) | |
| Settings | Specify the settings for the JW Player integration. For details, see Configuring the JW Player integration. This field is also available at the site level. |
| Global Import Frequency | Enter the interval in minutes between which Brightspot imports videos added to JW Player. For details, see Configuring the JW Player integration. This field is only available at the Global level. |
| Mailchimp (cluster) | |
| Settings | Specify the settings for the Mailchimp integration. For details, see Mailchimp. This field is also available at the site level. |
| Default Subject | Specify the default subject line for emails from Mailchimp that contain your newsletters. This field is also available at the site level. |
| Default From Name | Specify the default name of the individual or entity from which the newsletter emails appear to come. This field is also available at the site level. |
| Default Reply To | Specify the default email address for individals who wish to reply to your email mailings. This field is also available at the site level. |
| Admin URL | Enter the Admin URL. The value is obtained from Mailchimp. For details, see Mailchimp. This field is also available at the site level. |
| Submit Action URL | Enter a URL that specifies where to send the form data when it is submitted. This field is also available at the site level. |
| Marketo (cluster) | |
| Enable Import | Toggle on to enable the Marketo integration. For details, see Configuring Marketo. This field is only available at the Global level. |
| Fetch Size | Enter the number of forms Brightspot imports during each retrieval from Marketo. For details, see Configuring Marketo. This field is only available at the Global level. |
| Accounts | Create or select existing account settings for the Marketo integration. For details, see Configuring Marketo. This field is also available at the site level. |
| Microsoft (cluster) | |
| App | Create or select existing Microsoft app for use in Microsoft integrations. For details, see Adding a Microsoft app. This field is only available at the Global level. |
| Microsoft Teams (cluster) | |
| Account For App Installation | Click the button to be redirected to Microsoft to authenticate. You redirect back to Brightspot after authentication, and you are prompted to save your settings to activate the admin account. For details, see Configuring Teams. This field is only available at the Global level. |
| App For Teams Bot | Create or select an existing app for Teams bot. For details, see Configuring Teams. This field is only available at the Global level. |
| Teams Bot URL | Select your Bot from Azure Home -> Bot Services and open the Channels pane. Then copy the address of the 'Open in Teams' link and paste it here. This field is only available at the Global level. |
| Allow App Selection For Notification | This allows a user to choose an app for notification in the profile. Enable this option in multi tenant environment. This field is only available at the Global level. |
| Notifications (cluster) | |
| Slack Settings | Toggle on to allow editors to choose an app for notification in their profile. Enable this for multi-tenant environments. See Configuring Teams for details. This field is only available at the Global level. |
| Outlook Calendar (cluster) | |
| Microsoft App | Create or select an existing Microsoft app for use in the Microsoft Outlook Calendar integration. For details, see Adding a Microsoft app. This field is only available at the Global level. |
| Notification Tool URL Prefix | Add the URL Brightspot uses to receive notifications from Outlook, or leave blank to use the URL configured in Edit Global > Main > Default Tool URL. For details, see Configuring the Outlook Calendar integration. This field is only available at the Global level. |
| Pardot (cluster) | |
| Enable Import | A toggle that controls whether data is imported from Pardot into the Brightspot system. Enabling this setting activates the data synchronization process between Pardot and Brightspot. This field is only available at the Global level. |
| Accounts | Specify settings to be used for the Pardot integration. For details, see Adding a Pardot account. This field is also available at the site level. |
| Sailthru (cluster) | |
| Settings | Specify settings to be used for the Sailthru integration. For details, see Sailthru. This field is also available at the site level. |
| Content Library Auto Sync Settings | Select the content types you want to synchronize between Brightspot and the Sailthru content library. For details, see Sailthru. This field is also available at the site level. |
| Default From Name | Specify the default name for the individual or entity from which the newsletter emails appear to come. For details, see Sailthru. This field is also available at the site level. |
| Default From Email | Specify the email address that recipients will see as the sender of emails sent from Brightspot using the Sailthru platform. For details, see Sailthru. This field is also available at the site level. |
| Default Subject | Specify the default subject line for emails from Sailthru that contain your newsletters. For details, see Sailthru. This field is also available at the site level. |
| Default Reply To | Specify the default email address for individals who wish to reply to your email mailings. For details, see Sailthru. This field is also available at the site level. |
| Enable Beacon Injection | Toggle on to allow Sailthru to track the open rate for your emails. Beacon injection is required to track open rates. It is recommended that the beacon is configured in Sailthru as a transparent 1-pixel by 1-pixel gif or png if enabling this setting. This field is also available at the site level. |
| Shopify (cluster) | |
| Settings | Create or select existing settings for the Shopify integration. For details, see Shopify. This field is also available at the site level. |
| Shutterstock (cluster) | |
| Shutterstock API Client | Create or select an existing API client for the Shutterstock integration. For details, see Shutterstock. This field is also available at the site level. |
| Slack (cluster) | |
| Workspaces | Create or select an existing workspace for the Slack integration. For details, see Slack. This field is only available at the Global level. |
| Taboola Settings (cluster) | |
| Settings | Create or select existing settings for the Taboola integration. For details, see Taboola. This field is also available at the site level. |
| Vimeo (cluster) | |
| Client ID | Specify the client ID for use in the Vimeo integration. For details, see Configuring the Vimeo integration. This field is only available at the Global level. |
| Client Secret | Specify the client secret for use in the Vimeo integration. For details, see Configuring the Vimeo integration. This field is only available at the Global level. |
| Number of Videos to Load Each Request | Enter the number of videos Brightspot retrieves for each search. This field is only available at the Global level. |
| YouTube (cluster) | |
| YouTube API Client | Create or select an existing YouTube API client for use in the YouTube integration. For details, see Configuring the YouTube integration. This field is also available at the site level. |
Site-level settings
Some settings are specific to your site, meaning they are not available at the Global level and thus do not cascade down the hierarchy. These settings are only available at the Site level.
This topic was designed to be used in conjunction with Global-level settings, which details all settings that exist at either the Global level only, or settings that exist at both the Global and Site levels.
Main tab
| Field | Description |
|---|---|
| SEO Display Name | Appends this value in the <title> tag to the asset's title. This is also the value used for the OpenGraph site name which appears in objects such as Slack snippets. For example, if you have an article Benefits of GraphQL, and in this field you add GraphQL API Site, then the title tag is <title>Benefits of GraphQL - GraphQL API Site</title>. |
| URLs | List of URLs that prefix all pages in this site. truncates any trailing slashes. For example, an entry https://www.example.com in this list creates URLs of the form https://www.example.com/example-page.For details, see Site URLs. |
Front-End tab
| Field | Description |
|---|---|
| Type Specific Overrides | |
| Type Specific Landing Page Content | Allows you to separately configure the layout of various landing pages. For example, your site displays a list of quotes on every landing page; however, for blog landing pages, you want to include a list of promos after the quote list. This field allows you to specify that you want to include additional assets (in this case, a list of promos) before, after, or instead of the content that is already configured on any given landing page (in this case, a list of quotes). |
| Authentication / Authorization | |
| Authentication Settings | Select the settings you configured to authenticate visitors. For details, see Understanding authentication and authorization in Brightspot. |
| Authorization Settings | Select the settings you configured to authorize visitors. For details, see Understanding authentication and authorization in Brightspot. |
| Content Discovery | |
| Front End Accessible Sites | Select the sites to which you want the current site's assets be available in dynamic results. For example, if the current site is Brightspot, and you select Example in this field, then a dynamically populated module on the Example site can include assets from the Brightspot site. |
| Sitemap Settings | |
| Site Map Types | Select the type of site map (Standard, News, or Video). Through these various supported sitemap formats, provides additional information about your images, videos, and news content to search engines. |
| News Site Map Name | Enter the name for the specific sitemap file that includes information about your website's news articles. |
| Site Map Default URL | The default URL used to build the links within the sitemaps. recommends that this be set to your public facing domain that you want search engines to crawl and index. Defaults to the site's current URL. For details on submitting a sitemap to Google, see Submit your sitemap to Google. |
CMS tab
| Field | Description |
|---|---|
| CMS Logo | Sets the logo that replaces the hyperlinked site name in the left of the header. For details, see Logo. |
| Preview URL | Sets the URL to be used when previewing assets. |
| Site Category | Assigns the current site to a specified site category. For details, see Creating site categories. |
| Calendar | |
| External Calendar Distributions | Configure the sources and types of items that populate integrated calendars. |
| Content Discovery | |
| All Sites Accessible | Makes assets from all other sites accessible to the current site in search. For example, the current site is Brightspot. There are three other sites: Example, GraphQL, and Editing Site. Toggling this setting makes all assets from these three sites accessible to editors working in the Brightspot site.For details, see Sharing content. |
| Accessible Sites | Makes assets from specified sites accessible to the current site in search. For example, the current site is Brightspot. There are three other sites: Example, GraphQL, and Editing Site. Selecting GraphQL and Editing Site in this field makes all assets from those two sites accessible to editors working in the Brightspot site.For details, see Sharing content. Will be overriden by All Sites Accessible field, if enabled. |
| Sites With Read Access | Permits other sites to read the current site's assets without having to switch to the current site. For example, the article Benefits of GraphQL is owned by the Brightspot site. Selecting the Example site in this field allows users in the Example site to view Benefits of GraphQL without having to switch to the Brightspot site.For details, see Sites widget. This setting controls which sites can read this site's content. |
| Localization | |
| Localization Badge Display | Displays locale badges in the following places to indicate the locale when creating new assets:
|
| Available Locales | Locales into which assets in this site can be translated. For information about translating assets, see Sending an asset for translation. |
| Site Copier | |
| Allow Site Copy | Allows you to make a copy of this site. For details, see Copying a site. |
| UI | |
| Enable Enhanced SEO UI | Adds additional SEO fields and settings to a content type's SEO tab, it if has one. For details, see SEO. |
| Advanced | |
| CMS CSS Class | Adds an invisible CSS class that is inserted in the <head> element of the data object model. |
| Show Models Without Handlebars In Theme | Toggle on to hide content types in that are not supported by the current site's theme. |
| Always Generate Permalinks | Automatically generates permalinks when creating new assets. The permalinks are not published until the asset is published. |
| Single Generated Permalink | Forces the generated permalink to replace existing URLs. Tip This setting is helpful before a site is live, when the URL structure is still being adjusted. |
Integrations tab
| Apple News | |
|---|---|
| Default Channel | Create or select an existing Apple News Channel. For details on creating an Apple News Channel, see Creating or updating Apple News Channels. For details on associating an existing Apple News Channel to a site, see Assocating an Apple News Channel to a site. |
Section-level settings
For documentation on section-level settings, see the Content Types guide, specifically the Landing pages sections.
Asset-level settings
For documentation on section-level settings, see the Content Types guide, specifically the Assets sections.
Site management
This section covers how to manage sites, from creation to deletion.
Creating sites
There are two types of sites in Brightspot, Global and individual sites.
The Global site has settings that are cascaded down to your "regular" sites. Whereas, your regular sites have settings that only apply to them. You can create as many regular sites as you need with Brightspot.
Your Global site is already created for you when you first start with Brightspot. You will want to review the Global-level settings section and modify any that pertain to your organization. Many of the settings you set here will be cascaded down to any other sites you create, which reduces your maintenance.
Being able to publish to multiple sites gives you incredible flexibility. For example, if you are publishing to a site for a special event such as the Special Olympics, create a Special Olympics site. If you are publishing to a site that renders in French, create a french site. This topic discusses how to create those "other" sites (not Global).
Before you create a site, it is a great idea to review the global settings in Global-level settings, and try to use as many of the defaults as possible. Remember, these settings cascade down, so using the global settings reduces the maintenance effort on each of your site’s configurations.
To create a site:
- From the left navigation, under Admin, click Sites & Settings.
- In the Sites widget, click New Site.
- Using the options below, select the tab to view and configure the settings for your site.
- Click Save.
Copying sites
You can create a new site by copying an existing one. This feature can save you the effort of manually configuring the new site. You can copy a site’s configuration or a site’s configuration and its content.
Copying a large number of items can temporarily degrade your site’s performance. Copy no more than 500 items using the method described in this section.
To copy a site:
- From the left navigation, under Admin, click Sites & Settings.
-
In the Sites & Settings widget, click the site you want to copy.
-
Click , located to the left of , and type
Allow Site Copy. (If you see the messageThe Site Copier is turned off in Global, ask your Brightspot administrator to enable site copying. -
Click Save.
-
Click > Copy This Site.
-
In the Name field, enter the new site’s name.
-
In the URL field, enter the new site’s URL.
-
If you want to copy the site’s settings as they appear in the Edit Site page, turn on Copy Site Settings.
-
Do one of the following:
- If you want to retain each copied item’s original timestamps and editors, toggle off Replace Publish Data.
- If you want to replace the original timestamps and editors with the current timestamp and editor who initiated the site copy, toggle on Replace Publish Data.
-
Under Configs, mark or clear the items and settings you want to copy.
-
Click Copy.
Brightspot copies the site, and the new site’s Edit Site page appears.
Creating site categories
Just as the name implies, site categories allow you to categorize your sites into logical groupings. Site categories can contain actual sites, or they can contain other site categories to provide you with a means to sub-categorize your sites into smaller groupings. This can be helpful when switching between sites: you can filter the sites by category to quickly find the site you need.
To create a site category:
- From the left navigation, under Admin, click Sites & Settings.
- Under Site Categories, click New Site Category.
- The Parent field is optional and is only used when creating a sub-site category.
- In the Name field, type a name for the category.
- In the Sites field, click .
- Click the selection field, and select sites associated with this category.
- Click Save.
In the image above, you see a new site category named "Documentation" is being created. This site category contains two sites, Docs (Developer) and Docs (Product).
Creating site sub-categories
You can also create site categories as sub-categories of existing site categories. This is useful if you have a large number of sites and want a way to categorize them into even smaller groupings.
To create a site sub-category:
- From the left navigation, under Admin, click Sites & Settings.
-
Under Site Categories, click New Site Category.
-
Expand the Parent field and select the site category that will serve as the parent of the new site sub-category.
noteYou must create the parent site categories before creating the child site categories. If you do not create the parent site categories first, they will not be available in the Parents field for selection.
-
In the Name field, type a name for the site sub-category.
-
In the Sites field, click .
-
Click the selection field, and select sites associated with this site sub-category.
-
Click Save.
In the image above, you can see the name of this new site category is "Brightspot CMS User Guide," and it is nested under the site category named "Documentation." The new site sub-category has three sites associated with it.
Switching sites
This topic explains how to switch sites.
To switch sites from the header:
- In the header, click the current site’s name.
- Scroll through the list and select the site to which you want to switch.
To switch sites from the Sites widget:
- From the left navigation, under Admin, click Sites & Settings.
- In the Sites widget, select the required site.
To filter the list of available sites:
-
In the header, click the current site’s name.
-
Choose a method to filter the list of available sites:
- Use the Site Search field—Type the first few characters of the site you are looking for in the Site Search field to narrow down the list of available choices.
- Use the site category filter—Click the arrow in the Site Search field to see a list of site categories and site sub-categories, and then click the name of the site category or site sub-category to see a list of sites contained within them.
-
Select the desired site.
Brightspot displays the current page using the settings for the selected site.
Custom site widgets
You can customize the appearance of the Edit Global, New Site, or Edit Site widgets to show or hide tabs and fields, rename labels associated with the fields, and restrict fields to read-only. That way, your organization's Brightspot experience is configured exactly the way it needs to be in order to best serve your editorial teams.
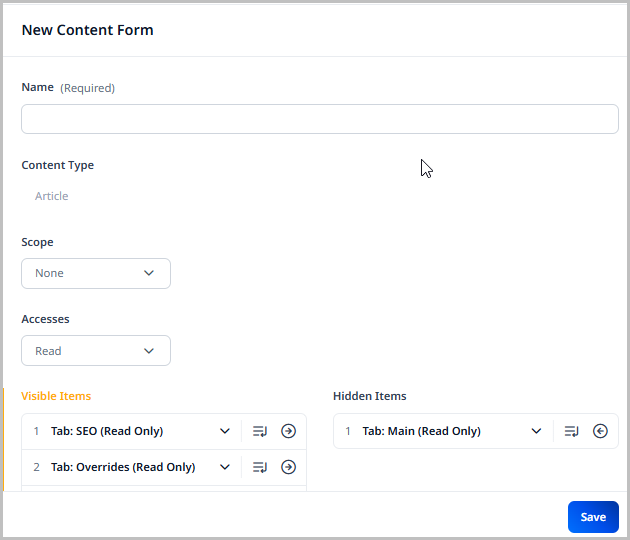
Creating custom site widgets
This topic explains how to create a custom site widget in Brightspot.
Custom site widgets override the standard widgets that all users see when editing a site. If you want to design a site widget for a particular role or role-site combination, contact your Brightspot representative.
To create a custom site widget:
-
From the left navigation, under Admin, click Users & Roles. The Content Forms widget is displayed on the left side of the page.
-
From the drop-down list, do one of the following:
- Select Global to customize the Edit Global widget.
- Select Site to customize the New Site and Edit Site widgets.
-
Click New.
-
In the Name field, type a name for the widget.
-
From the Scope list, select Global. (This setting overrides the default site widget with the custom site widget.)
-
From the Accesses list, select read or write access for all tabs and fields on the widget. (This setting applies to the entire widget; you can override this setting at the tab and field levels in the following steps.)
-
Show, hide, and reorder items by doing the following:
- Hide a visible tab by dragging it to the Hidden Items list. (Don’t hide tabs containing fields that are required in the default site widget.)
- Show a hidden tab by dragging it to the Visible Items list.
- Reorder the visible tabs by dragging them to the required position.
-
To add a new tab to the widget, do the following:
- Under Visible Items, click and select Tab.
- In the Name field, type a name for the tab.
- From the Access list, select one of the access options.
- Repeat steps a–c to add additional tabs.
-
To customize a tab and its fields, do the following:
-
Click the tab field to expand it.
-
In the Name field, type a name for the tab.
-
From the Access list, select one of the access options.
-
To hide a visible field, drag it to the Hidden Items list. (Don’t hide a field that is required in the default site widget.)
-
To show a hidden field, drag it to the Visible Items list.
-
To reorder visible items, drag them to the required position.
-
To change a field’s name or access level, do the following:
- Click the field.
- In the Name field, type a name for the field.
- From the Access list, select one of the access options.
-
Group fields within the tab by doing the following:
- Under Clusters, click Add Group.
- In the Name field, type a name for the group.
- From the Access list, select one of the access options.
- From the Fields list, drag fields into the group and in the desired order.
-
-
Click Save.
Brightspot saves the custom site widget, and the widget appears in the Content Forms widget. In addition, administrators use this widget when configuring the Global site or other sites.
Modifying custom site widgets
This topic explains how to modify a custom site widget in Brightspot.
To modify a custom site widget:
- From the left navigation, under Admin, click Users & Roles. The Content Forms widget is displayed on the left side of the page.
- Click the widget you want to modify. Brightspot displays the widget’s settings in the Edit Content Form widget.
- Modify the widget.
- Click Save.
Deleting custom site widgets
When you delete a custom site widget, Brightspot displays the default Edit Global, New Site, or Edit Site widgets.
To delete a custom site widget:
- From the left navigation, under Admin, click Users & Roles. The Content Forms widget is displayed on the left side of the page.
- Click the widget you want to delete.
- At the bottom of the widget, click Delete Permanently.
Customizing labels
This section describes using resource bundles to customize Brightspot's widgets, dashboard, reports, and other editorial components.
Some of Brightspot's labels are in configuration files. For example, the configuration file SiteDefault_en.properties provides labels appearing in the Sites widget.
Example 1. Configuration file for labels in Sites widget
1displayName=Site2global=Global3action.switch=Switch
Brightspot uses the labels when rendering the Sites widget, as described in the following illustration.
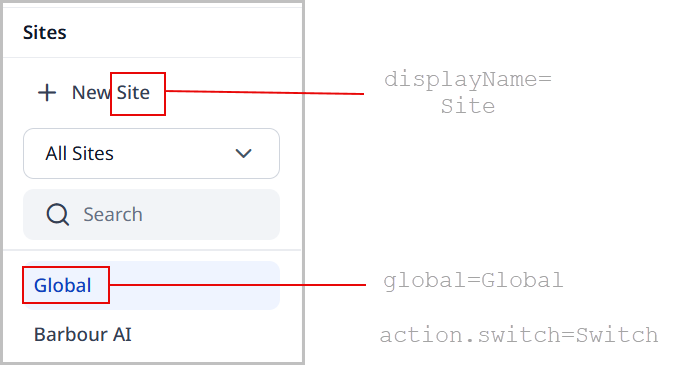
Each configuration file's name contains one of the following:
- A code indicating a language and region
- A code indicating only a language
- Neither language nor region code
The following table illustrates file names and the associated language and region.
Table 1. Language and region codes in file names
| File name | Language code | Region code | Language | Region |
|---|---|---|---|---|
| SiteDefault_en_GB.properties | en | GB | English | United Kingdom |
| SiteDefault_en.properties | en | N/A | English | N/A |
| SiteDefault_es_MX.properties | es | MX | Spanish | Mexico |
| SiteDefault_es.properties | es | N/A | Spanish | N/A |
For a list of language and region codes, see ISO-3166 Country Codes and ISO-639 Language Codes.
Brightspot retrieves labels based on an editor's locale.
-
If an editor selected a locale English (United States), then Brightspot retrieves the labels for the Sites widget using the following priority:
- From the file SiteDefault_en_US.properties. If that file does not exist,
- From the file SiteDefault_en.properties. If that file does not exist,
- From the Brightspot defaults (which are US English).
-
If an editor selected a locale Spanish (Mexico), then Brightspot retrieves the labels for the Sites widget using the following priority:
- From the file SiteDefault_es_MX.properties. If that file does not exist,
- From the file SiteDefault_es.properties. If that file does not exist,
- From the Brightspot defaults (which are US English).
(For information about setting a user's locale, see Users.)
You can override the labels appearing in the configuration files to customize the Brightspot experience to your organization's needs (and personality).
To customize labels:
-
Acquire from your Brightspot developer the path and name of the file you want to override. Examples of these files are as follows:
- com/psddev/cms/db/SiteDefault_en_US.properties
- com/psddev/cms/tool/content/SitesWidgetDefault_en.properties
-
Inside the file, identify the label you want to customize.
- From the left navigation, under Admin, click Sites & Settings, then select the Global site.
-
From the CMS tab, expand the UI cluster.
-
Under Localization Bundles, click Add Localization Bundle.
-
From the Locale list, select the language and region whose labels you want to customize. The language corresponds to the two-letter code in the file name.
-
Under Localizations, click .
-
In the Name field, enter the path and filename from step 1 until the word Default. For example, if the developer gave you a path and filename com/psddev/cms/db/SiteDefault_en.properties, enter com/psddev/cms/db/Site.
-
Under Entries, click. .
-
In the Key field, enter the key corresponding to the label you want to customize. Enter one of the following keys: displayName, global, or action.switch.
-
Repeat steps 10–11 to customize additional labels in the configuration file.
-
Repeat steps 8–12 to customize labels in other configuration files for the current locale.
-
Repeat steps 6–13 to customize labels for other locales.
-
Click Save.
When an editor uses the locale you selected in step 7, Brightspot retrieves the label from the override you entered.
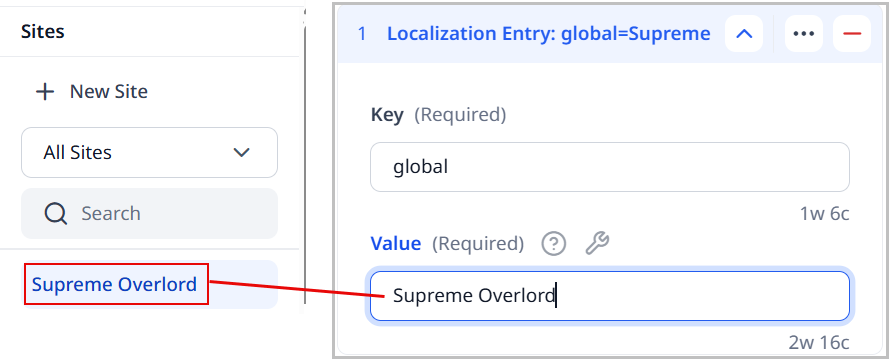
Adding characters to the rich-text editor virtual keyboard
Brightspot’s virtual keyboard includes special characters not included in most keyboard layouts. You can add additional characters to the virtual keyboard.
To add characters to the virtual keyboard:
- From the left navigation, under Admin, click Sites & Settings, then select the Global site.
- From the CMS tab, expand the RTE cluster.
- In the Custom Keyboard Config field, enter the characters that you want to appear in the rich-text editor's unicode keyboard.
- Click Save.
To ensure Brightspot displays the new characters, advise editors to clear their browser’s cache.
Working with custom <head> elements
Configuring custom elements
Web pages delivered from Brightspot include the standard HTML elements that a browser needs to render pages correctly. These elements are configured in your sites' themes. Administrators can add additional HTML elements to the delivered pages. Examples include the following:
- Adding or overriding styling elements with a
<style>element. - Adding or overriding dynamic behavior with a
<script>element. - Adding additional meta data with a
<meta>element. - Adding external resources with a
<link>element. - Adding child elements allowed within a parent
<head>element.
Configuring custom head elements
To configure custom head elements:
- From the left navigation, under Admin, click Sites & Settings.
-
In the Sites widget, select the site for which you want to configure custom head elements, or select Global to configure custom head elements for requests made to any site.
-
Under Front-End > Advanced > Custom Scripts and Styles, click Add Custom Head Elements.
-
In the Internal Name field, enter an internal name for this custom head element. You can use the internal name to quickly identify this configuration in the list of custom head elements (particularly when the configuration is collapsed).
-
From the Request Matcher field, select one of the available matchers.
-
To prevent Brightspot from returning this element, toggle on Disabled. For an explanation of this toggle, see "Disabling a custom head element," below.
-
Complete the other fields for the selected request matcher.
-
For the default Path Request Matcher, configure the following fields:
- HTTP Methods—Select the methods that the request must include, or leave blank to match all HTTP methods. For a description of the HTTP methods, see HTTP request methods.
- URL Pattern—Java-compliant regular expression that the request's path must match, or leave blank to match any path. For an introduction to regular expressions, see Regex 101; for a Java-compliant regex tester, see Java Regular Expression Tester.
- Content Types—List of content types that must be associated with the request, or leave blank to match all content types.
-
Projects can implement other request matchers as necessary.
-
-
To prevent Brightspot from checking matches in subsequent custom head elements after satisfying the criteria in this matcher, toggle on Stop Processing. For details about this toggle, see "Interrupting rule evaluation," below.
-
Under Elements, do the following:
- Click ⨁ and select one of the available elements.
- In the Internal Name field, enter an internal name for this element. You can use the internal name to quickly identify this configuration in the list of elements (particularly when the configuration is collapsed).
- For each attribute field, enter a value. Ensure the values you enter are appropriate for the element you are configuring.
- Repeat steps a–c to configure additional elements for this request matcher.
-
Click Save.
Delivering custom head elements
Brightspot examines each incoming request, and can return custom elements associated with those requests. The following sections describe the various mechanisms Brightspot uses to determine which custom elements to return.
Matching criteria for incoming requests
Brightspot delivers custom elements unconditionally or only for those incoming requests that satisfy criteria you define. Brightspot's standard version comes with a path request matcher that applies the following filters to incoming requests:
- Request's HTTP method, such as GET or POST. (For a description of the HTTP methods, see HTTP request methods.)
- Requested asset's content type, such as Article or Gallery.
- Request's path matching a pattern, such as starting with
/customersor containing the wordintegrations.
Order of matching criteria
The order of your matching criteria determines the element returned. Suppose you design three groups of custom head elements Group 1, Group 2, and Group 3, each with its own matching criteria, as in the following illustration.
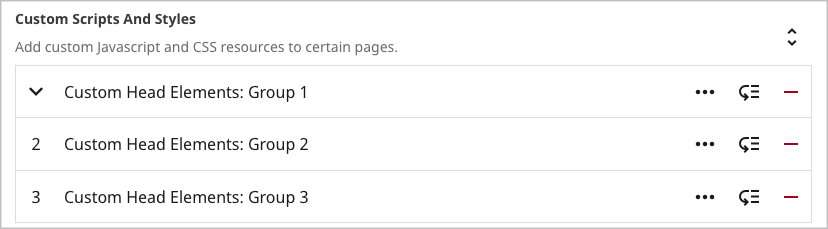
Brightspot evaluates all the matching criteria in order, and the sent elements are based on those rules that are successfully evaluated. In this example, Brightspot evaluates first the criteria in Group 1, then in Group 2, and then in Group 3. If an incoming request matches all three rules, then Brightspot sends all the elements defined in all three rules. If an incoming request matches only the first two rules, then the elements sent are those defined in Group 1 and Group 2.
Disabling custom head elements
Suppose Group 1, Group 2, and Group 3 configure different attributes of a <meta> element, as in the following example.
| Custom head element | Value for name attribute | Value for content attribute |
|---|---|---|
Group 1 | product | brightspot |
Group 2 | product | assignment_desk |
Group 3 | product | ops_desk |
Normally, a request satisfying the matching criteria of all three groups sends three <meta> tags:
<meta name="product" content="brightspot"><meta name="product" content="assignment_desk"><meta name="product" content="ops_desk">
If you want to avoid sending the second tag, you can disable the evaluation in Group 2, as in the following illustration.
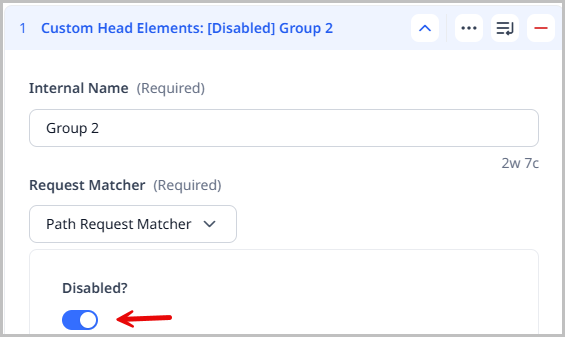
Because Group 2 is disabled, Brightspot sends the following two <meta> elements if the incoming request satisfies the criteria in Group 1 and Group 3:
<meta name="product" content="brightspot"><meta name="product" content="ops_desk">
Interrupting rule evaluation
Suppose Group 1, Group 2, and Group 3 set a value for a <meta> tag's attributes. If you stop evaluation at Group 2, then Brightspot sends one of the following:
<meta name="brightspot">configured inGroup 1(ifGroup 2is not a match)<meta name="brightspot">and<meta name="assignment_desk">configured inGroup 1andGroup 2(ifGroup 2is a match).
If you want to avoid sending the header configured in Group 3, you can stop processing in Group 2, as in the following illustration.
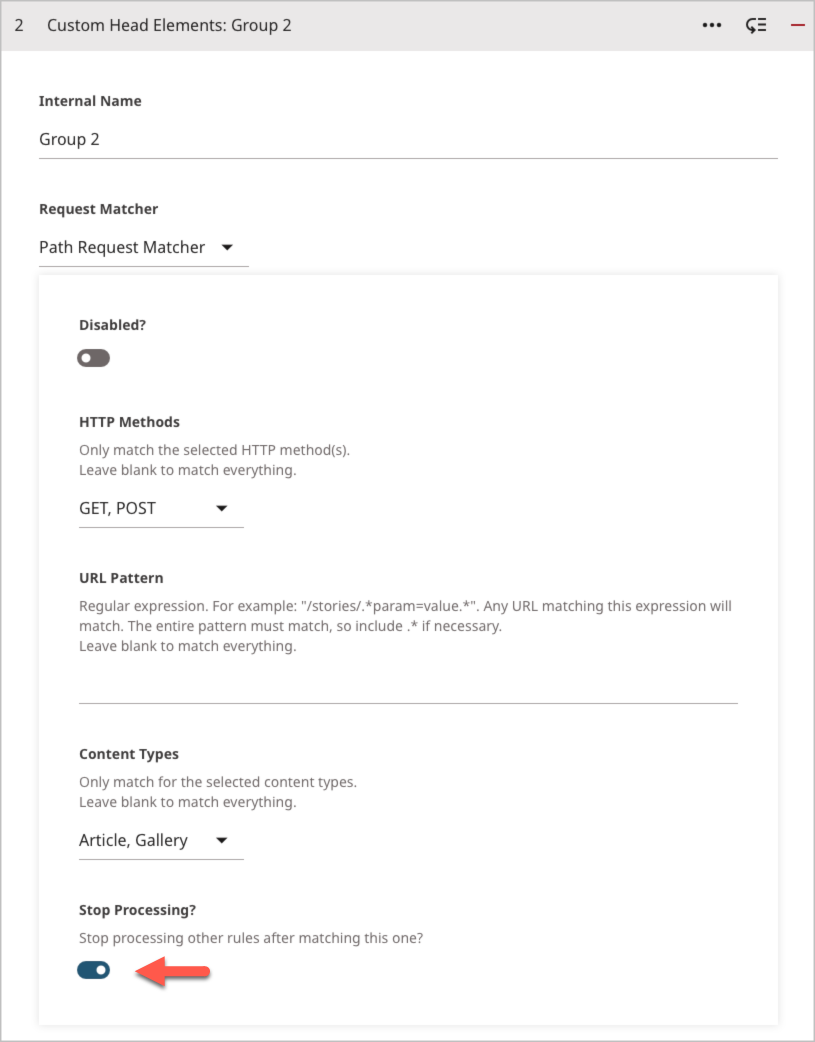
Disabling a rule takes precedence over rule interruption. If you stop evaluation at Group 2 and also disable Group 2, then Brightspot proceeds to Group 3 and assigns the attributes configured in Group 1 (if Group 3 is not a match) or the attributes in Group 1 and Group 3 (if Group 3 is a match).
Example: Modifying styling without front-end development
A news site has a dedicated page with the slug /breaking-news that contains promos to its latest stories. The site's theme sets the page title Breaking News in black, and management prefers that the color be red. Front-end developers are working on other priorities, so instead the site admin can inject a one-line CSS instruction .Page-headline {color: red;} that changes the title to red.
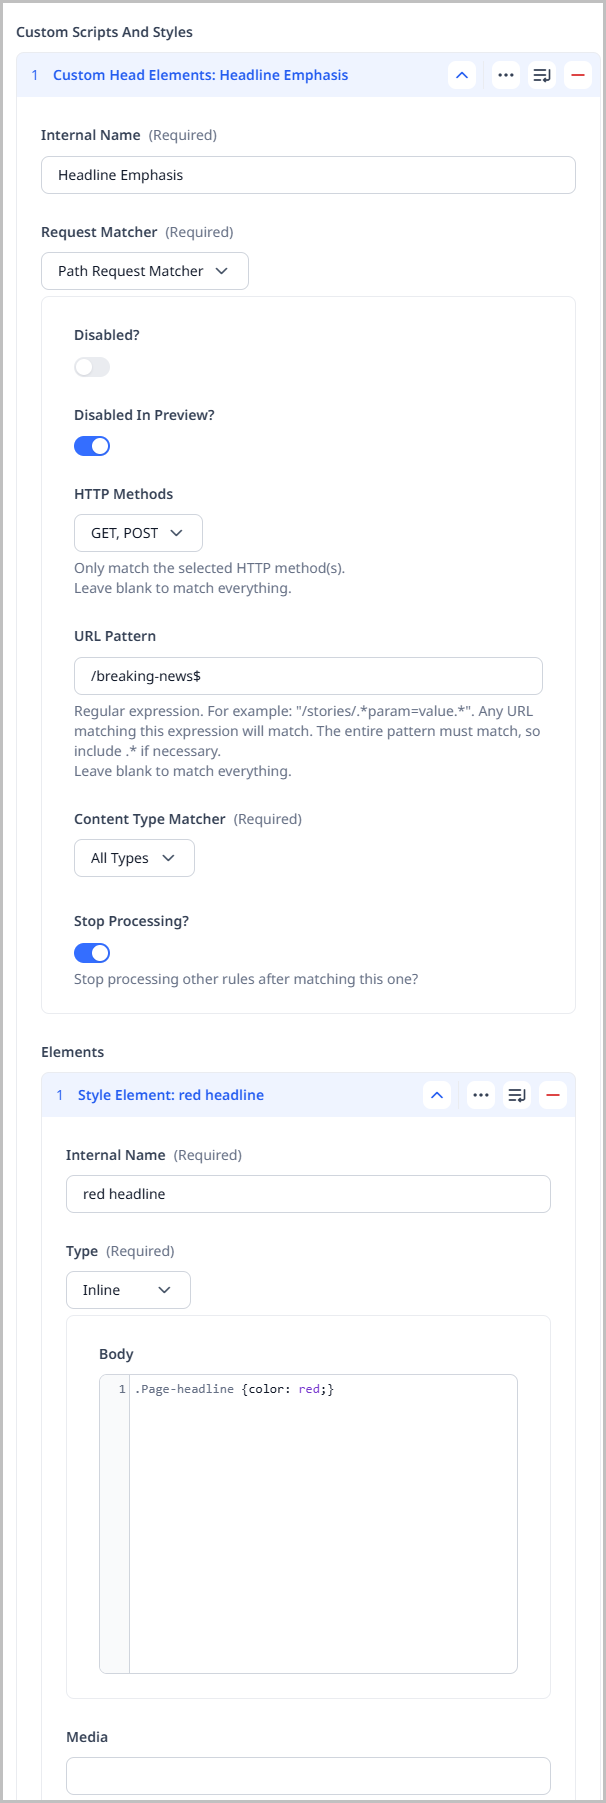
Referring to the previous illustration, Brightspot sets the page title in red when the incoming request satisfies the following criteria:
- The request uses the method GET or POST.
- The requested asset's URL ends with
/breaking-news.
When these two criteria are met, Brightspot includes with the web page the CSS statement .Page-headline {color: red;}.
Working with response headers
When a visitor makes a request to retrieve an asset from Brightspot, the server often includes in the response pre-configured headers. Some of those headers come from the underlying web server, and some of them are standard headers provided by Brightspot. (For an overview of request and response headers, see HTTP header.)
You can add additional response headers to implement business processes. Examples include the following:
- Requiring visitors to view an instructions page before any other page on your site.
- Displaying a message every 30 days.
- Reminding visitors to complete a customer satisfaction survey.
- Requiring web browsers to always refresh assets from the server instead of caching them.
Configuring custom response headers
To configure custom response headers:
- From the left navigation, under Admin, click Sites & Settings.
-
In the Sites widget, select the site for which you want to configure response headers, or select Global to configure response headers for requests made to any site. (For an explanation about how Brightspot resolves multiple response headers with the same name, see the section "Resolving conflicting response headers," below.)
-
Under Front-End > Advanced > Custom Response Headers, click Add Custom Response Headers.
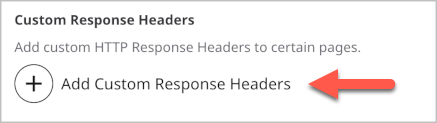
-
In the Internal Name field, enter an internal name for this custom response header. You can use the internal name to quickly identify this configuration in the list of custom response headers (particularly when the configuration is collapsed).
-
From the Request Matcher field, select one of the available matchers.
-
To prevent Brightspot from returning this response header, toggle on Disabled. For an explanation of this toggle, see "Disabling a custom response header," below.
-
Complete the other fields for the selected request matcher.
-
For the default Path Request Matcher, configure the following fields:
- HTTP Methods—Select the methods that the request must include, or leave blank to match all HTTP methods. For a description of the HTTP methods, see HTTP request methods.
- URL Pattern—Java-compliant regular expression that the request's path must match, or leave blank to match any path. For an introduction to regular expressions, see Regex 101; for a Java-compliant regex tester, see Java Regular Expression Tester.
- Content Types—List of content types that must be associated with the request, or leave blank to match all content types.
-
Projects can implement other request matchers as necessary.
-
-
To prevent Brightspot from checking matches in subsequent response headers after satisfying the criteria in this matcher, toggle on Stop Processing. For details about this toggle, see "Interrupting rule evaluation," below.
-
Under Response Headers, do the following:
-
Click ⨁ Add Response Header.
-
In the Header Name field, enter a header name.
- For a list of standard header names and associated header values, see HTTP Headers.
- Header names are not case-sensitive. Also, some browsers reformat received response headers into train case, so you may need to compare the header name you define with its rendition in the browser.
-
In the Header Value field, enter a value. Some response headers typically have multiple values, such as
Cache-Control: private, no-cache, max-age=0. To assign multiple values to a header, specify all of them in the Header Value field, as in the following illustration.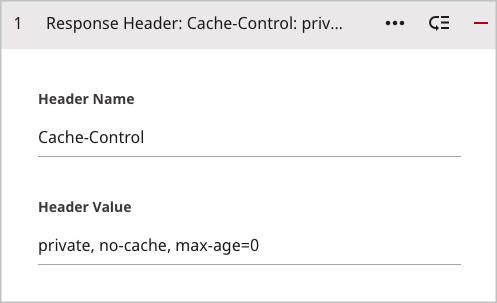
-
Repeat steps a–c to configure additional response headers for this request matcher.
-
-
Click Save.
Delivering custom response headers
Brightspot examines each incoming request, and can return custom response headers associated with those requests. The following sections describe the various mechanisms Brightspot uses to determine which custom response header to return.
Matching criteria for incoming requests
Brightspot can deliver your response headers unconditionally or only for those incoming requests that satisfy criteria you define. Brightspot's standard version comes with a path request matcher that applies to incoming requests the following filters:
- Request's HTTP method, such as GET or POST. (For a description of the HTTP methods, see HTTP request methods.)
- Requested asset's content type, such as Article or Gallery.
- Request's path matching a pattern, such as starting with
/customersor containing the wordintegrations.
Order of matching criteria
The order of your matching criteria determines a response header's value. Suppose you design three custom response headers Group 1, Group 2, and Group 3, each with its own matching criteria, as in the following illustration.
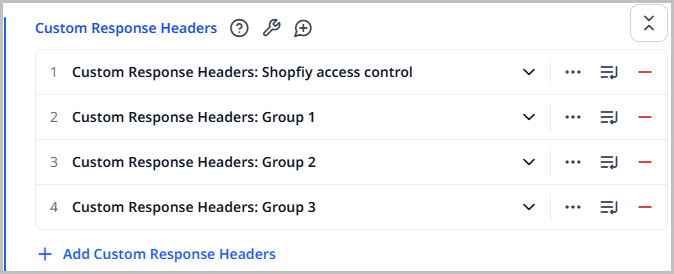
Brightspot evaluates all the matching criteria in order, and the header receives the value based on the last rule successfully evaluated. In this example, Brightspot evaluates first the criteria in Group 1, then in Group 2, and then in Group 3. If an incoming request matches all three rules, then the header receives the value assigned in Group 3. If an incoming request matches the first two rules, then the header receives the value assigned in Group 2.
Disabling custom response headers
Suppose Group 1, Group 2, and Group 3 set a value for the header Header-A, as in the following example.
| Custom response header | Value for Header-A |
|---|---|
Group 1 | 500 |
Group 2 | 505 |
Group 3 | 510 |
Normally, a request satisfying the matching criteria of all three groups applies the value configured in the last matching group. In this example, Brightspot could send any of the following headers, depending on the last match satisfied: Header-A: 500, Header-A: 505, or Header-A: 510.
If you want to avoid the possibility of sending Header-A: 505, you need to disable the evaluation in Group 2, as in the following illustration.
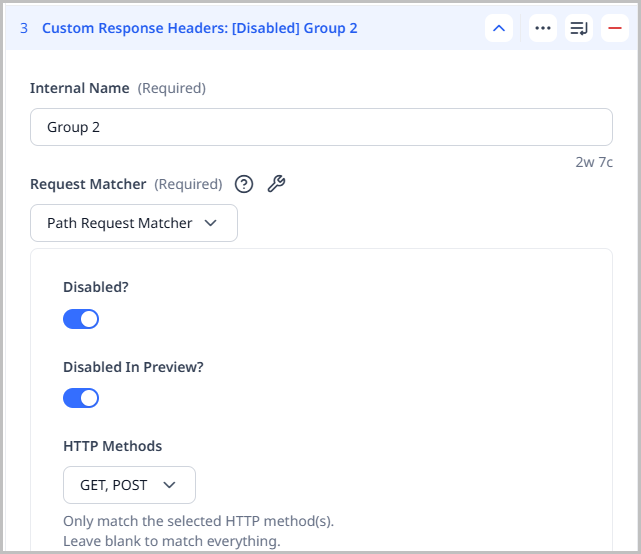
Because Group 3 follows disabled Group 2, Brightspot sends Header-A: 510 if the match in Group 3 is successful.
Interrupting rule evaluation
By default, Brightspot evaluates all the rules in order, and assigns a header's value based on the last matching rule. You can interrupt the sequence of rule evaluation.
Suppose Group 1, Group 2, and Group 3 set a value for Header-A. If you stop evaluation at Group 2, then Brightspot sends one of the following headers:
Header-A: 500configured inGroup 1(ifGroup 2is not a match)Header-A: 505configured inGroup 2(ifGroup 2is a match)
If you want to avoid sending the header configured in Group 3, you need to stop processing in Group 2, as in the following illustration.

Disabling a rule takes precedence over rule interruption. If you stop evaluation at Group 2 and also disable Group 2, then Brightspot proceeds to Group 3 and assigns to Header-A the value determined in Group 1 (if Group 3 is not a match) or the value in Group 3 (if Group 3 is a match).
Resolving conflicting response headers
If you configure a response header with the same name more than once, Brightspot uses the following logic to determine which value to return.
- Determine from which site to send the header (first a specific site, then global).
- Send the header's value defined last in the UI.
Example 1: Same header configured at global and site levels
A header name at the site level has higher precedence than the same name at the global level. For example, you have a header-value pair Cache-Control: public defined for the site Brightspot, and a header-value pair Cache-Control: private defined for the global site. Visitors to the site Brightspot receive Cache-Control: public , and visitors to all your other sites receive Cache-Control: private.
Example 2: Same header configured multiple times in same site
When the same header is defined more than once within the same site, the one appearing last in the Custom Response Headers widget has the highest precedence. Below are two examples.
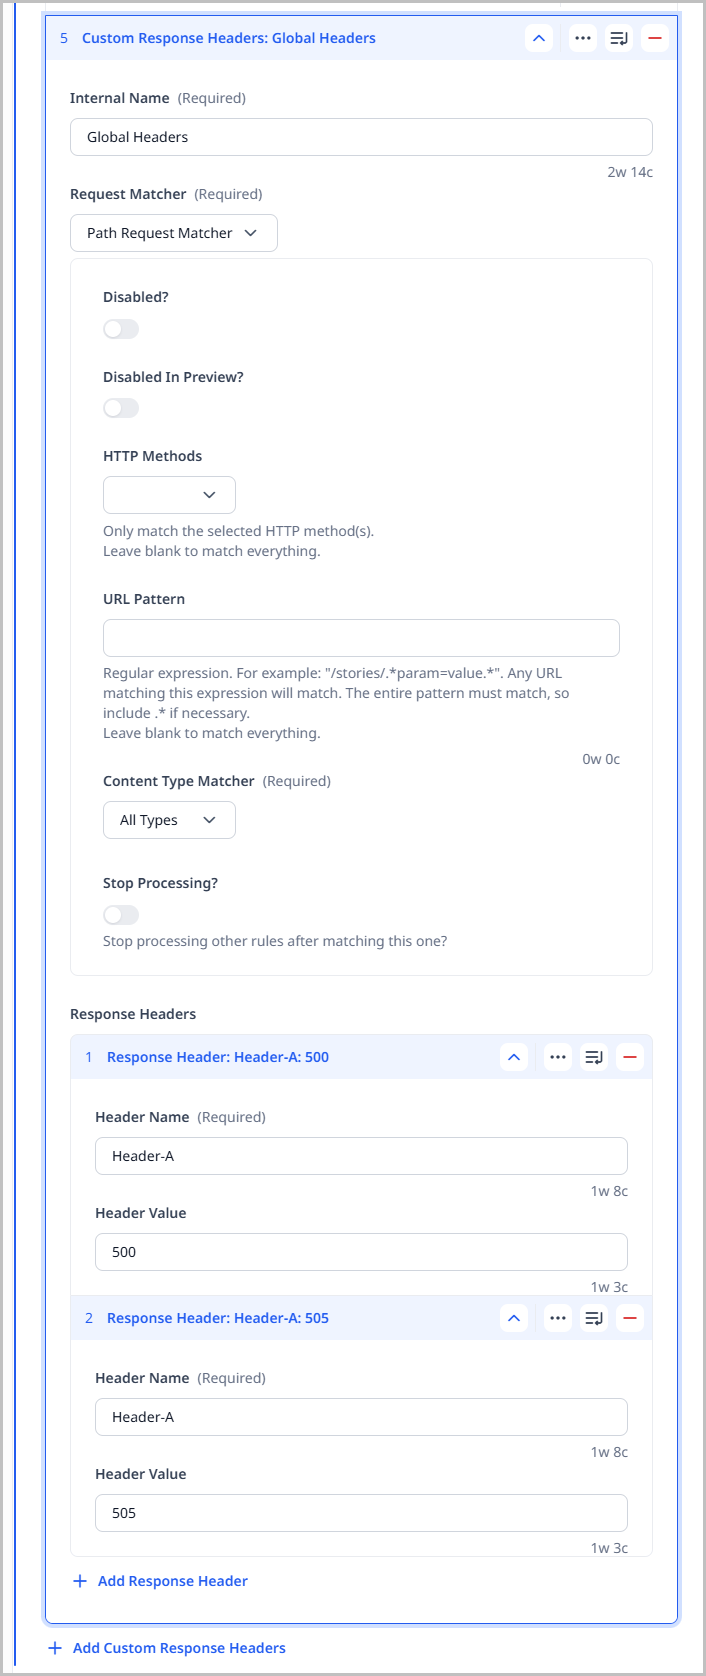 | 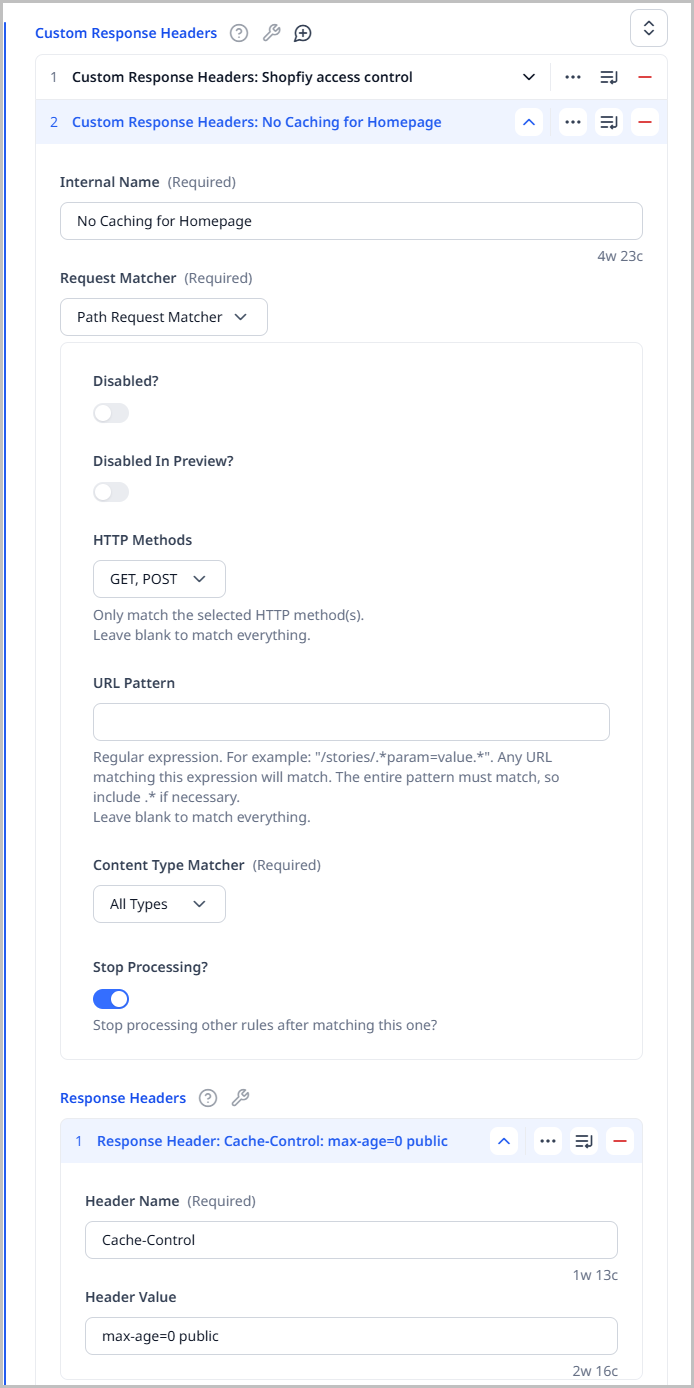 |
|---|---|
In this scenario, the site has a single custom response header with two response headers having the same name. Brightspot returns the last one in the list, Header-A: 505. | In this scenario, the site has multiple custom response headers, each with a response header having the same name. Brightspot returns the last one in the list, Header-A: 510. |
Example: Controlling browser caching
A high-volume news site posts headlines and images to its homepage every few minutes. To ensure their visitors always see the latest headlines, management requires that the visiting browsers do not cache any content from previous visits to the homepage. The following illustration implements this policy.
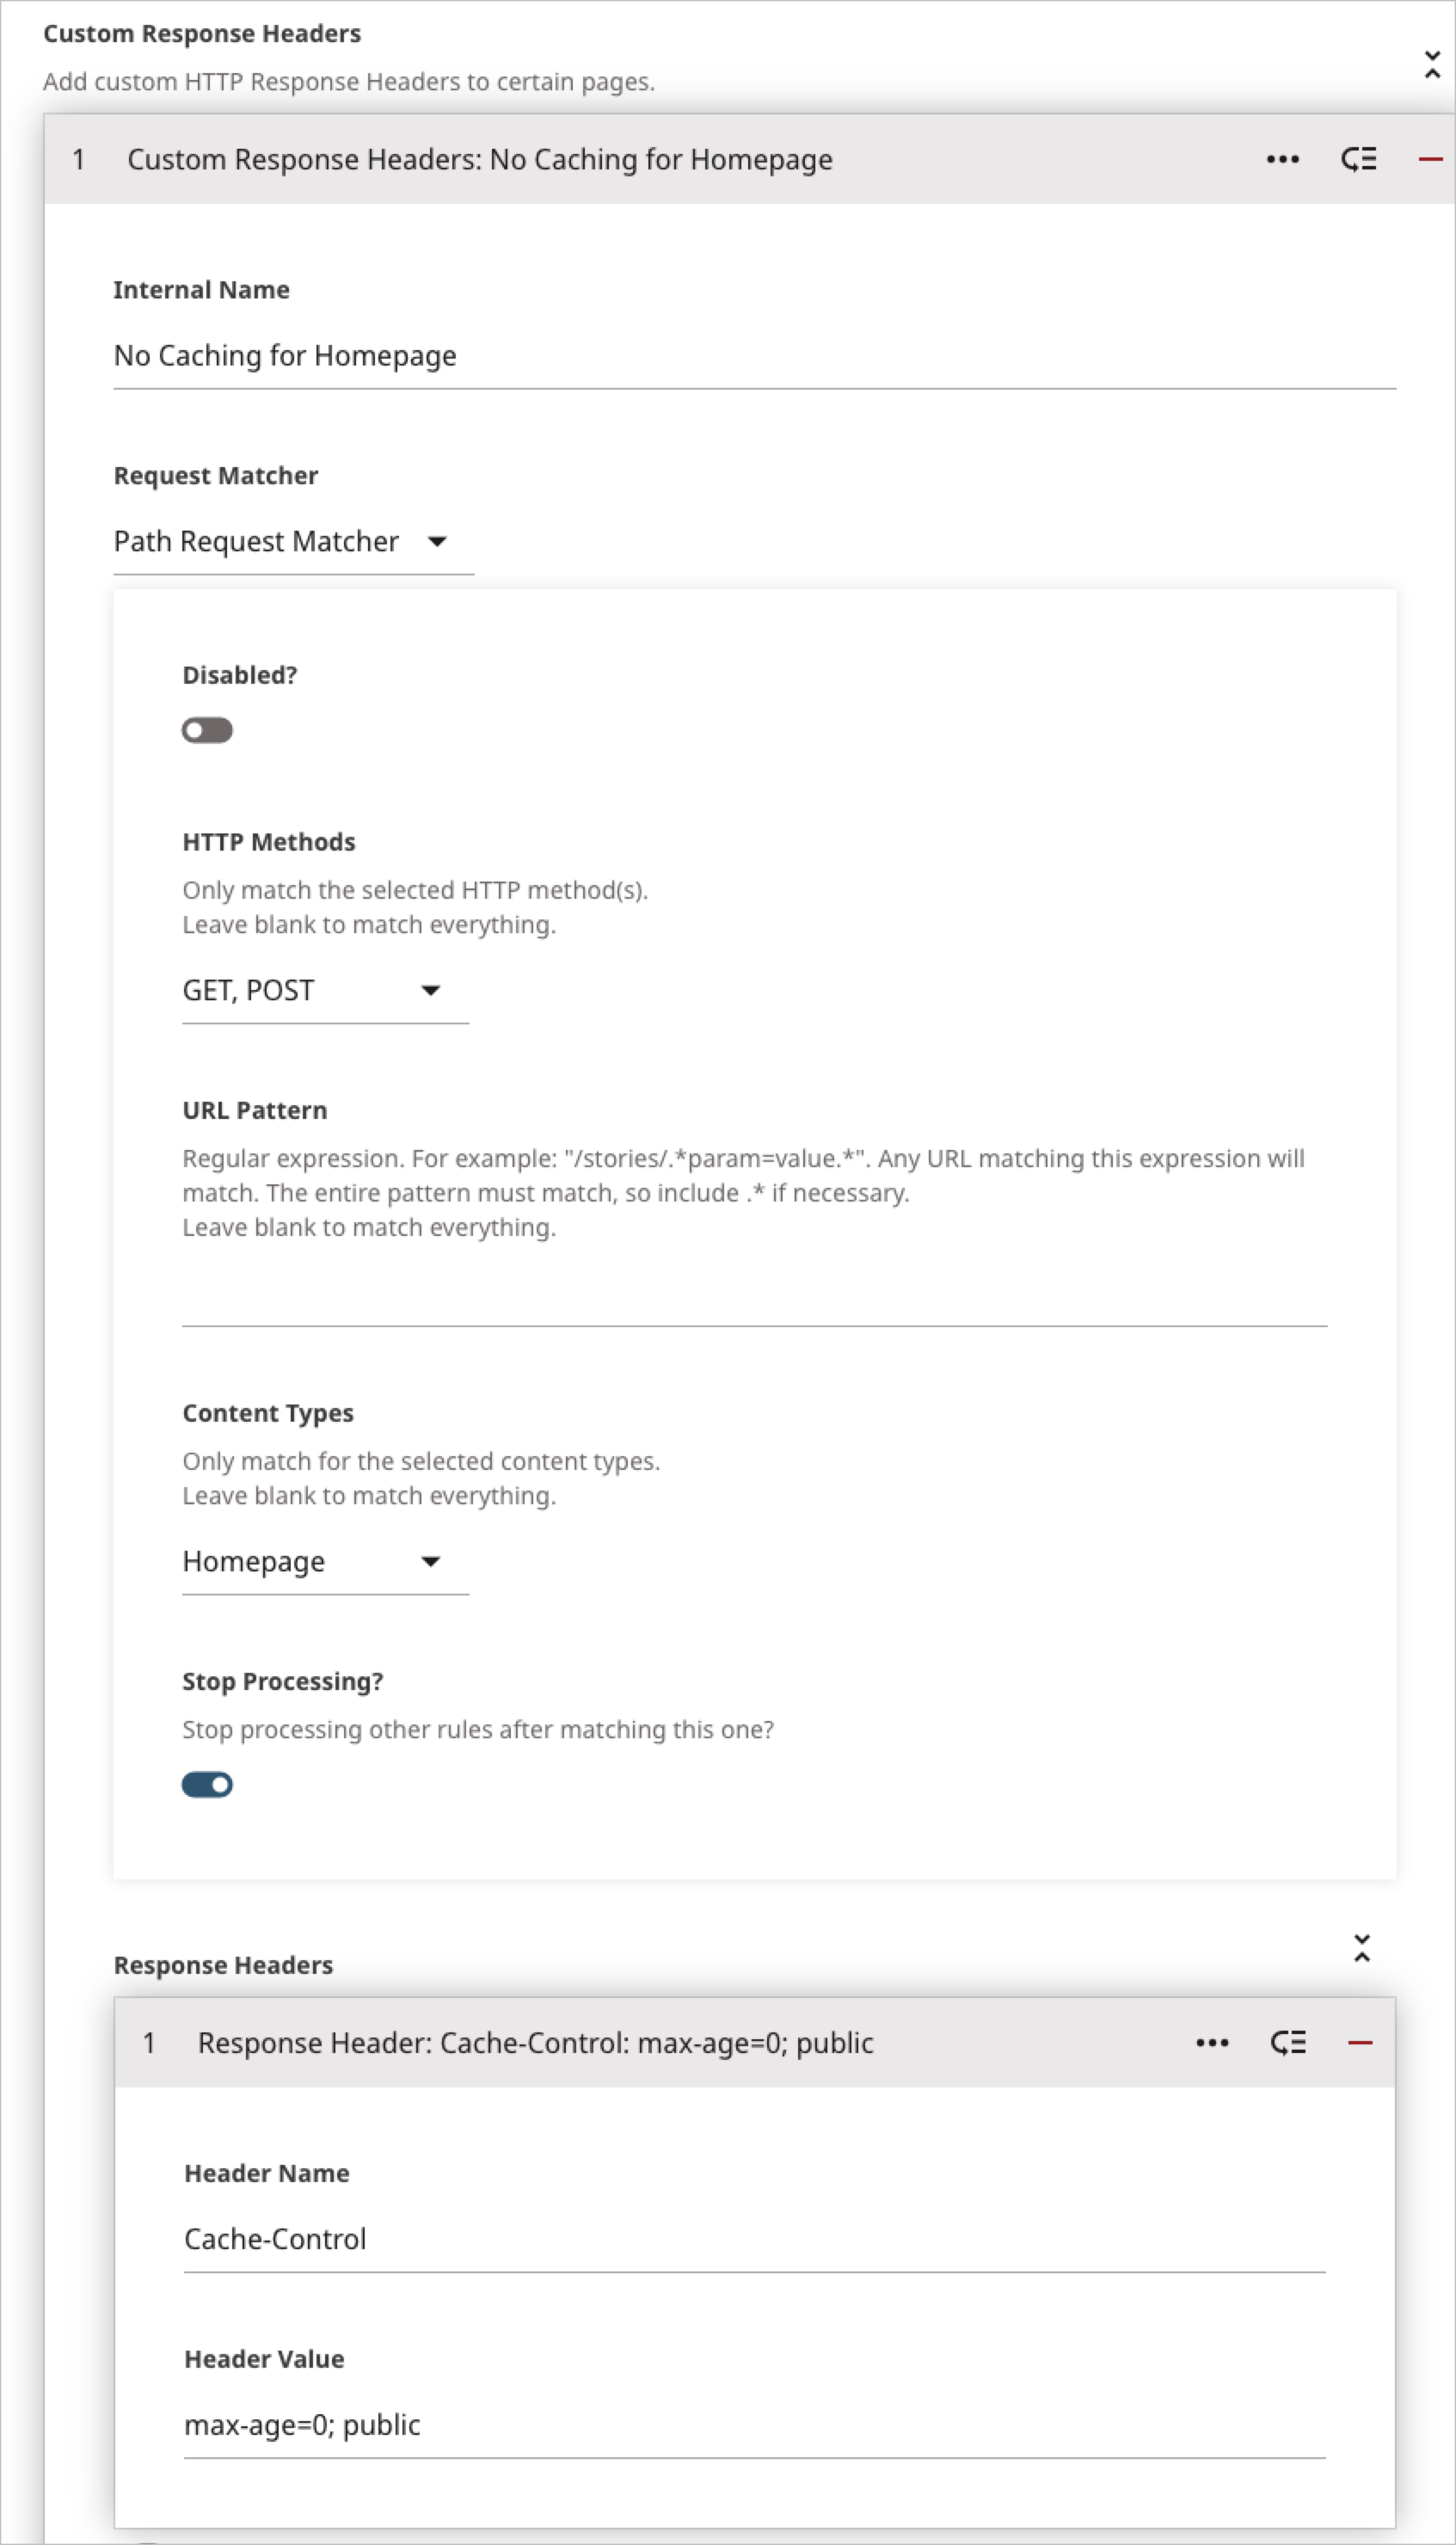
Referring to the previous illustration, Brightspot returns a custom header when the incoming request satisfies the following criteria:
- The request uses the method GET or POST.
- The requested asset is a homepage.
When these two criteria are met, Brightspot returns the response header Cache-Control: public, max-age=0. Because the toggle Stop Processing is on, once these rules are satisfied Brightspot does not check any subsequent rules that may deliver a different caching policy to the browser.
Type-specific overrides
This how-to guide explains how to apply type-specific overrides.
- From the left navigation, under Admin, click Sites & Settings.
-
In the Sites widget, click site to which you want to apply a type-specific override.
-
From the Front-End tab, expand the Type Specific Overrides cluster.
-
Under Type Specific Landing Page Content, click .
-
From the Types list, select content types to which you want to apply a type-specific override.
-
From the Content list, select one of the following:
- Inherit—Inherits the content from the parent level in the content hierarchy. Skip to step 9.
- Add After—Inherits the content from the parent level and adds a new module under them.
- Add Before—Inherits the content from the parent level and adds a new module above them.
- Replace—Replaces the content inherited from the parent level.
-
Click , and select the module you want to use. You return to the Type Specific Landing Page Elements widget.
-
Configure the module as necessary.
-
Under Type Specific Overrides, click .
-
From the Types list, select content types to which you want to apply a type-specific override.
-
Expand Logos & Icons Overrides.
-
From the Logo and News Publisher Logo lists, select one of the following:
- Inherit—Inherits the logo from the parent level in the content hierarchy.
- None—Applies logo from the parent level in the content hierarchy.
- Select—Displays a content picker for selecting an existing logo.
-
Expand Layout Overrides.
-
From the Hat, Navigation, and Footer fields, select one of the following
- Inherit—Inherits the logo from the parent level in the content hierarchy.
- None—Applies item from the parent level in the content hierarchy.
- Select—Displays a content picker for selecting an existing item.
-
From the Above, Aside, and Below fields, select one of the following
- Add After—Inherits the above, aside, or below layout block’s modules from the parent level and adds a new module under them.
- Add Before—Inherits the above, aside, or below layout block’s modules from the parent level and adds a new module above them.
- None—Removes any modules in the above, aside, or below layout block that may be inherited from the parent level.
- Replace—Replaces the above, aside, or below layout block’s modules inherited from the parent level.
-
Click Save.
Configuring error responses
You can configure your error handling to cover status codes, status categories, and exception classes. When a visitor encounters an issue, you can specify which page they are taken to and what content they see.
This topic explains how to configure error responses; however, you must first create the pages that correspond to these error responses before being able to apply the error responses. See Error pages for more information.
To configure error handling:
- From the left navigation, under Admin, click Sites & Settings.
-
In the Sites widget, select the site for which you want to configure this setting.
-
From the Front-End tab, expand the Error cluster.
-
Under Error Handlers, click Add Content Error Handler.
You have three options available for error handling:
- Status Codes - enter the error status code you would like handled with this error handler.
- Status Categories - expand the menu and select either 4xx Client Error or 5xx Client error depending on which category for which you are creating the error handler.
- Exception Classes - enter the Java class for which you are creating the error handler. For instance, you could enter
IllegalArgumentExceptionto have that specific exception handled by this error handler.
-
Using the descriptions above, select one of the options and enter the data for that type of error.
-
In the Content field, click to open the content picker to choose the page you want visitors to be taken to if they encounter any of the error types configured above.
-
Complete steps 3–5 for each additional type of error you want handled in this site.
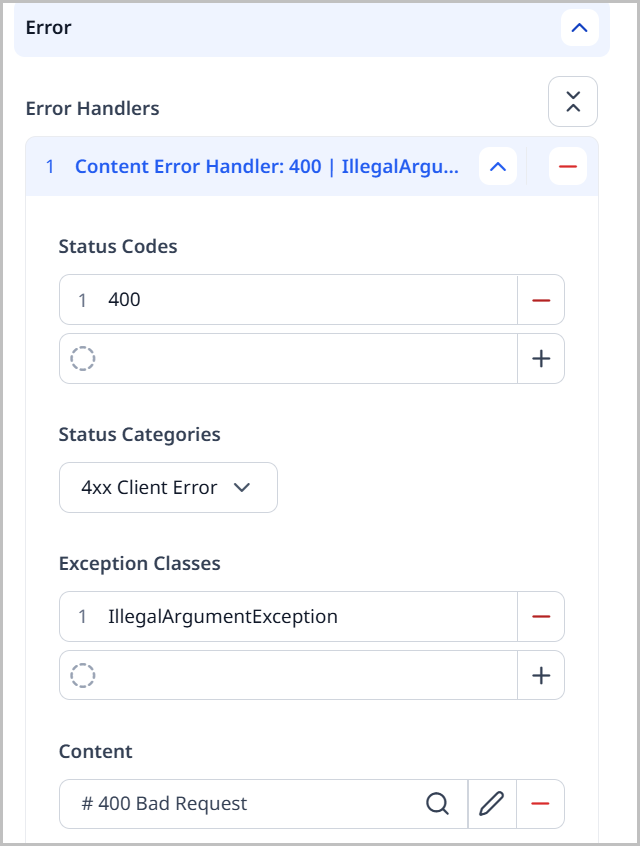
-
Click Save.
Now when a visitor encounters any of the errors you specified, they are taken to the desired page. In the above image, whenever a visitor encounters a 4xx Client Error, they are taken to the
404 Error Pagespecified in the Content field.
Limiting access to sites and settings
You can granularly control which access a user has in sites and settings. This is done using content edit forms. For general details on content forms, see Content edit forms.
To limit access to sites and settings:
- From the left navigation, under Admin, click Users & Roles.
- In the Content Forms widget, select one of the following:
- Global—Limits access to sites and settings at the global level.
- Site—Limits access to sites and settings at the site level.
- Click .
- Give the content form a name based on its purpose.
- Under Scope, retain None.
- Under Accesses, select Write.
- Under Visible Items and Hidden Items, hide the tabs and fields you do not want users to have access to.
- Click Save.
- In the Roles widget, select the role you want to associate the content form to.
- Under Types, select either All Except or Only.
- Under Restricted Types, select Other Type.
- Under Type, select either Site or Global, depending on your selection in step 2 above.
- Under Form, select the content form you created in step 8.
- Click Save.
Configuring style groups
Some content types, such as pages, sections, and tags, use modules to lay out and format text. You can configure style groups to predefine settings and styles associated with a theme's modules. For example, you can predefine a module's text or background color, guaranteeing a consistent appearance across multiple assets in a site.
Curated style gry=oups only appear when a theme is set. Ensure a theme is set by doing the following:
- From the left navigation, under Admin, click Themes.
To configure a style group:
- From the left navigation, under Admin, click Sites & Settings.
- In the Sites widget, select the site for which you want to configure a module's style, or select Global to configure a style group for all sites.
- Under the CMS tab, expand the Style Groups cluster.
- Under Curated Style Groups, click Add Curated Style Group.
- In the Display Name field, enter a name for this style group.
- Under Styles, click Add Module.
- In the module picker, select the module you want to add to the style group.
- Fill out the fields as desired.
- Repeat steps 6–7 to add additional modules.
- Click Save.
Submitting content via email
With the Mail Publishing plugin you can submit content to Brightspot using your email app.
To submit content via email:
-
Obtain the following from your Brightspot administrator:
- The “to” address to which you send the email. There are different email addresses for different content types (one address for submitting articles, another address for submitting images, and so on), so be sure to obtain the correct email address for the content type you are submitting.
- The names of fields you can include in the email.
-
From the left navigation, under Admin, click Mail Publishing.
The Mail Publishing widget lists all email content submissions that have been made through Brightspot. This includes the date the content was submitted, the email it was submitted from, the email address it was submitted to, the email's subject, and the number of assets created.
-
Click Compose to begin an new email content submission.
-
Ensure your email “from” address matches your email address in Brightspot. You can view your Brightspot email address in your profile (click your username in the header, then click Profile).
-
In the “to” field, enter the email address you obtained in step 1.
-
Enter an arbitrary subject.
-
In the body, enter field names preceded by a hash (#), and in the next line enter the field’s text. Use the field names you obtained in step 1.
-
If applicable, click to attach one image. You can choose to attach an existing image from within Brightspot, or upload a new one. Only one image can be attached per email content submission.
-
Click Send.
You will receive an email confirmation with a link to your newly created article as well as a confirmation page in Brightspot.
Referring to the previous illustration—
- Lines starting with a hash (#) correspond to fields in a content edit form. In this example, the fields are headline, body, section, and tags.
- Fields can be in any order, not necessarily the order appearing in the content edit form.
- If you attach an image to an article, Brightspot uses the image as the article’s lead.
- If you attach multiple images, Brightspot uses only the first one.
- Brightspot saves your submission as a draft. Contact your Brightspot administrator if you want Brightspot to automatically publish your submissions.
- If you do not have a
#headlinein the email’s body, Brightspot uses the email’s subject as the headline. - For section and tag fields (and any other field with a on the content edit form), separate values with commas.
- Use only names of existing tags or sections. Brightspot ignores tags or sections it does not recognize.
Ask your administrator if fields such as body are configured to accept markdown syntax. If so, you can add special effects such as boldface and italics. For an overview of how to apply text effects, see Basic Syntax