Content edit pages
The content edit page is the area where editors make content, typically consisting of several fields, tabs, and widgets and can vary depending on content type. Content edit pages can also be configured in different ways to meet custom use cases. For details on this kind of configuration, see Content edit forms.
Page anatomy
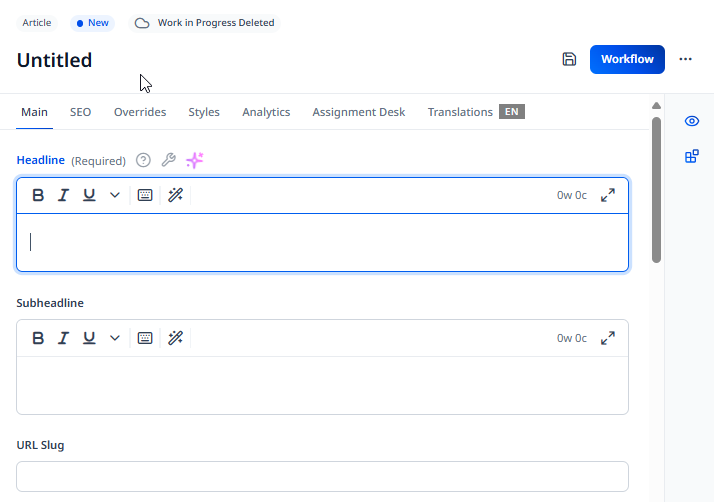
You create and modify assets in Brightspot by using the content edit page. Though the fields, tabs, and widgets of a content edit page vary by content type, their anatomy is similar.
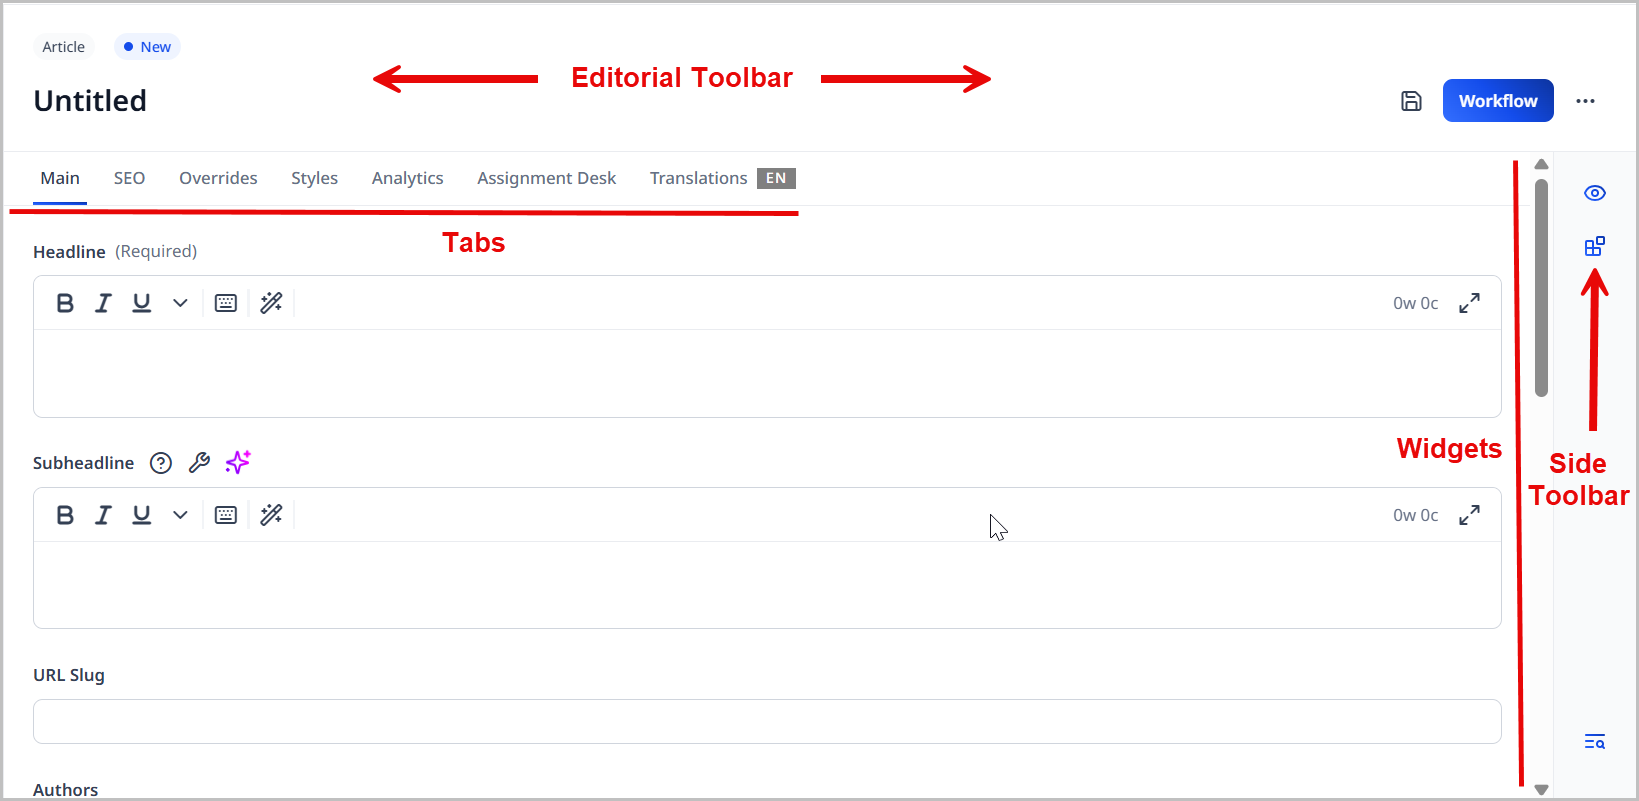
Editorial toolbar
The editorial toolbar sits at the top of the content edit page.

It contains the following:
- The content type of the asset.
- The content state that the asset is in. See Content lifecycle.
- The name of the asset you are creating or modifying.
- A save () icon that saves an asset that has not yet been published. For details, see Creating drafts.
- A calendar () icon that opens a date picker you can use to schedule the asset to be published. For details, see Scheduling assets.
- A workflow or publish button (depending on whether a workflow has been associated to the asset's content type) that either moves the asset through a workflow or publishes it. For details, see Moving assets through a workflow.
- A menu () that opens the editorial tools menu containing additional options both before and after publishing.
Tabs
Each content type contains a number of tabs that house additional fields related to the asset you are creating or modifying.

Though these tabs vary by content type, they often include the following:
- Main—The main set of fields required to build an asset of the selected content type.
- SEO—A set of fields related to search engine optimization. For details, see SEO.
- Overrides—A set of fields that override elements of the asset you are creating or modifying.
Depending on which plugins you have enabled, you may see additional tabs, like Analytics or Translations.
For a more precise list of tabs available across different content types, see the Content Types guide.
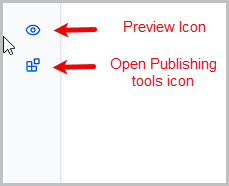
Side toolbar and widgets
The side toolbar contains icons that open various widgets in the widgets section of the content edit page. By default, the widgets are closed to give you more work area/preview area; however, you can select which widgets or additional information you want to see by clicking the appropriate icon in the side toolbar.
Below is an example of a side toolbar with three icons.
These widgets rarely vary by content type; however, the inclusion of some of them depends on your site's configuration and on certain third-party integrations your site may have. Standard widgets include:
- URLs—A widget to manage permalinks and redirects. An asset's permalink is often auto-generated from the slug field, which itself is auto-generated from the asset's title or headline. For details, see URLs widget.
- Sites—A widget to manage ownership and access to the asset. For details, see Sites widget.
- References—A widget that contains links to other assets that reference the asset you are modifying. For details, see References widget.
- Version History—A widget that lists the version history of the asset you are modifying. You can compare each revision to the live version of the asset. For details, see Version History widget.
- The Shelf—A widget that allows you to more easily reference and use different assets in the current asset on which you are working. For details, see Working with The Shelf.
- Conversation—A widget that allows you to leave comments and have conversations with other users in Brightspot. For details, see Collaboration.
If there is a scenario within a widget in the side toolbar that prevents the editor from publishing an asset (like a non-unique URL), Brightspot displays an icon where the error is occurring, helping the editor more easily find the error and correct it.
URLs widget
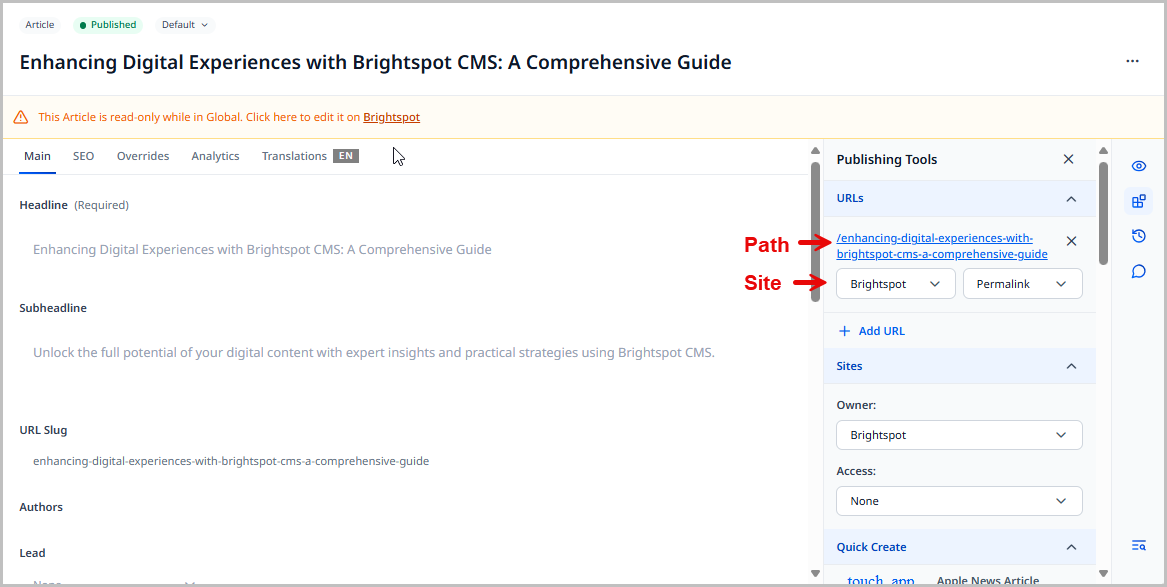
Many assets you publish in Brightspot are associated with a URL. Most URLs have two components, a site name and a path.
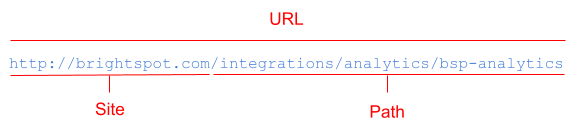
You can determine an asset's URL from the Sites widget in the side toolbar of the content edit page. Both the site and path portions of the URL appear in the URLs widget, which is visible after clicking in the side toolbar of a content edit form.
The following sections describe the four types of URLs you can assign to an asset.
- Permalink—A permalink is the currently live URL associated with the asset. No two assets can have the same permalink.
- Alias—An alias is an additional URL for an asset. For example, you have an asset published at the path
/partner-with-brightspot. You can add the alias/developer-partnersto the same asset. When a visitor retrieves the URLhttp://brightspot.com/developer-partners, the asset athttp://brightspot.com/partner-with-brightspotappears. - Redirect (Permanent)—A permanent redirect causes the server to send an HTTP status code 301 to the client (browser or search engine) along with the new URL. The client then retrieves that new URL. In addition, the client typically (but not always) caches the redirect. When a visitor again requests the old URL, the browser immediately fetches the asset at the new URL. Similarly, when a search engine receives a permanent redirect, it no longer indexes the asset at the old URL.
- Redirect (Temporary)—A temporary redirect causes the server to send an HTTP status code 302 to the client (browser or search engine) along with the new URL. The client then retrieves that new URL. Because the redirect is temporary, clients continue to retrieve assets at the old URL.
You can set whether or not Brightspot automatically generates a permalink. See the following topics:
- Sites and settings—Expand the Front-End tab and view the Permalink Rule Overrides field.
- Sites and settings—Expand the CMS tab and view the Always Generate Permalinks and Single Generated Permalinks fields.
See also:
Sites widget
New assets default to being owned by the site in which they are created, with no other sites having access; however, you can change the site owner and grant access to other sites from the Sites widget on the asset's content edit page.
To change site ownership of an asset:
- In the Sites widget, under Owner, select a new site. Assets may have only one owner.
- Save or re-publish the asset.
To grant access to other sites:
-
In the Sites widget, under Access, select one of the following options:
- All Others—Grants access to this asset to all other sites.
- Some Others—Grants access to this asset to other sites that you select. You can select multiple sites.
-
Save or re-publish the asset.
Once you grant another site access to an asset, it surfaces both in the receiving site's search panel in the CMS and also when visitors to the receiving site conduct site searches.
See also:
References widget
Brightspot lists assets referring to the current asset in the References widget. Among other use cases, the References widget is especially helpful when an asset needs to be archived, as editors can refer to the widget and update the references, thereby preventing broken links from appearing on their site.
To view a list of assets referencing the current asset:
- Search for and open an asset.
- In the References widget, view the assets that reference the current asset. The 10 most recent references are listed.
- If the asset has more than 10 references, click View All
[Number]References. This opens a search panel from which you can further query and filter for all referencing assets.
Version History widget
After you save or publish the first draft of an asset, Brightspot displays the Version History widget in the content edit page. This widget lists the following:
- The live version of the asset (if the asset has been published)
- Current and previous drafts, including any that are scheduled
- Current and previous revisions, including any that are scheduled
- The audience the revision applies to (if applicable)
- Revision-specific history (accessible by clicking )
- Workflow transitions involving the asset
- Comments left when transitioning the asset through a workflow
For each version, the Version History widget lists the time it was saved and the user who saved it. The following illustration provides some examples of entries in the Version History widget.
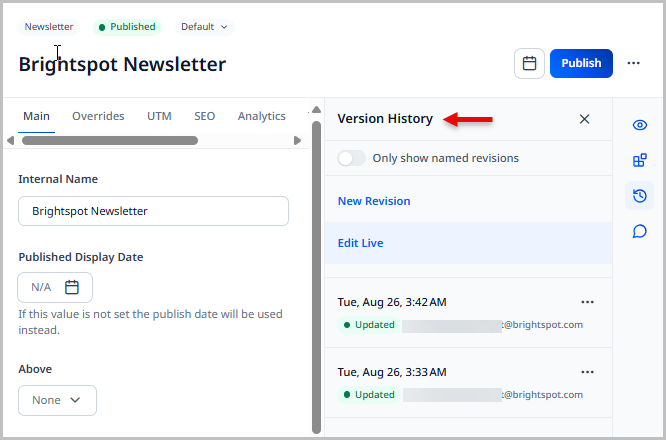
Clicking next to a version displays the revision menu with a list of actions available to you for that specific version.
Conversation widget
After you save or publish an asset, Brightspot displays the Conversation history widget. This widget allows you to collaborate with other users. See Collaboration.
Customizing content edit forms
You can create a customized content edit page for a particular content type, and then associate it to a role or role-site combination.
This feature is useful when you want to show, hide, or rearrange certain widgets or fields, or if you want to make some widgets or fields read-only.
For example, for articles, you can have one version of the content edit page without the Overrides tab for your users in the reporter role, and another version of the form that includes the Overrides tab for your administrators.
Content edit form hierarchy
Brightspot generates default content edit forms based on the fields in the underlying content type. For example, if an article has fields for headline, author, body, and image, the default content edit form for articles displays those four fields. Whenever you create a new article, you see the default content edit form.
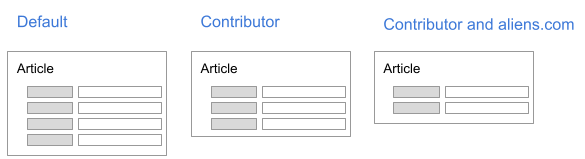
You can display different versions of content edit forms based on an editor’s role or role-site combination. Referring to the following diagram, when creating a new article—
- A user not assigned to any role sees the form’s default version with four fields.
- A user assigned to the role Contributor sees the version with three fields.
- A user assigned to the role Contributor and working on the site aliens.com sees the version with two fields.
Creating content forms
The feature that controls this customization of content edit pages is called content forms. Brightspot provides the ability for you to create content forms to override default field and widget placements on an asset's content edit page.
To create a content form:
- Click > Admin > Users & Roles.
-
In the Content Forms widget on the left at the bottom, select the content type for which you want to create a content form, and then click New.
-
In the Name field, type a name for the form.
-
From the Scope list, select one of the following:
- None—The content form is the default for all roles to which it is assigned.
- Global—The content form is the global default for all roles, replacing the one automatically generated by Brightspot.
-
From the Accesses list, select read or write access for all tabs and fields on the form. (This setting applies to the entire form; you can override this setting at the tab and field levels in the following steps.)
-
To customize a tab and its fields, do the following:
- Click the tab field to expand it.
- In the Name field, type a name for the tab.
- From the Access list, select whether the tab has read-only or read and write access. By default, the tab has read and write access.
- To hide a visible field, drag it to the Hidden Items list. (Do not hide a field that is required in the default content edit page.)
- To show a hidden field, drag it to the Visible Items list.
- To reorder visible items, drag them to the required position.
-
To change a field’s name or access level, do the following:
- Click the field.
- In the Name field, type a name for the field.
- From the Access list, select whether the field has read-only or read and write access. By default, the field has read and write access.
-
Group fields within the tab by doing the following:
- Under Clusters, click Add Group.
- In the Name field, type a name for the group.
- From the Access list, select whether the fields have read-only or read and write access. By default, the fields have read and write access.
- From the Fields list, drag fields into the group and in the desired order.
-
To change the placement of a widget on the content edit page:
- Click the widget field to expand it.
- From the Placement list, select one of the placement options.
-
To add a tab, do the following:
- Under Visible Items, click and select Tab.
- In the Name field, type a name for the tab.
- From the Access list, select whether the tab has read-only or read and write access. By default, the tab has read and write access.
- Repeat steps 1–3 to add additional tabs.
- Click Save.
-
Click Save.
Modifying content forms
You can modify an existing content edit form.
To modify a content form:
- Click > Admin > Users & Roles.
- In the Content Forms widget, select the form you want to modify. Brightspot displays the form in the Edit Content Form widget.
- Modify the form.
- Click Save.
Deleting content forms
You can delete a content edit form in Brightspot. Once deleted, the content edit form cannot be recovered, and the content edit page that the content edit form affected reverts back to its default state.
To delete a content form:
- Click > Admin > Users & Roles.
- In the Content Forms widget, select the form you want to delete.
- At the bottom of the widget, click Delete Permanently.
- In the confirmation prompt, click OK.
Assigning content forms to a role
Assigning a content form to a role makes that form the default for that role for that content type. Referring to the illustration in Content edit form hierarchy, when you assign a three-field content form to the role Contributor, all users with that role see that content form when working on articles.
To assign a content form to a role or role-site combination:
- Click > Admin > Users & Roles.
- In the Roles widget, select the role to which you want to assign the form.
- See the widget below for more details on assigning content forms to roles.
Assigning to roles
- From the Types list, select All Except.
- In Restricted Types, click and select Content Type.
- From the Types list, select a content type.
- From the Form list, select the content form associated with the content type you selected in step 3. (If you select Default, the role sees the default content edit page for the selected content type.)
- Click Save.
Assigning to role-site combinations
- under Site Specific Permissions, click .
- From the Sites list, select the sites with which you want to associate the content form.
- From the Types list, select All Except.
- In Restricted Types, click and select Content Type.
- From the Types list, select a content type.
- From the Form list, select the content form associated with the content type you selected in step 5. (If you select Default, the role sees the default content edit page for the selected content type.)
- Click Save.
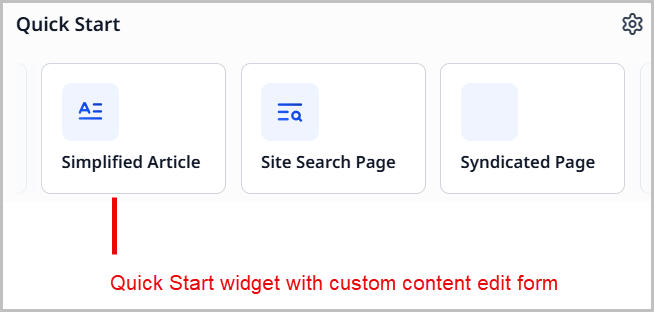
When you assign a content form to a role or role-site combination, or if you change the default content edit page, the content form’s name appears in the Create list in the search panel and in the Quick Start widget. For example, you create a content form Simplified Article for the role Junior Editor. The junior editors see Simplified Article in the Quick Start widget, and other editors see Article.
 |  |
Field types
Brightspot's content edit page has different types of fields for entering different types of data. You access a content edit page in various ways, including:
- By selecting a content type after clicking in the header.
- By opening an asset after searching for it.
Text field
Text fields allow for entering a single line of text. Headlines, photo credits, copyright dates, and attributions are examples of single-line text fields. The following illustration is an example of a text field with a note providing a cue about how to write a headline.

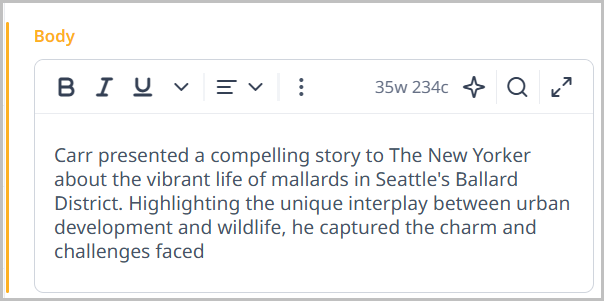
Rich-text editor field
Rich-text editors serve as a small word processor. You can add formatting and media in rich-text editors, such as boldface, italics, images, and hyperlinks. You usually use a rich-text editor to compose content such as body text, author biographies, headers, and footers.
Selection field
Selection fields provide suggested values for a field. For example, a selection field for authors lists some of the authors in Brightspot.
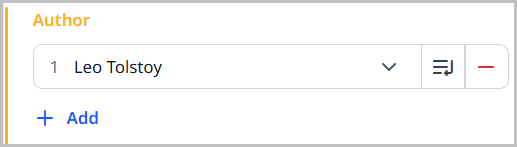
Selection fields typically have three controls:
- — Opens the content picker. If the selection field doesn’t show the item you need, you can find the item using the content picker.
- — Opens a content edit form for editing the current selection.
- —Removes the current selection.
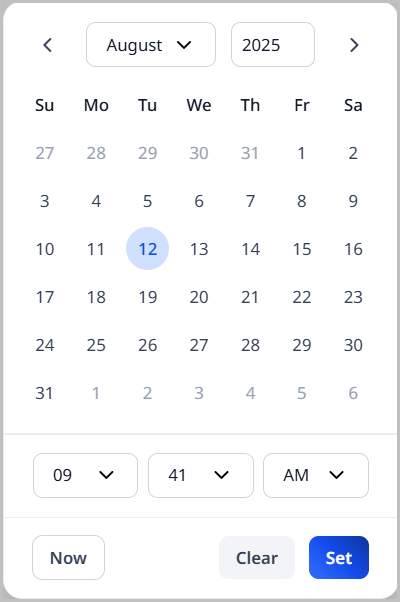
Date selector field
Date selectors help you easily select a date and time. You usually use a date selector for setting fields such as scheduled dates, embargo dates, and review dates.
File selector field
File selectors provide a way to include a file, such as an image, document, or media, into your content.
There are two ways to include a file in Brightspot:
- New Upload—Selecting this option in a file selector displays a Choose button. When you click on this button, you can navigate to the file on your computer. Brightspot uploads and saves the image.
- New URL—Selecting this option in a file selector displays a text field for pasting a URL. Brightspot saves the URL, not the actual file.
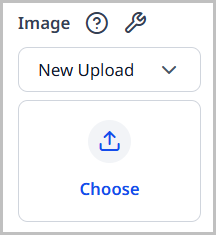
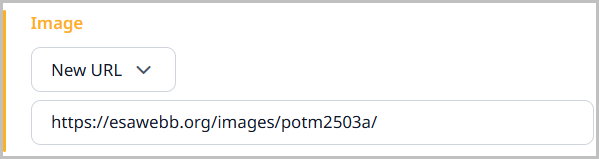
After you select the file, Brightspot displays a preview in the content edit form.
Toggle field
Toggles provide answers to yes-or-no questions. Many settings in your profile are toggles, such as returning to the dashboard after saving an item.


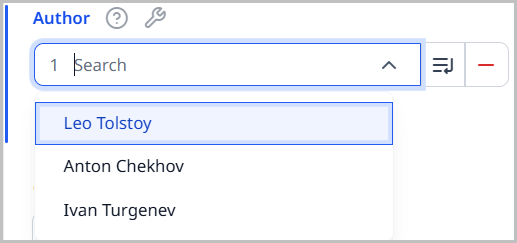
List field
Lists contain one or more items of the same content type, such as one or more authors.

Lists have two controls:
- — Displays a field for adding another item to the list. Many fields in a list are selection fields.
- — Removes the item from the list.
All the fields described in this section change color as you modify them.
Showing, hiding, and reordering fields
You have the ability to show, hide, or reorder fields on a content edit form.
To show, hide, or reorder field items:
- Hide a visible tab by dragging it to the Hidden Items list, or by clicking . (Brightspot recommends not hiding tabs containing fields that are required in the default content edit form.)
- Show a hidden tab by dragging it to the Visible Items list, or by clicking .
- Reorder the visible tabs by dragging them to the required position.
- Change the placement of widgets on the content edit form.
Renaming fields
Brightspot provides the ability to rename a field name on a content edit form.
To rename a field name:
- Click > Admin > Users & Roles.
-
In the Content Forms widget, click the content form whose field name you want to change, or create a new content form.
-
Under Visible Items, locate the field.
-
In the Name field, type a name for the field.
-
Click Save.
Limiting access to fields
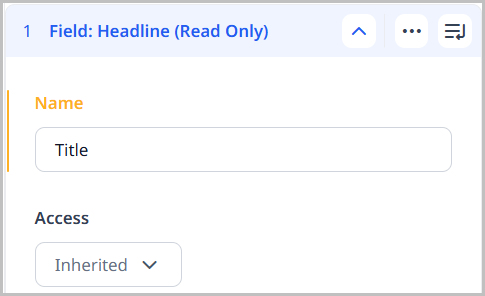
Brightspot allows you to specify levels of access to field items on a content edit form.
To limit access on a field item:
- From the Access dropdown, and using the table below as a reference, select one of the access options.
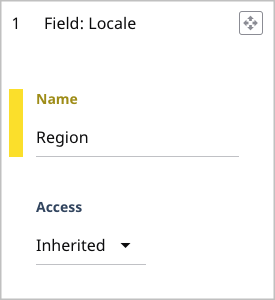
| Access option | Tab level | Group level | Field level |
|---|---|---|---|
| Inherited | Fields in the tab have the same read and write access as the default form for the content type. | Fields in the group have the same read and write access as the containing tab. | Field has the same read and write access as the containing group or tab. |
| Read Only | Fields in the tab have read-only access. | Fields in the group have read-only access. | Field has read-only access. |
| Read & Write | Fields in the tab have read and write access. | Fields in the group have read and write access. | Field has read and write access. |
Viewing developer info
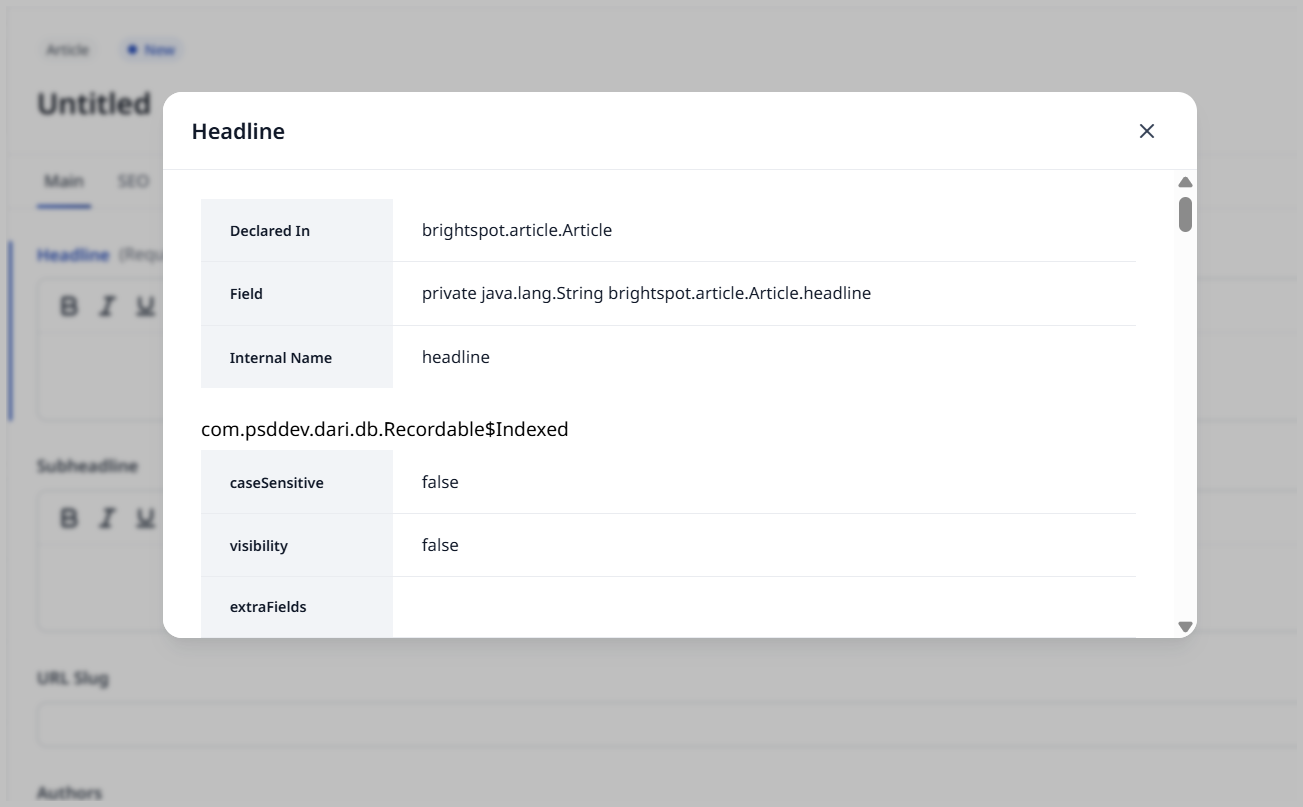
Developers can access additional information about fields or assets on the content edit form. For this feature to be available, a developer must be given a role that includes developer permissions in the Developer list. For details, see Editing roles.
Asset level
To view data about an asset:
- Click to the right of the Publish or Workflow button.
- Click Tools.
- Under the For Developers tab, view any relevant details.
Field level
To view data about a field:
- In a content edit form, hover over the field title until Brightspot displays .
- Click .