Content lifecycle
Assets go through many statuses throughout their lifecycle, and many different actions you take apply new statuses. Read more below about the statuses and lifecycle of a piece of content. Read more below to learn not only about the different statuses an asset can have, but also about how you can perform actions that relate to the statuses.
Basic lifecycle example
An example of a basic lifecycle of an asset is as follows:
New > Draft > Scheduled > Published > Revision > Published
However, this basic lifecycle does not include a workflow that the asset may be transitioned through, nor does the asset ever become archived, restored, and others.
States
The following table summarizes the actions that move an asset into various states.
| Action | Asset moves to this state |
|---|---|
| Creating a new asset | New |
| Clicking (for a new asset or draft) | Draft |
| Clicking (for a revision) | Revision |
| Clicking a workflow transition | Corresponding workflow status |
| Clicking Publish | Live |
| Selecting > Archive | Archived |
| Selecting Restore > Restore To Draft | Draft |
| Selecting Restore > Restore To Live | Live |
| Selecting > Delete Permanently (for an archived asset) | Deleted |
| Clicking and selecting a date (for a draft) | Scheduled draft |
| Clicking and selecting a date (for a revision) | Scheduled revision |
| Selecting > Unschedule (for a scheduled draft) | Draft |
| Selecting > Start New Revision | Revision |
Creating content
Once an asset is created, it is in New status. You can create content in Brightspot in one of three ways:
| Method | Example |
|---|---|
| Clicking in the header. | |
| From the Quick Start widget on the dashboard. | |
| From the Create widget found at the bottom left of many search results screens. | 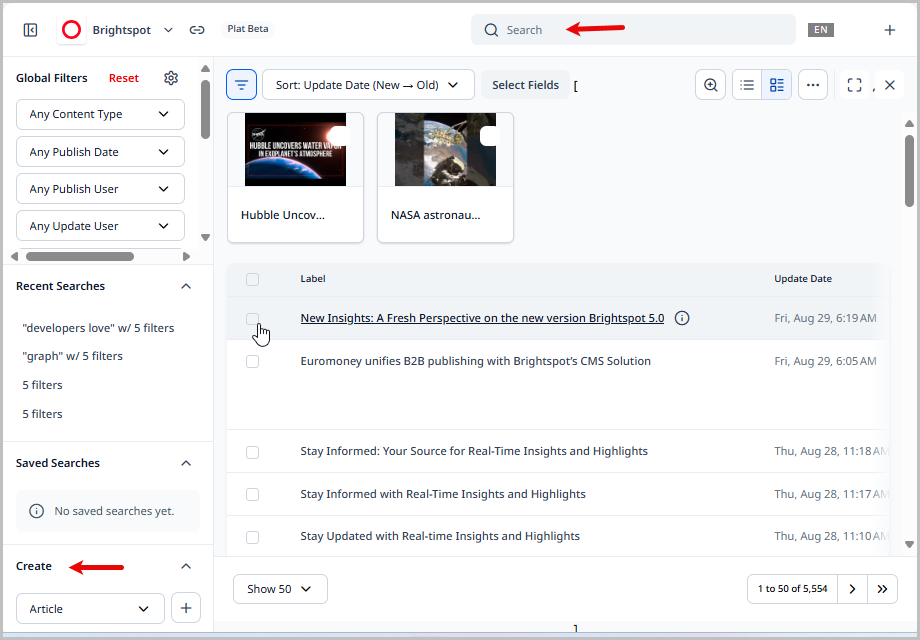 |
Edit the asset to create a work in progress.
Work in progress (WIP)
As you work on your asset, Brightspot continually performs background saves to prevent loss of data (for example, if your browser window closes unexpectedly before you save the asset). This kind of tentative state is known as a work in progress (WIP).
Creating WIPs
You create a WIP whenever you enter text in an asset, regardless of the asset's state (i.e., New, Draft, Revision, etc.)
To create a WIP
- Create a new asset or search for and open an existing one.
- Enter text into one of the fields.
Brightspot displays messages indicating that the WIP has been created and saved.
WIP messages
The first time a WIP is created, Brightspot displays a message at the top of the content edit form, Work in Progress Created. Subsequent changes show a Saving Work in Progress message, and then a Work in Progress Saved message.
Returning to WIPs
You can see a list of your WIPs from the profile menu. From this list, you can return to a WIP.
To return to a WIP:
- In the header, click your username to open the profile menu.
- Click WIPs.
- Referring to the information provided, like the date and time the WIP was created, click on a WIP.
Brightspot displays a banner that says Restored Work in Progress.
Clearing changes
When you return to a WIP, you have the option to resume editing or clear changes and work on the live asset.
To clear WIP changes:
- Return to a WIP.
- In the
Restored Work in Progressbanner, click Clear Changes.
Drafts
An asset is in a draft state once it is saved. These assets are visible in Brightspot, but not to your visitors.
Creating drafts
The first state of an asset is Draft. You can create multiple drafts for an asset before publication, compare the changes between two drafts, republish an asset based on a previous draft, and merge a later draft into an earlier one.
To create a draft:
- Create a new asset.
- In the editorial toolbar, click .
After you save a draft, it appears in the Version History widget.
Editing drafts
You can save drafts and return to them later to continue your edits.
To edit a draft:
- Search for an existing draft (under Global Filters, ensure the Any Status filter has Draft selected).
- Open the draft.
- Continue editing.
Naming drafts
You can name drafts, which provides additional context beyond the reported timestamp and username that made the version.
Brightspot strongly recommends naming drafts to add context to different versions of an asset. This context is crucial to communicating among different users so everyone understands what a version changes or achieves.
To name a draft:
- Search for and open a draft.
- In the side toolbar, click .
- Next to the draft you want to name, click > Name Revision.
- Give the draft a name.
- Click Save.
The name now appears in the Version History widget.
Comparing drafts
You can compare a draft to other drafts or revisions, or to the live version of the asset.

To compare a draft to the live version:
- Search for and open a draft.
- In the side toolbar, click .
- In the Version History widget, next to the draft you want to compare, click > Compare to Live.
- View the differences.
- When finished, click .
To compare a draft to another draft or revision:
- Search for and open a draft.
- In the side toolbar, click .
- In the Version History widget, select the draft you want to compare.
- In the Version History widget, next to the draft you want to compare your selected draft to, click > Compare.
- View the differences.
- When finished, click .
Brightspot displays the differences between the draft you are viewing and the live version.
Saving or publishing drafts
You can save or publish drafts (or enter them into a workflow if one has been set for its content type).
To save a draft:
- Search for and open a draft.
- Click .
To publish a draft:
-
Search for and open a draft.
-
Do one of the following:
- Click the Workflow button and enter the draft into a workflow.
- Click the Publish button and publish the draft.
Once published, the asset moves to Published status.
Deleting drafts
You can delete any draft that has not entered a workflow or been published.
To delete a draft:
- Search for and open a draft.
- In the side toolbar, click .
- In the Version History widget, select the draft you want to delete.
- In the editorial toolbar, click .
- Select Delete Permanently.
- In the confirmation prompt, click OK.
Revisions
A revision is a new instance of a draft or a published asset where you can make changes before bringing it live. Revisions track content across various rounds of editing, helping users understand which changes were made at each point in the content lifecycle.
Creating revisions
You can create a revision of either a draft or of a published asset.

To create a revision of a published asset:
- Search for and open the asset for which you want to create a new revision.
- In the side toolbar, click .
- Click New Revision.
- Name the revision.
- Click Create.
To create a revision of a draft:
- Search for and open the draft for which you want to create a new revision.
- In the side toolbar, click .
- Click New Revision.
- Name the revision.
- Click Create.
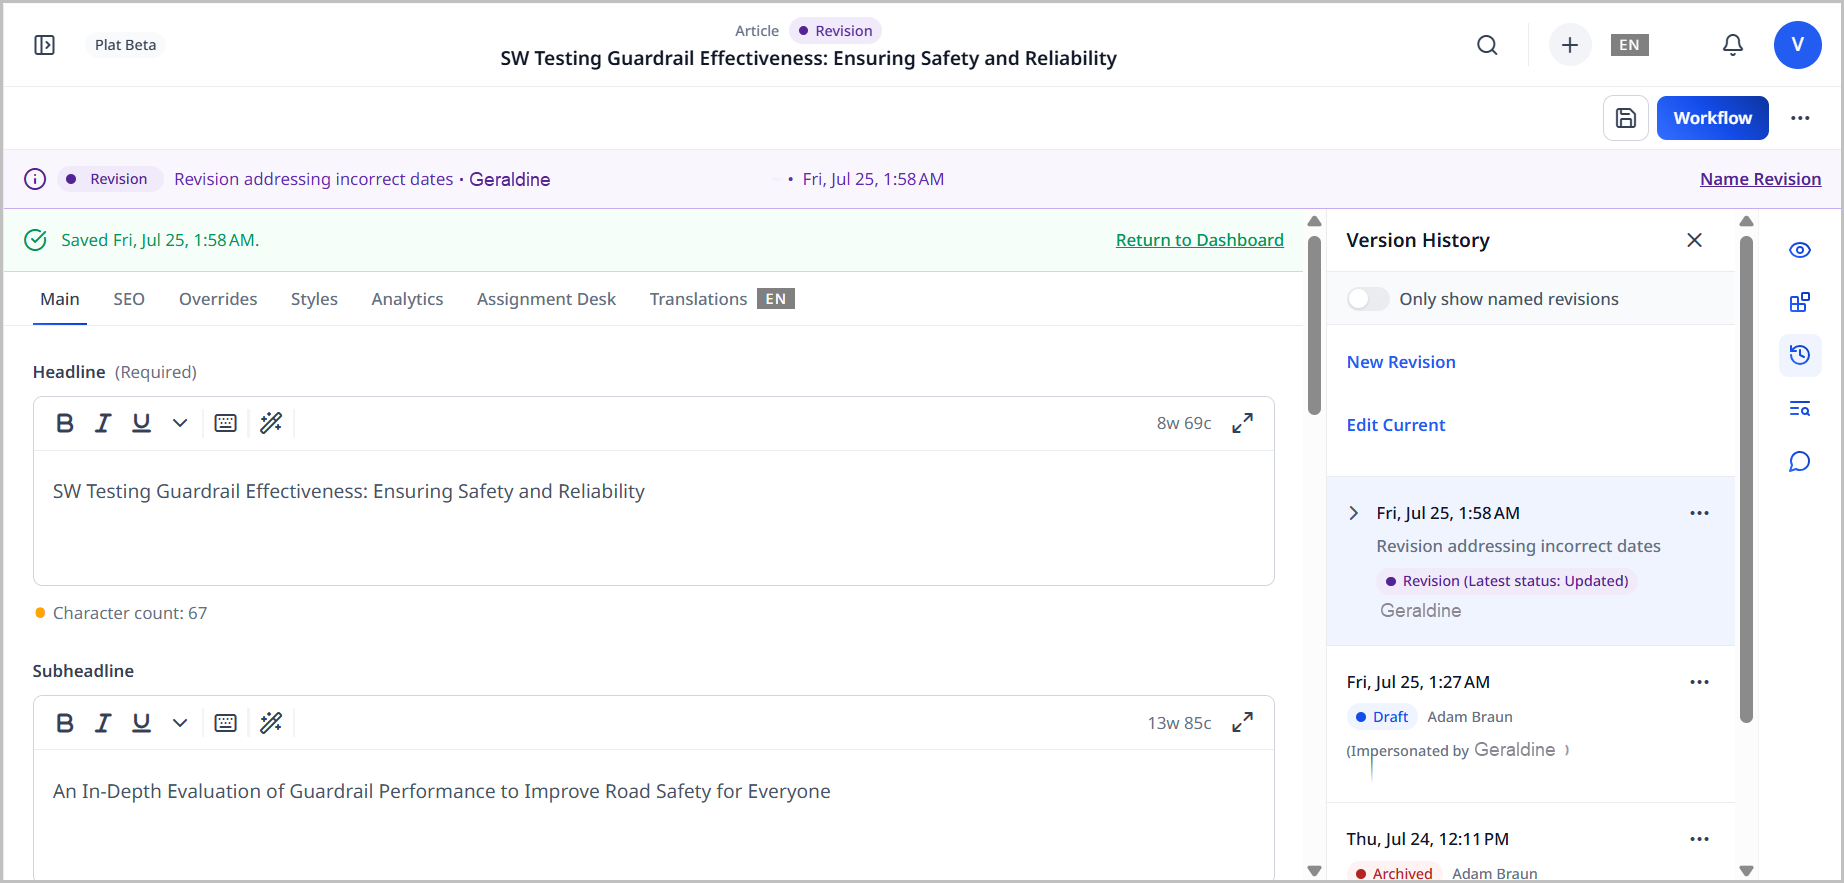
Once you create a revision, Brightspot adds the new revision to the Version History widget and lists the new revision in the Recent Revisions banner when editing previously live revisions.
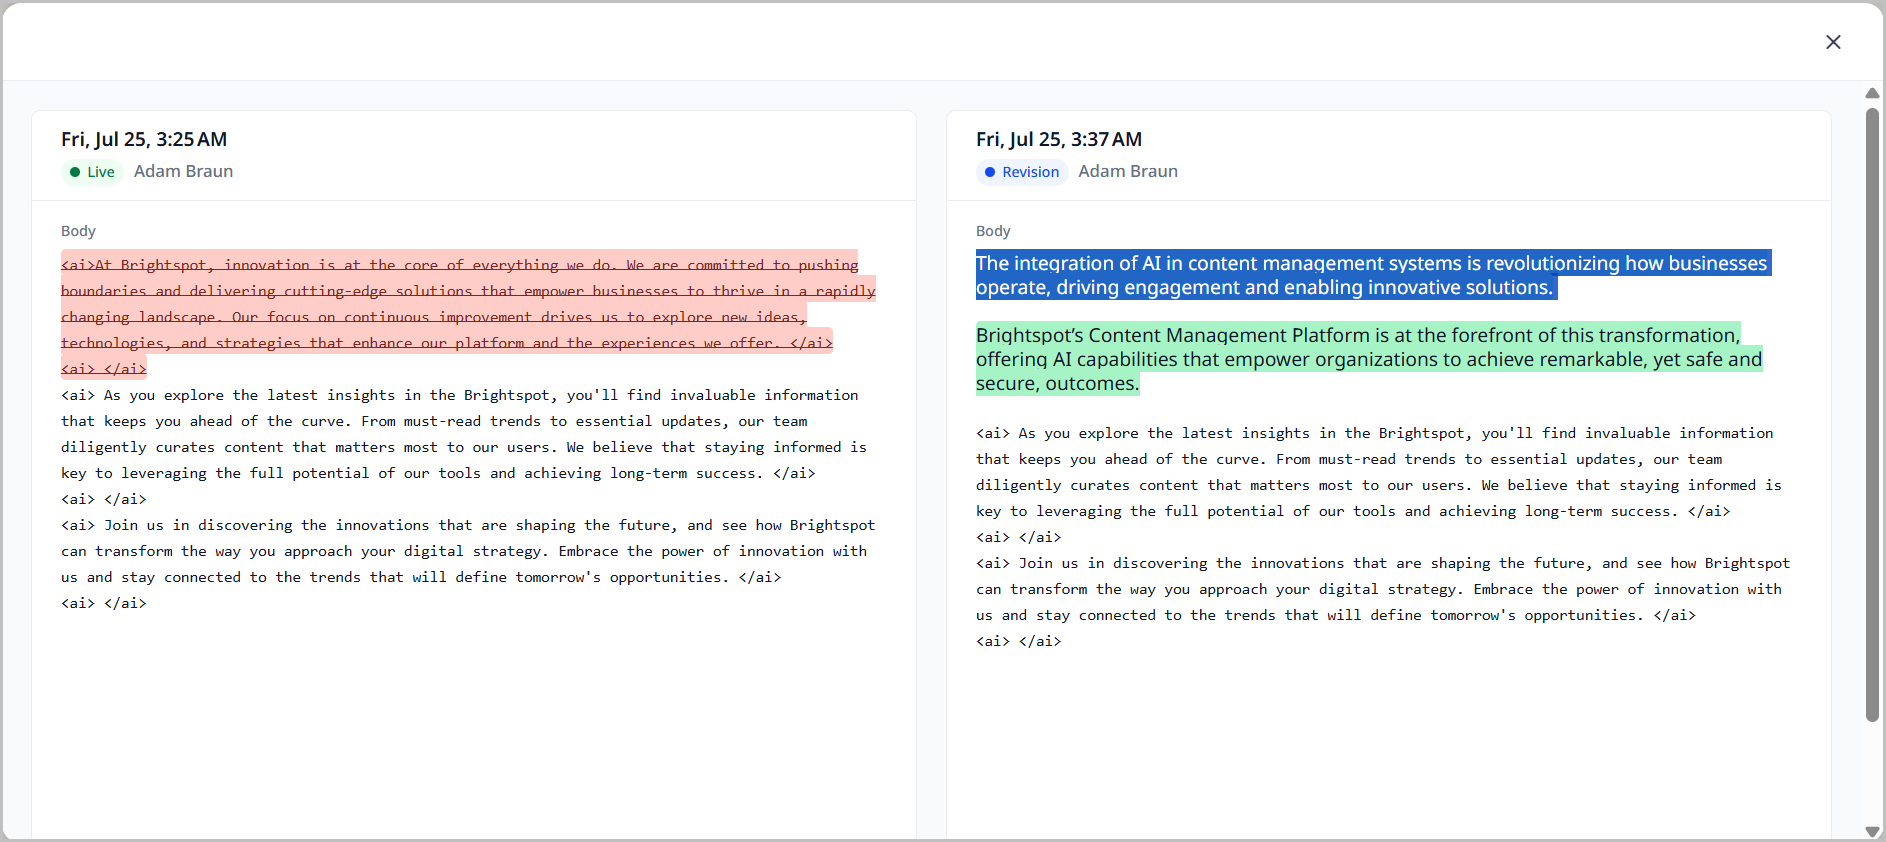
The following example shows that a revision is in progress.
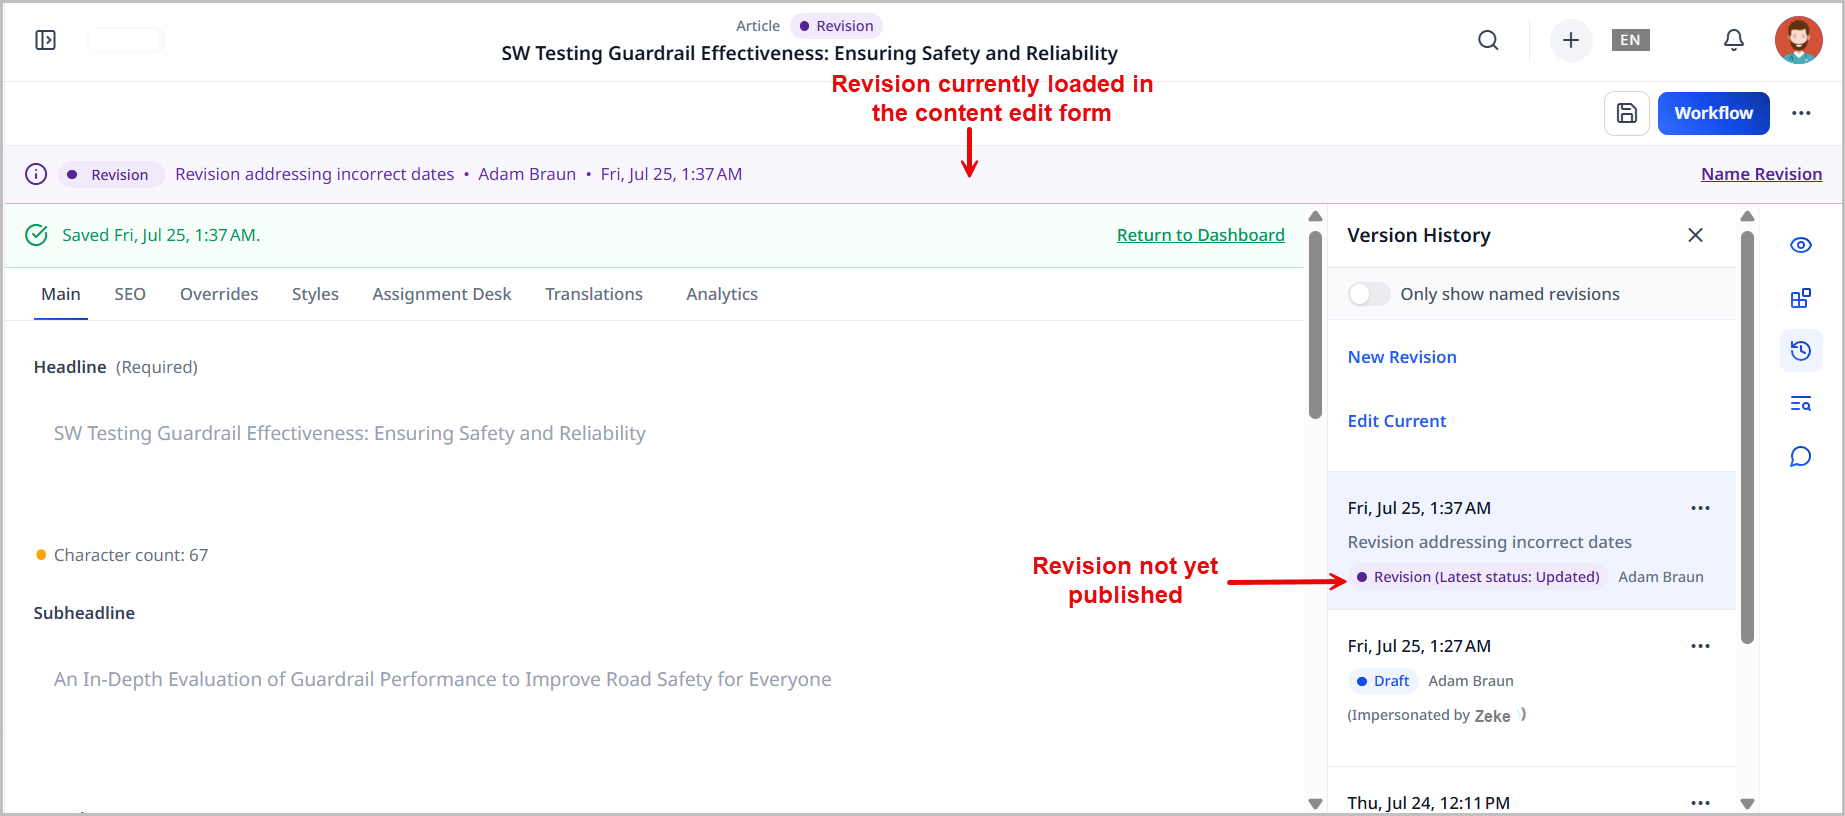
The following example shows the list of recent revisions that are not yet published.
Editing revisions
You can edit a revision prior to its publication.
To update an in-progress revision:
- Search for and open the asset with the revision you want to update.
- In the side toolbar, click .
- Select the revision you want to edit.
- Make your edits.
- Save or publish the asset.
Naming revisions
You can name revisions, which provides additional context beyond the reported timestamp and username that made the version.
Brightspot strongly recommends naming revisions to add context to different versions of an asset. This context is crucial to communicating among different users so everyone understands what a version changes or achieves.
To name a revision:
- Search for and open the asset with the revision you want to update.
- In the side toolbar, click .
- Next to the revision you want to name, click > Name Revision.
- Give the revision a name.
- Click Save.
The name now appears in the Version History widget.
When making new revisions, which automatically opens the Name Revision popup, you can make the Name field required. To do this, do the following:
- Click > Admin > Sites & Settings.
- From the CMS tab, expand the UI cluster.
- Toggle on the setting under the Revision Name Required field.
Comparing revisions
You can compare a revision to other drafts or revisions, or to the live version of the asset.
To compare a revision to the live version:
- Search for and open the asset with the revision you want to compare.
- In the side toolbar, click .
- In the Version History widget, next to the revision you want to compare, click > Compare to Live.
- View the differences.
- When finished, click .
To compare a revision to another draft or revision:
- Search for and open the asset with the revision you want to compare.
- In the side toolbar, click .
- In the Version History widget, select the draft you want to compare.
- In the Version History widget, next to the revision you want to compare your selected draft to, click > Compare.
- View the differences.
- When finished, click .
Brightspot displays the differences between the revision you are viewing and the live version.
For enhancements embedded into the rich-text editor that have changes, you can click that appears in the upper-right corner of the enhancement to view differences.
Saving or publishing revisions
You can save or publish revisions (or enter them into a workflow if one has been set for its content type).
To save a revision:
- Search for and open the asset with the revision you want to save.
- Click .
To publish a revision:
- Search for and open the asset with the revision you want to publish.
- Do one of the following:
- Click the Workflow button and enter the revision into a workflow.
- Click the Publish button and publish the revision.
Once published, the asset moves to Published status.
Merging revisions into workflows
If you have an asset that is in a workflow, you can update the asset without restarting the workflow. The following scenario provides an example.

-
Adam creates a draft, and sends it to the first status in the workflow
Fact Checking. -
Olivia takes the draft from
Fact Checking, makes a few edits, and advances the draft toProofreading. -
The next day, Adam realizes that he needs to update the draft, so he creates a new revision from it. That revision starts from where Olivia ended.
-
Adam finishes his new revision, and has two choices:
- Restart the workflow by advancing the revision to
Fact Checking. - Continue the workflow by keeping the revision in
Proofreading.
- Restart the workflow by advancing the revision to
To merge a revision into a workflow:
-
Search for and open the asset in the workflow.
-
In the side toolbar, click .
-
In the Version History widget, click New Revision.
-
Make edits to the asset as desired.
-
In the editorial toolbar, ensure that Merge is selected.
-
Click Workflow, and then click one of the following:
- Merge with Draft—Brightspot moves the revision to the latest point in the workflow when the revision started.
- Send to (first workflow status)—Brightspot moves the revision to the first point in the workflow.
Deleting revisions
You can delete any revision that has not entered a workflow or been published.
To delete a revision:
- Search for and open the asset whose revision you want to delete.
- In the side toolbar, click .
- In the Version History widget, select the revision you want to delete.
- In the editorial toolbar, click .
- Select Delete Permanently.
- In the confirmation prompt, click OK.
Scheduling
You can schedule assets to be published at a future date and time. You can change the scheduled date, or schedule multiple dates for different versions of the asset. You can also unschedule the asset and publish the asset right away if you need.
Scheduling assets
This topic explains how to set an asset to be published at a future date and time.
To schedule an asset:
- Search for and open the asset that you want to schedule.
- In the editorial toolbar, click .
- In the calendar, set the date and time when you want the asset to be published.
- Click Set. The scheduled time appears in a banner, and the Schedule button replaces the Publish button.
- Click Schedule.
The asset gains the Scheduled status.
Updating schedules
You can change an asset's scheduled publish date.
To update a scheduled publication date:
- Search for and open a scheduled asset.
- In the editorial toolbar, click .
- In the calendar, set the new date and time when you want the asset to be published, then click Set.
- Click Schedule.
The asset retains the Scheduled status.
Unscheduling assets
You can unschedule an asset that is scheduled.
To unschedule an asset:
- Search for and open a scheduled asset.
- In the editorial toolbar, click .
- Click Unschedule.
The asset gains the Draft status. From this point, save or publish the draft.
Publishing scheduled assets immediately
You can publish a scheduled asset immediately.
- Search for and open a scheduled asset.
- In the editorial toolbar, click .
- Click Clear.
- Click Publish.
The asset gains the Published status.
Merging revisions or replacing content in scheduled assets
To assist editorial needs, you can do the following:
- Merge edits into a scheduled asset, combining its existing content with your edits. This is useful if you only want to add a few sentences or images, but want the content to remain largely the same.
- Replace content within a scheduled asset, thereby overwriting its existing content without having to re-schedule the asset.
In order to perform a merge or replace action on an asset, its schedule must have a defined trigger date.
To merge revisions or replace content:
- Search for and open a scheduled asset.
- In the side toolbar, click .
- In the Version History widget, click New Revision.
Brightspot now displays scheduling options in the editorial toolbar.
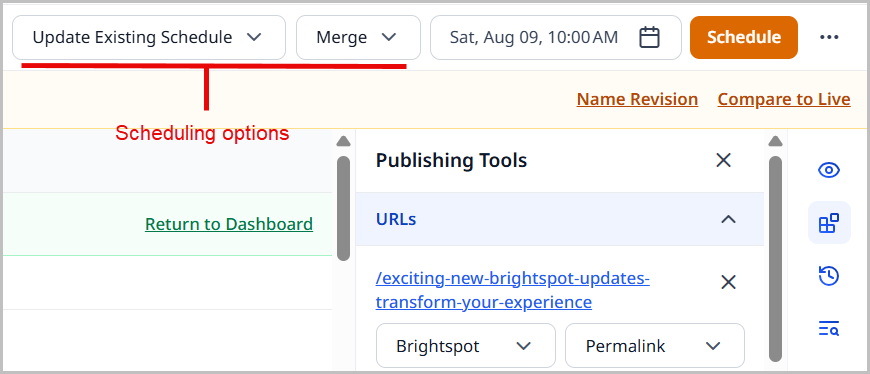
- In the scheduling options, select one of the following:
- Merge—Merges any changes into the existing scheduled asset.
- Replace—Replaces the existing scheduled asset with the changes you have made.
- Click Schedule. Any edits you make to the revision are either merged into the scheduled asset, or replace the scheduled asset entirely.
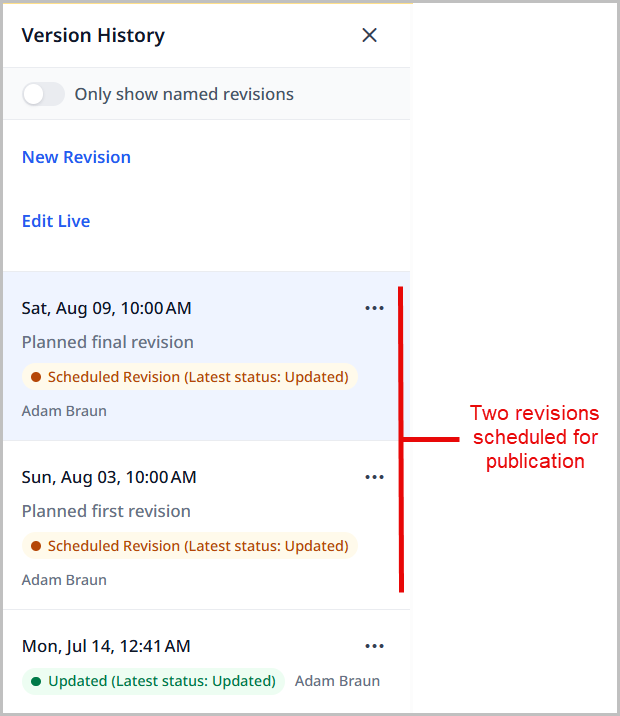
Scheduling multiple versions of an asset
You can schedule multiple versions to be published at different dates. For example, you might have an abbreviated version of a story that appears in a weekday edition, and a full-length version of the same story in a weekend edition. To do this requires that the asset is scheduled (version 1), and that a revision created from it is also scheduled (version 2).
To publish an asset with multiple schedules:
- Create or open the asset.
- If not already scheduled, schedule the asset. See Scheduling assets.
- In the side toolbar, click .
- In the Version History widget, click New Revision.
- Make edits as desired.
- In the editorial toolbar, click the date picker.
- Select a new date and time when the revision will be published.
- Click Schedule.
Two versions of the asset are now scheduled.
Archiving and deleting content
Brightspot provides the ability to archive and delete assets.
- Archiving keeps assets accessible within Brightspot, but they are not visible to your visitors.
- Deleting permanently removes assets from Brightspot, and they cannot be recovered.

To find archived assets in search, use Archived status filter.
Archiving assets
You can archive published assets. After archiving, visitors cannot view the assets, but you can still locate them via search.
To archive an asset:
- Search for and open the asset.
If the asset you want to archive is referenced by other assets, you must address those references first. Not doing so will result in a 404 error when a visitor clicks on those broken links. To view an asset's References widget, click in the side toolbar, and locate the widget. It only appears if the asset has references.
- In the editorial toolbar, click , and click Archive.
- In the confirmation prompt, click OK.
Brightspot archives the asset, and displays an indication in the content edit form. Visitors cannot view the asset, but Brightspot retains the asset in the database.
Restoring archived assets
Once an asset is archived, it is still available within Brightspot. In order to save any edits or have it visible on your web site, you must restore it.
To restore an archived asset, the role assigned to the user must have the appropriate permission.
- Roles with the Restore to Draft permission only have the Restore to Draft option available.
- Roles with the Restore to Live permission only have the Restore to Live option available.
- Roles with both permissions assigned have both the Restore to Draft and Restore to Live options available.
To restore an archived asset:
-
Search for and open an archived asset.
-
Click Restore, then select Restore To Draft or Restore To Live.
- Restore To Draft—Restores the asset to a draft status.
- Restore To Live—Restores the asset to a published status.
Deleting assets
Assets that are no longer needed can be permanently deleted from Brightspot.
The following procedure permanently deletes an asset from Brightspot, and you cannot restore it.
To permanently delete an asset:
- Search for and open the archived asset.
- In the editorial toolbar, click , and click Delete Permanently.
- In the confirmation prompt, click OK.
Brightspot deletes the asset.