Users and roles
Brightspot uses permissions to limit access to certain features based on a user's role. This section describes creating users and roles, assigning permissions and scopes, and more.
Users
This guide provides detailed information on managing your users within Brightspot.
Creating users
This topic describes how to create a user in Brightspot.
- From the left navigation, under Admin, click Users & Roles.
- In the Users widget, click New Tool User.
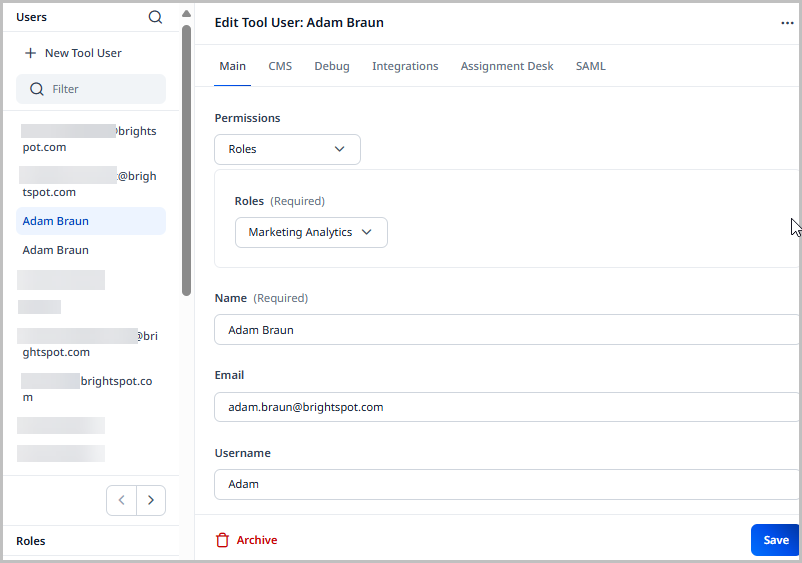
- Using the following tables as a reference, complete the fields as needed.
- Click Save.
The following tables describe the available user settings.
Main tab
| Field | Description |
|---|---|
| Permissions | User's roles. • Full Access—Default setting. The user has no role and therefore has all permissions. • Roles—Assign roles from a list. You can select multiple roles. • Site Specific Roles—Click Add Site Specific Roles to specify sites and associate roles with these sites. For details, see Site-specific roles. |
| Name | User's name. Brightspot displays this name for any content that this user creates or edits. The name also appears in various widgets. |
| User's email address. If blank, Brightspot applies the user's username. | |
| Username | User's username. This value is used when logging in to Brightspot. |
| Password | User's password. • Change—Displays fields for adding or changing a user's password. • Keep Same—Retains current password. If you are creating a new user and select this option, the user will not be able to log in. |
| Change password on login | Forces the user to change the password on next login. |
| Avatar | User's avatar. The avatar appears in the header and in various Brightspot widgets. • None—No avatar associated with the user. • New Upload—Displays a field for uploading an avatar. • New URL—Displays a field for entering an avatar's URL. |
| Locale | User's language and location. Brightspot's appearance changes to the selected language. For example, if you select Spanish, Brightspot appears in Spanish. If the selected language is not available, Brightspot appears in English. |
| Time Zone | User's time zone. |
| Phone Number | User's phone number for receiving text messages from Brightspot. For information about receiving text messages from Brightspot, see Notifications. |
| Guide Open | Toggle on to open Guide by default each time the user logs in to Brightspot. |
| Site Owner Filter Override | Filters search results by site owner. • Current Site—The user only sees content in search results owned by the current site. • All Sites (None Selected)—The user sees content in search results owned by any site. • Select—The user sees content in search results owned by the sites you select. |
Localization
| Field | Description |
|---|---|
| Content Locale | The locale used on newly created content. |
| Search Locale Override | The locale selected by default in search results. |
Notifications
| Field | Description |
|---|---|
| Delivery Methods | Available default delivery methods. See Delivery methods. |
| Subscriptions | Available default subscriptions. See Subscriptions. |
| Automatic Subscriptions | Automatic subscriptions configured by the Brightspot administrator. Users can specify delivery methods for all such subscriptions as well as opt out of them. See Managing automatic subscriptions. |
CMS tab
Dashboard
| Field | Description |
|---|---|
| Dashboard | Settings for user's dashboard. See Dashboards. |
| Edit Existing Content | List of existing content items appearing in this user's Quick Start widget. See Dashboards. |
Content Templates
| Field | Description |
|---|---|
| Content Templates | Create any user-specific content templates. See Content templates. |
RTE
| Field | Description |
|---|---|
| Custom Keyboard Config | Add or remove characters that appear in a user's custom keyboard in the rich-text editor. To access the custom keyboard, click CTRL + CMD + SPACE (Mac) or WIN + (Windows) |
UI
| Field | Description |
|---|---|
| Enable v5 UI | Enables Brightspot v5 UI. |
| Appearance | Sets the appearance mode (Light, Dark, or Follow OS). |
| Contrast | Increases the contrast of the UI (Normal, More, or Follow OS). |
| Enable Guides | Enables Guides. See Guides. |
| Enable Pre Publish Actions | Enables pre-publish actions. See Pre-publishing actions. |
| Enable Post Publish Actions | Enables post-publish actions. See Post-publishing actions. |
| Open Post Publish Actions Automatically | Sets whether the post-publish actions pop-up menu displays immediately after publishing an asset. |
| Enable Preview To Edit | Enables preview to edit. See Preview to edit. |
| Retain Search Settings | Sets what gets retained in future searches once you have selected search settings. |
| Bulk Scheduling | Sets whether content can be added from Bulk Scheduling pop-up. |
| Widgets Watching Filter | Sets whether a filter pertaining to watched content is included in search. |
V4 UI
| Field | Description |
|---|---|
| Preset Theme | Sets a pre-made theme for the UI (Bold, Brightspot, Calm, Custom.) |
| Enable High Contrast | Enables high contrast mode. |
| Enable Boxed Input | Enables sharper box outlines for fields. |
| Enable Compact | Enables compact mode. |
| Enable Compact Rails | Enables compact rails. |
| Header Background | Sets the background color of the header. |
Quick View
| Field | Description |
|---|---|
| Quick View Settings | Enables quick view on specified content types for specified fields. |
Shelf
| Field | Description |
|---|---|
| Enable Shelf | Enables Shelf. See Shelf |
| Type Settings | Sets which content types feature Shelf, and which content types can be dropped from Shelf into assets. |
| Shelf Default Source | Sets the source of items in Shelf per content type. |
Watch
| Field | Description |
|---|---|
| Auto Watch User on Publish | Automatically sets the user as a watcher after publishing an asset. |
| Auto Watch User on Update | Automatically sets the user as a watcher after updating an asset. |
Advanced
| Field | Description |
|---|---|
| Return to Dashboard on Save | Toggle on to route the user to the dashboard after saving changes to content. |
| Return to Dashboard on Workflow | Toggle on to route the user to the dashboard after moving content into a workflow. |
| Disable Navigate Away Alert | Toggle on to prevent the user from receiving a message when leaving the content edit page without saving or publishing. |
| Disable Work In Progress | Disables the work-in-progress feature, which maintains live backups of work if a Brightspot session unexpectedly ends. |
| Excluded Classes | Excludes users from accessing certain functionality in Brightspot based on the Java class name responsible for the functionality. For details on how to discover Java class names, see Viewing developer info. |
| Global Theme Override | Overrides the front-end theme applied to all sites. This setting impacts what the user sees when previewing content; when publishing content, Brightspot uses the site's theme. This setting is primarily used for quality assurance in case a user needs to test out the presentation of a different theme while maintaining the theme set to the site on the live site. |
| Site Theme Overrides | Overrides the front-end theme applied to the sites you define. This setting impacts what the user sees when previewing content; when publishing content, Brightspot uses the site's theme. This setting is primarily used for quality assurance in case a user needs to test out the presentation of a different theme while maintaining the theme set to the site on the live site. |
Editing users
This topic describes how to create a user in Brightspot.
- From the left navigation, under Admin, click Users & Roles.
- In the Users widget, in the Search field, and start typing the user's name.
- Click the user you want to edit.
- Using Creating users, update the user's settings as required.
- Click Save.
Copying users
This topic describes how to copy a user in Brightspot.
- From the left navigation, under Admin, click Users & Roles.
- In the Users widget, in the Search field, and start typing the user's name.
- Click the user you want to edit.
- At the top of the edit form, click , then click Copy This Tool User.
Archiving users
This topic describes how to archive a user in Brightspot.
- From the left navigation, under Admin, click Users & Roles.
- In the Users widget, in the Search field, and start typing the user's name.
- Click the user you want to edit.
- At the bottom of the edit form, click Archive.
- In the confirmation prompt, click OK.
Restoring users
This topic describes how to restore a user in Brightspot.
- From the left navigation, under Admin, click Users & Roles.
- In the Users widget, in the Search field, and start typing the user's name.
- Click the user you want to edit.
- At the top of the edit form, click .
Viewing user history
This topic describes how to view a history of actions taken on a user.
This does not show the actions a user has taken in Brightspot; only the actions taken on the user, like when the user was created, archived, restored, etc.
- From the left navigation, under Admin, click Users & Roles.
- In the Users widget, in the Search field, and start typing the user's name.
- Click the user you want to edit.
- At the top of the edit form, click , then click History.
Deleting users
This topic describes how to delete a user in Brightspot.
- From the left navigation, under Admin, click Users & Roles.
- In the Users widget, in the Search field, and start typing the user's name.
- Click the user you want to edit.
- At the top of the edit form, click , then click Delete Permanently.
- In the confirmation prompt, click OK.
Impersonating users
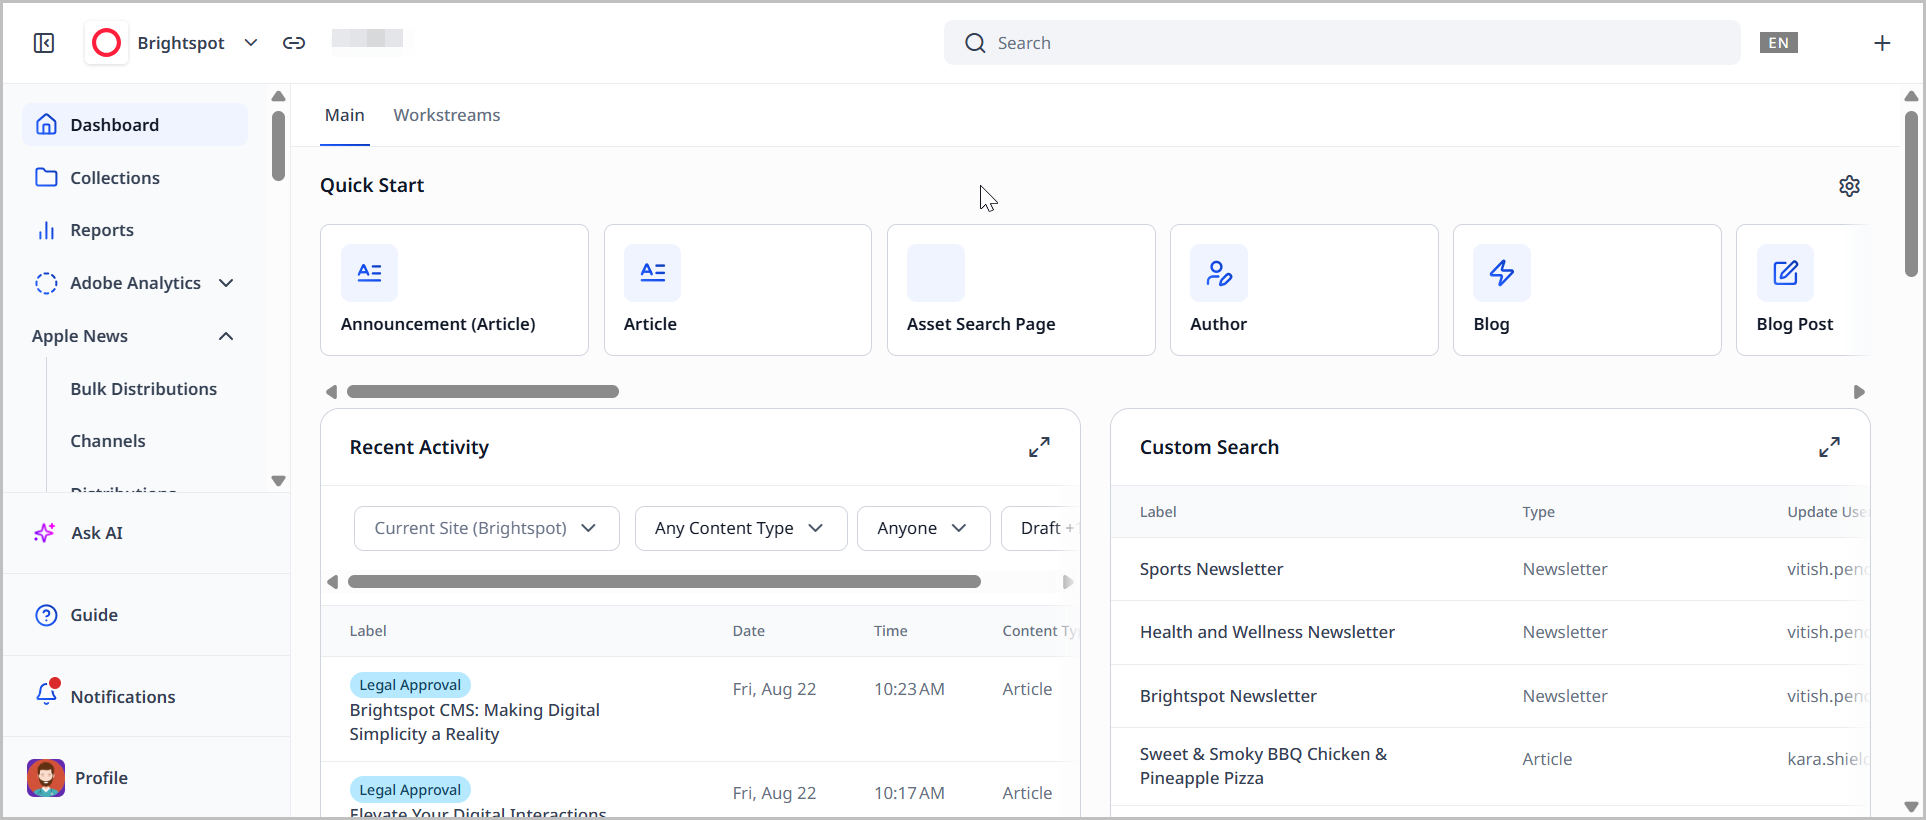
You can use Brightspot as a different user. This is useful when you need to verify that a user's role or permissions are configured correctly. For example, Olivia configured a role, Proofreader, with access only to the Workstreams and Scheduled Events widgets on the dashboard. Olivia can impersonate a user who has the Proofreader role to verify the dashboard is configured correctly.
- From the left navigation, under Admin, click Users & Roles.
- Select the user you want to impersonate.
- Click , and from the menu, select Impersonate This Tool User.
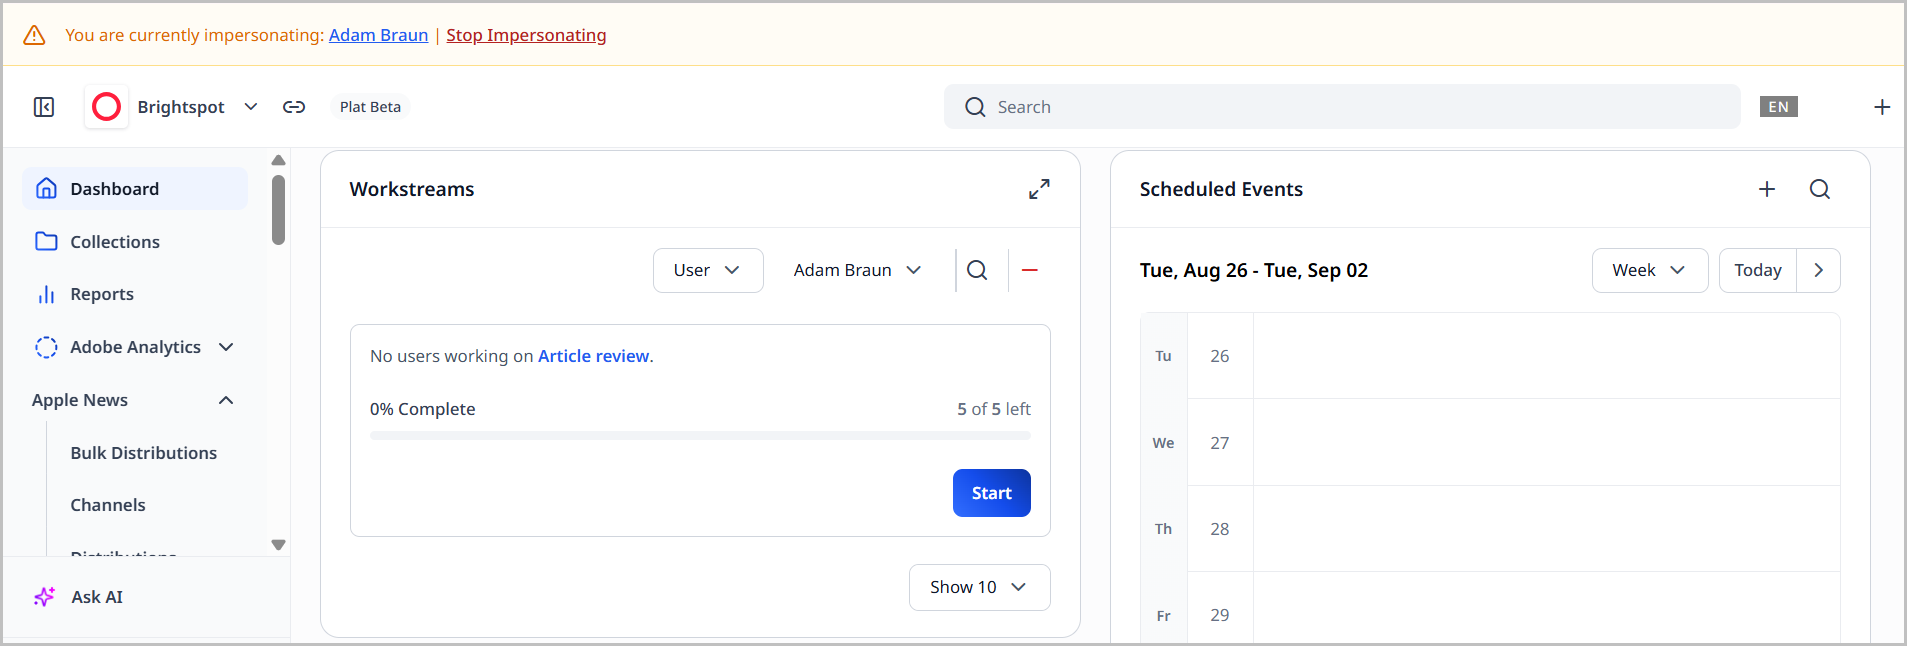
You return to the dashboard as seen by the impersonated user. A banner appears above the header indicating the user you are impersonating.
In widgets that show an editor's name, such as the Version History widget, the impersonated user's name appears.
To stop impersonating the user, click Stop Impersonating in the banner above the header.
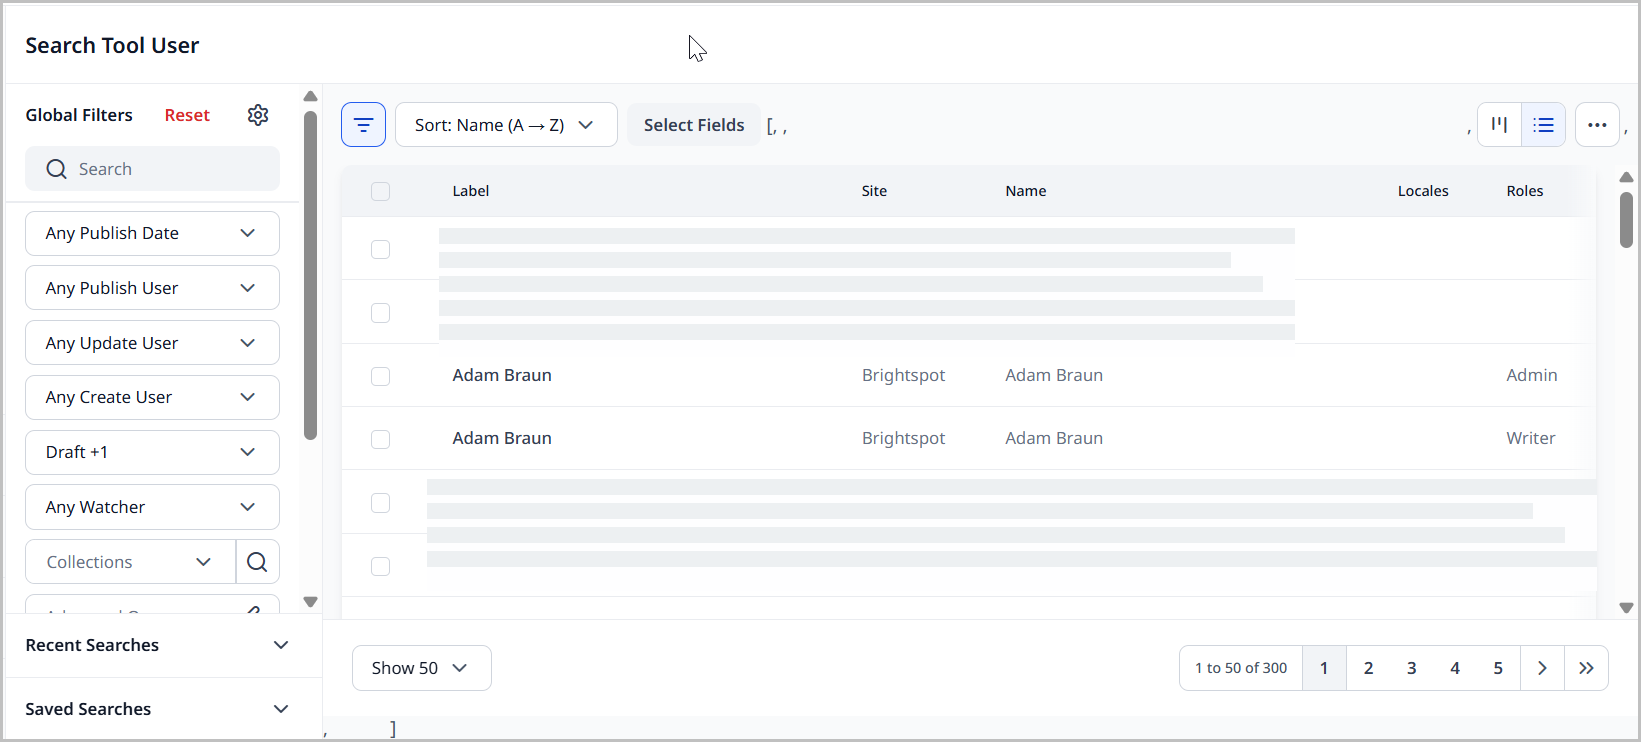
Searching all users
You can view all users in your site in a list. This is helpful if you want to view a list of multiple users at once, including their roles and any attributes you include in your search criteria. For details on search filtering, see Adding fields to search results.
- From the left navigation, under Admin, click Users & Roles.
- At the top of the users list, click .
- Apply filters and sort through users as necessary.
Roles
Each role has an associated list of permissions needed to access features and areas within Brightspot. For example, administrators typically have access to all sites, tabs, widgets, and the entire left navigation. Editors typically have access only to those sites, tabs, widgets, and items on in the left navigation menu associated with the content they provide.
In addition to a single role given to an administrator or editor, you may also assign site-specific roles that differ depending on the site in which the administrator or editor is working.
Creating roles
This topic covers how to create a role in Brightspot.
- From the left navigation, under Admin, click Users & Roles.
- In the Roles widget, click New Tool Role.
- Using the following tables as a reference, configure the role.
- Click Save.
Main tab
| Field | Description |
|---|---|
| Name | Name of role. |
Permission Settings:
| Field | Description |
|---|---|
| Sites | Specifies the sites to which the role has access. |
| Areas | Specifies the areas in the left navigation available to the role. |
| UI | Specifies the actions a user can take: - Content Unlock—The role can unlock an asset-level lock. - Disable Content Unlock–The role can prevent other users from unlocking assets they opened. - Edit Guide Field Editorial Note–The role can edit the granular Guides note for a field. - Field Unlock–The role can unlock a field-level lock. - Impersonate User–The role can impersonate another user. - Image Editor–The role can access the image editor. - Manage Watchers–The role can add or remove watchers on an asset. - Manage Reports–The role can manage content reports. - Pin Posts–The role can pin posts in the Conversation widget. - Site Site Tool Theme–The role can modify Brightspot's appearance and layout for a site. - Set Global Tool Theme–The role can modify Brightspot's appearance and layout for all users. - View All Collections–The role can view all shared collections within their sites. When this permission is absent, users with this role can only view their own collections. |
| Types | Specifies the content types available to the role. - Content Type–Specifies which content types the role can see. Also allows you to specify the content form a role can see, whether assets are read-only after publish, which actions are available to the role ( Archive, Publish, etc.), and even which specific assets of a specified content type the role can see.- External Type–Specifies which external types the role can see. The options in this list depend on which integrations you have enabled. - Other Type–Specifies which fields or within a content type or sites the role can see. Also allows you to specify whether the field is read-only after publish, which actions are available to the role ( Archive, Publish, etc.), and even which specific fields of specific assets of a specified content type the role can see. |
| Developer | Specifies developer-level features available to the role, like whether the HTML toggle is available in the rich-text toolbar, or whether the role can view field-level developer information. |
| Additional Permissions | A list of additional permissions that depend on which integrations and plugins you have enabled. See the relevant documentation for more information on these permissions. |
| Site Specific Permissions | Allows you to designate permissions on a specified site. |
Dashboard tab
| Field | Description |
|---|---|
| Dashboard | Settings for role's dashboard. See Dashboards. |
| Quick Start Settings | List of content types and assets appearing in this role's Quick Start widget. See Dashboards. |
Advanced tab
| Field | Description |
|---|---|
| Two-factor authentication required | Setting for two-factor authentication to log in to Brightspot. |
CMS tab
| Field | Description |
|---|---|
| Content Templates | Create any role-specific content templates. See Content Templates. |
Notifications tab
| Field | Description |
|---|---|
| Automatic Subscriptions | Notifications to which users associated with this role are automatically subscribed. See Managing automatic subscriptions. |
Editing roles
This topic covers how to edit a role in Brightspot.
- From the left navigation, under Admin, click Users & Roles. The Roles widget is displayed on the left side of the page.
- In the Roles widget, click the role you want to edit.
- Using Creating roles, update the role's settings as required.
- Click Save.
Copying roles
This topic describes how to copy a role in Brightspot.
- From the left navigation, under Admin, click Users & Roles.
- In the Roles widget, find the role you want to copy.
- At the top of the edit form, click , then click Copy This Tool User.
Archiving roles
This topic describes how to archive a role in Brightspot.
- From the left navigation, under Admin, click Users & Roles.
- In the Roles widget, find the role you want to archive.
- At the bottom of the edit form, click Archive.
- In the confirmation prompt, click OK.
Restoring roles
This topic describes how to restore a user in Brightspot.
- From the left navigation, under Admin, click Users & Roles.
- In the Roles widget, find the role you want to restore.
- At the top of the edit form, click .
Viewing role history
This topic describes how to view a history of actions taken on a role.
This does not show the actions a role has taken in Brightspot; only the actions taken on the role, like when the role was created, archived, restored, etc.
- From the left navigation, under Admin, click Users & Roles.
- In the Roles widget, find the role whose history you want to see.
- At the top of the edit form, click , then click History.
Deleting roles
This topic describes how to delete a role in Brightspot.
- From the left navigation, under Admin, click Users & Roles.
- In the Roles widget, find the role you want to delete.
- At the top of the edit form, click , then click Delete Permanently.
- In the confirmation prompt, click OK.
Site-specific roles
If users require different levels of permissions across sites, you can assign site-specific roles.
To assign site-specific roles, the role must first be created, and it must be associated to all sites (configured in the role's Sites field). For details, see Creating roles.
- From the left navigation, under Admin, click Users & Roles.
- From the Users list, in the Search field, and search for an existing user.
- Click the user to whom you want to assign site-specific roles.
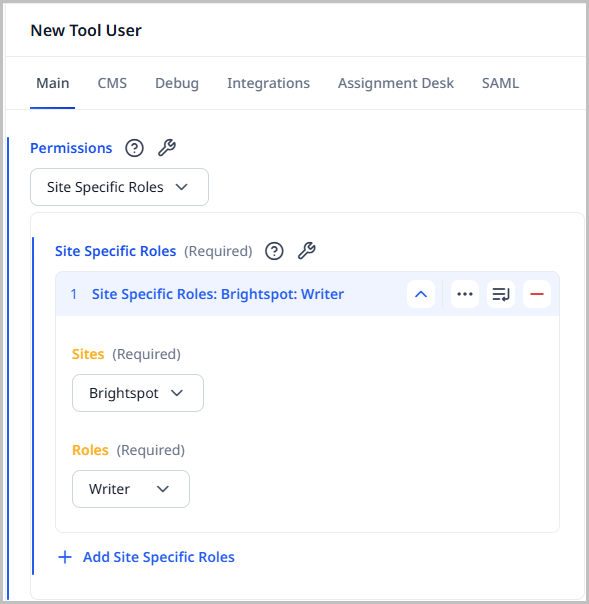
- From the Permissions list, select Site Specific Roles.
- Click Add Site Specific Roles to add a new site-specific role to the user.
- Under Sites, select the site to which the role applies.
- Under Roles, select a role to apply to the selected site.
- Click Save.
Multiple roles
You can assign multiple roles to a user. Permissions belonging to roles are additive, meaning the user assigned with multiple roles receives all of the permissions afforded by the assigned roles. Consider the following scenarios:
- If one role allows a user to only create articles, while another role allows a user to create only sections, then a user with both roles can create both articles and sections.
- Similarly, if one role allows a user to only create new articles, while another role allows a user to only archive articles, then a user with both roles can both create and archive articles.
See the table below for more information on how multiple roles interact.
| Condition | Behavior |
|---|---|
| When multiple content forms are set for a certain type... | The first content form on the first role set on the user will be used. For example, Role A includes a content form that hides the Internal Name field for an article, but Role B does not. If Role A is set before Role B, the editor will not see Internal Name when creating a new article. |
| When multiple content templates are set for a certain type... | The first content template on the first role set on the user will be used. For example, Role A includes a content template that populates the Headline field for an article with Brightspot News:, and Role B populates that field with Brightspot Insider:. If Role A is set before Role B, the editor will see Brightspot News: when creating a new article, but not Brightspot Insider:. |
| When only one role has two-factor authentication enabled... | Two-factor authentication is not required. |
| When only one role has read-only access after publishing... | Assets of the designated content type are read-only after publish, even if another role does not include this restriction. |
| When roles have different dashboards... | Both dashboards are displayed for the editor, separated by tabs. |
Default role for new users
The default role is the role assigned to new users by default.
- From the left navigation, under Admin, click Sites & Settings, then select the Global site.
- Under Main, from the Default Role list, select the default role.
- Click Save.
Brightspot saves the default role, and uses it as the default when you create new users.
Permissions
Permissions are a set of configurations that control access to Brightspot features. By configuring permissions, you can improve the security of your site.
Permissions are set at the role level, so they apply to all editors assigned to that role. If you have a role Reviewer, you customize permissions for that role, and then assign individual editors to that role.
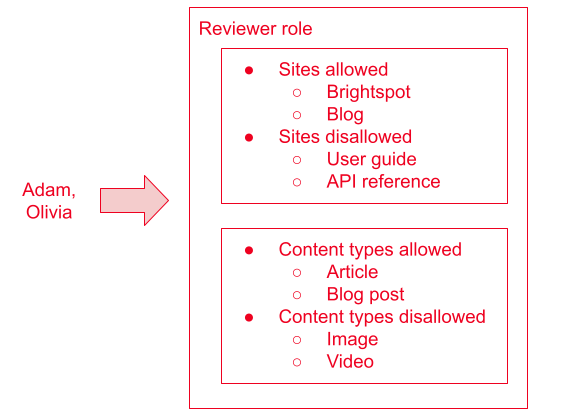
Referring to the previous illustration, the Reviewer role has access to two sites (Brightspot and Blog) and to two content types (Article and Blog Post). The two editors assigned to that role, Adam and Olivia, inherit those permissions. They can only write articles and blog posts for the sites Brightspot and Blog.
You can provide granular permissions at the site level.

Referring to the previous illustration, the Reviewer role now has additional access to the site User Guide. Adam and Olivia, when working on that site, can publish four content types: Article, Blog Post, Image, and Video.
For information about configuring a role's permissions, see Creating roles.