Amazon Transcribe configuration
We are actively working to improve this documentation. The content you see here may be incomplete, subject to change, or may not fully reflect the current state of the feature. We appreciate your understanding as we continue to enhance our docs.
With Amazon Transcribe, you can easily generate a transcript of an audio file or video file that you added to Brightspot. Editors can then perform a text search to find the file and use it in their own content.
Configuration
You can configure Amazon Transcribe at the Global level or the site level. Global configurations are inherited by all sites, and site-level configurations override Global configurations. This topic explains how to configure this integration at the Global level.
To perform this integration, you will need to have access to settings in your AWS console.
To integrate Amazon Transcribe with Brightspot:
-
Obtain the following from your AWS console:
- SQS queue name for the transcription service. A list of available queues is in your Amazon SQS console.
- Transcribe role ARN (as necessary; this role has access to the AWS Transcribe service). A list of available roles is in your Amazon IAM console.
- AWS region (unless already configured on your Brightspot server).
- Your AWS account's access key and secret access key (unless already configured for your other AWS services). A list of available accounts and associated access keys is in your Amazon IAM console.
- Click > Admin > Sites & Settings > Sites > Global.
-
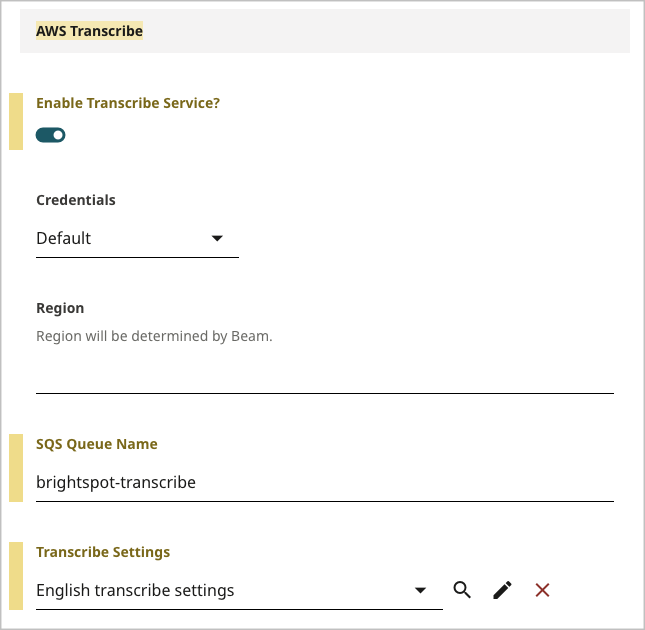
Under the Integrations tab, expand the AWS Transcribe cluster.
-
Toggle on Enable Transcribe Service.
-
Under Credentials, select one of the following:
- Default—AWS credentials are configured on the Brightspot server.
- Assume Role—Provide your AWS Role ARN from step 1 and an identifying session name for this service.
- Static—Provide the access key and secret access key you determined in step 1.
-
In the Region field, enter the region to use when making requests to this AWS service.
-
In the SQS Queue Name field, enter your Amazon SQS queue name from step 1.
-
Under Transcribe Settings, click .
-
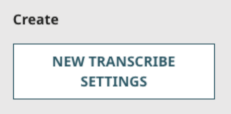
Select an existing transcription setting, or create a new setting by doing the following:
NoteThe setting you select in this step is the default for all files submitted to AWS Transcribe. You can override these settings for individual submissions.
-
In the content picker, under Create, click New Transcribe Settings.
-
In the Name field, enter an internal name. Brightspot uses this name in selection fields.
-
From the Language Code list, select one of the available languages, or select Default to use US English.
-
To accommodate more than one voice in an audio file, toggle on Enable Multiple Speakers.
-
If you want to share this setting with your other sites, do the following:
-
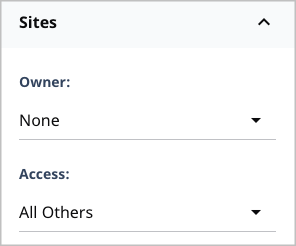
Click to show the Sites widget.
-
From the Owner list, select None.
-
From the Access list, select All Others.
-
-
Click Save.
-
Click Back.
-
-
In the content picker, click the transcription setting you created.
-
Click Save.
Submitting a file to Amazon Transcribe
You can use the Amazon Transcribe service to generate transcripts of audio or video files you upload through Brightspot.
To submit a file to Amazon Transcribe:
-
To submit an audio file, do the following (otherwise skip to step 2):
-
In Brightspot, create a new audio file from a file in .mp3, .wav, or .flac format. (For more information, see Audio File.)
-
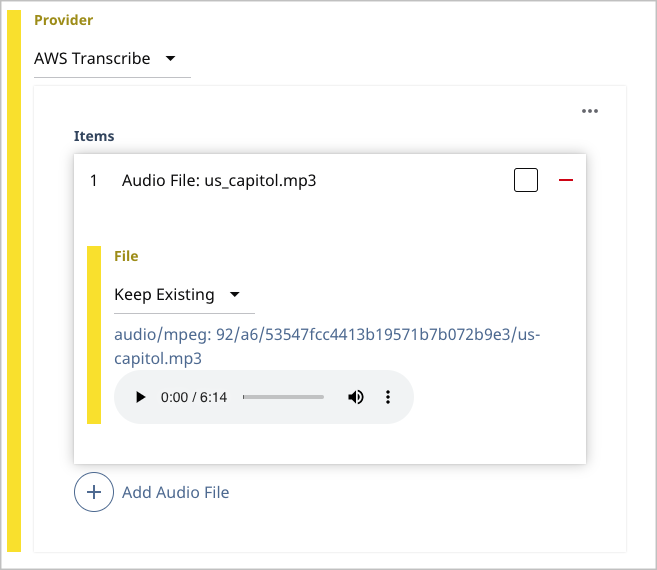
In the content edit form, from the Provider list, select AWS Transcribe.
-
Under Items, click Add Audio File.
-
Skip to step 3.
-
-
To submit a video file, do the following:
-
In Brightspot, create a new video file from a file in .mp4 or .mov format. (For more information, see Video.)
-
Under Items, click Add Video File, then select one of the following options:
- Select New Upload, and navigate to a file on your laptop.
- Select New URL, and paste the URL of a file.
-
-
If you want to use transcription settings different from the default, do the following:
-
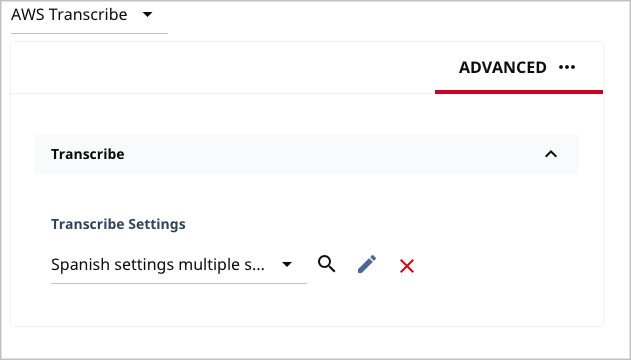
Toward the right of the widget, select > Advanced.
-
Expand Transcribe, and select one of the transcription settings.
-
-
Complete the remaining fields in the content edit form.
-
Complete your site's workflow and publish the asset.
Brightspot sends the file to Amazon Transcribe for transcription, and receives the transcript a few minutes later. You can view the transcription in the asset's Transcription cluster.
For information about viewing a transcript, see Viewing and adding transcripts.
Viewing and adding transcripts
You can view a transcript of an audio or video file. You can also attach your own transcript to a file; this feature is useful if you want to annotate the original transcription.
To view and add a transcript:
-
Search for and open the asset in the content edit page.
-
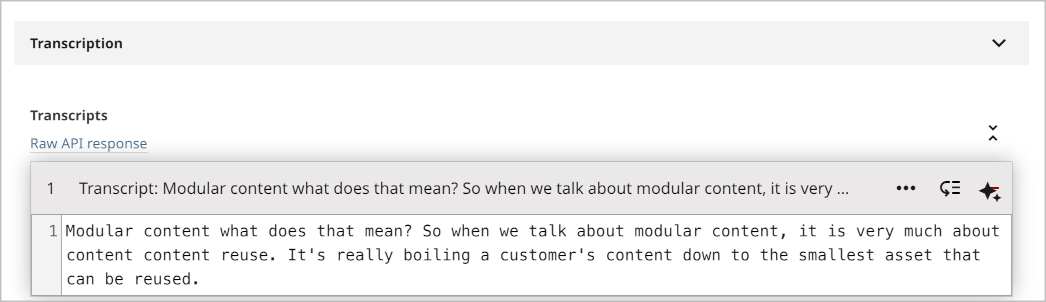
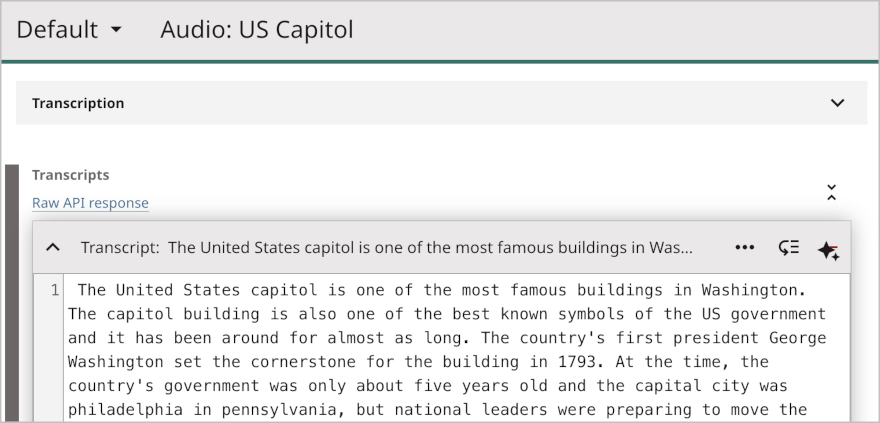
Expand Transcription. A list of transcripts appears.
-
Click to view the entire transcript.
-
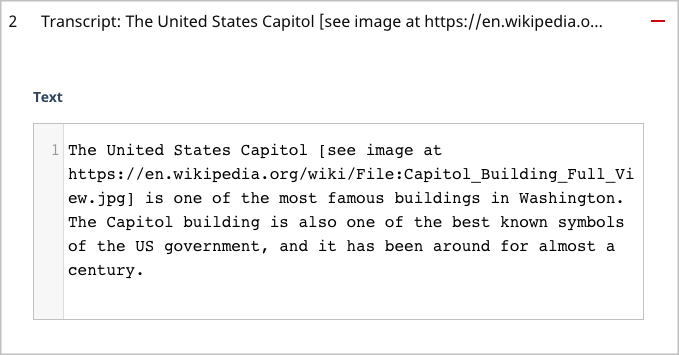
To add a transcript, do the following:
-
Under Transcripts, click .
-
In the Text field, type or paste the transcript.
-
Click Publish.
-