Bulk actions
Bulk actions speed up your time to completion when performing a number of similar changes to your content. Brightspot supports the following bulk actions:
- Bulk editing
- Bulk archiving
- Bulk restoring
- Bulk translating
- Bulk scheduling
This section explains how to perform each bulk action.
Bulk actions affect all selected assets indescriminately. If you need to make more granular updates, edit assets individually. See Creating revisions.
Bulk editing
With bulk editing, you can modify many assets at once, such as adding or removing tags from multiple articles.
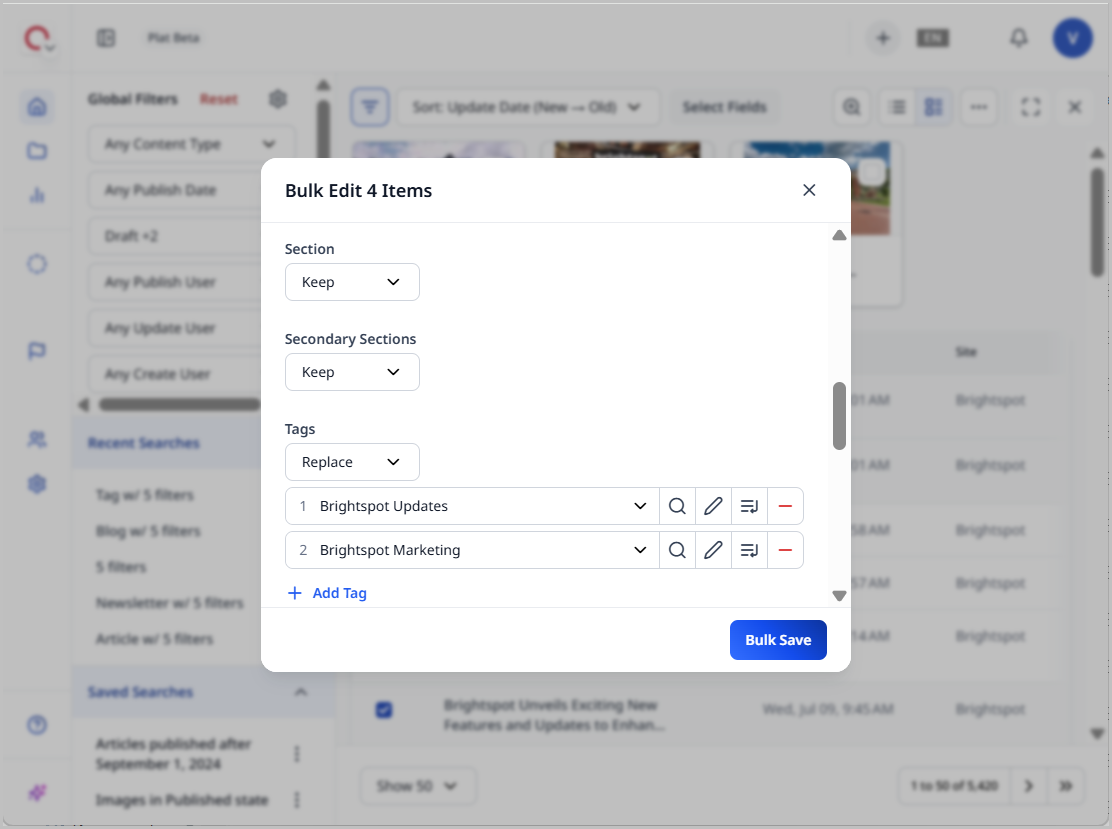
In the example below, you can see that four assets were selected for bulk editing and are having their tags replaced with two new ones. Using the bulk editing feature can help you speed up your processes.
To bulk edit assets:
- Open the search panel.
- Under Global Filters, in the content type filter, select a content type.
- Click the checkboxes of the assets you want to edit in bulk.
- Click > Bulk Edit.
- Scroll through the fields and decide whether to retain the current field values (Keep), change the current field values (Replace), or remove the current field values (Clear).
- Click Bulk Save.
Bulk archiving
With bulk archiving, you can archive many assets at once.
To bulk archive items:
- Open the search panel.
- Under Global Filters, in the content type filter, select a content type.
- Click the checkboxes of the assets you want to archive in bulk.
- Click > Bulk Archive.
- Click Confirm Bulk Archive.
Bulk restoring
With bulk restoring, you can restore many archived assets at once.
To bulk restore assets:
- Open the search panel.
- Under Global Filters, in the content type filter, select a content type.
- Click the checkboxes of the assets you want to restore in bulk.
- Click > Bulk Restore.
- Click one of the following:
- Confirm Bulk Restore—Restores the assets to a live state. See Restoring assets.
- Confirm Bulk Restore to Draft—Restores the assets to a draft state. See Restoring assets.
Bulk translating
With bulk translating, you can translate many assets at once.
Translation is a plugin. See Translation for details.
To bulk translate assets:
- Open the search panel.
- Under Global Filters, in the content type filter, select a content type.
- Click the checkboxes of the assets you want to translate in bulk.
- Click > Bulk Translate.
- Under Service, select a translation service.
- Click Next.
- Under Source Locale, select the locale of the assets you are translating in bulk.
- Under Target Locale, specify the locales to which you want to translate the assets in bulk.
- Click Next.
- Click Translate.
Bulk scheduling
With bulk scheduling, you can schedule multiple assets to be published at the same date and time. This is in contrast to regular scheduling, which only schedules an individual asset.
This feature is helpful if a number of different assets need to be held off from the live site at once, or if a reorganization of content needs to occur in the background while leaving the live site unaffected.
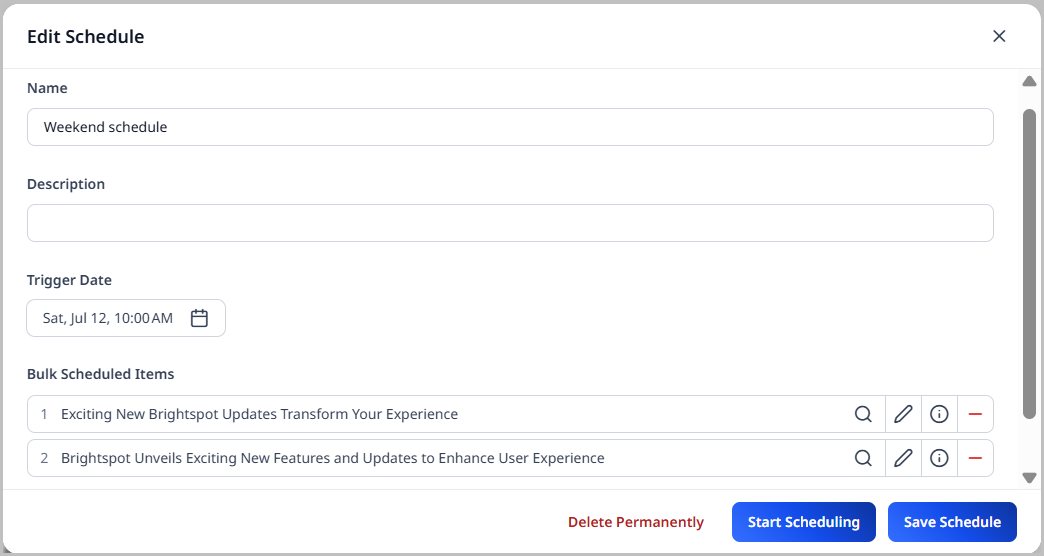
Bulk schedules are containers that hold all scheduled assets. The image below shows a bulk schedule named Black Friday Schedule, which includes the bulk schedule's name, a description, the date and time it will trigger, and all assets included in it.
Enabling bulk scheduling
To use bulk scheduling, you must first configure it in Sites & Settings, and then ensure that the Scheduled Events widget is present on your dashboard.
To enable bulk scheduling in Sites & Settings:
-
Do one of the following, depending on which level of the hierarchy you want to enable bulk scheduling (at the global level, which applies to all sites, or at the site level, which applies to a specific site.)
- (Global) Click > Admin > Sites & Settings > Sites > Global.
- (Site) Click > Admin > Sites & Settings.
-
From the CMS tab, expand the UI cluster.
-
Toggle on Enable Bulk Scheduling.
-
Click Save.
To add the Scheduled Events widget to your dashboard:
See Scheduled Events widget, and then add it by following the directions in Creating a one-off dashboard or Creating a shared dashboard.
Creating bulk schedules
This section explains how to create a bulk schedule.
To create a bulk schedule:
- From the dashboard, in the Scheduled Events widget, click .
- Add a Name and Description for the schedule.
- In the Trigger Date field, select the date and time which the assets will be published.
Trigger date is optional. If you need to schedule assets before setting a date and time, leave this field blank.
- Click Start Scheduling.
Once you click Start Scheduling, you enter bulk scheduling mode. See Bulk scheduling mode.
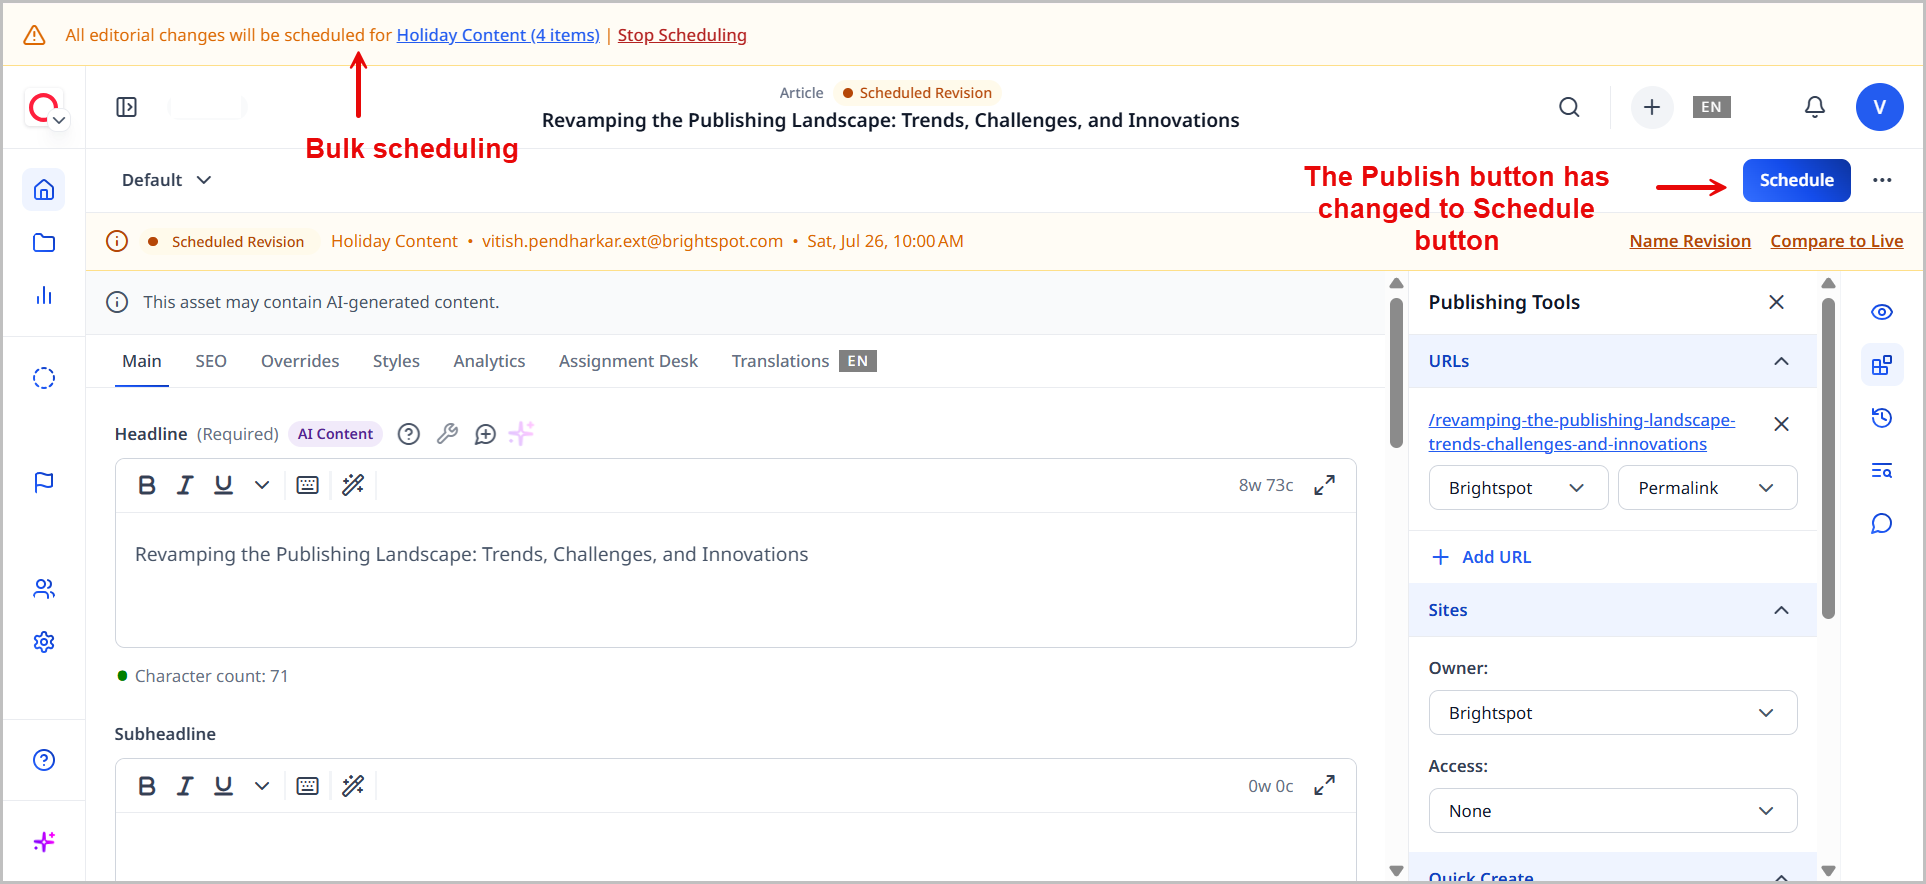
Bulk scheduling mode
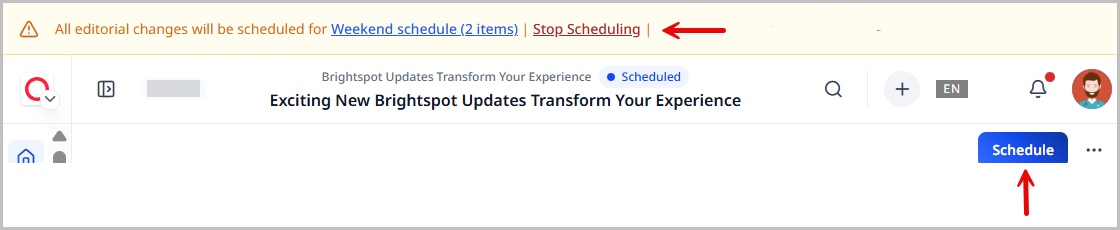
Bulk scheduling mode is a state you enter where assets can be added to a bulk schedule. As with individual scheduling, a Schedule button replaces the Publish button. In bulk-scheduling mode, a yellow banner displays.
Entering bulk schedules
You can enter a bulk schedule to make changes or add assets to it.
To enter a bulk schedule:
-
From the Scheduled Events widget, click .
-
In the Edit Schedule popup, click the schedule you want to enter.
-
Click Start Scheduling. You enter bulk scheduling mode.
Editing bulk schedules
You can edit a bulk schedule once you have created it.
To edit a bulk schedule:
- From the Scheduled Events widget, click .
- In the Edit Schedule popup, click the schedule you want to enter.
- Edit the fields as desired.
- Click Save Schedule to save your edits.
Exiting bulk schedules
This section explains how to exit a bulk schedule.
To exit a bulk schedule:
- In the bulk scheduling banner at the top of the screen, click Stop Scheduling.

When you exit a schedule, you revert back to the live version of the site, including the live versions of any scheduled assets. To view the scheduled versions of these assets, see Viewing a scheduled asset.
Deleting bulk schedules
To delete a bulk schedule:
- Enter the bulk schedule you want to delete. See Entering a bulk schedule.
- In the Edit Schedule popup, click the schedule you want to delete.
- Click Delete Permanently.
This action only deletes the schedule, but does not delete any of the assets that were contained in the schedule, regardless of the content status they have. For details on content statuses, see Content lifecycle.
Adding assets to bulk schedules
Assets can be added to bulk schedules in one of two ways: from the bulk schedule or while in bulk-scheduling mode.
- Directly from the bulk schedule pop-up—Allows you to search for and add assets to the schedule itself.
- At the asset-level while in bulk scheduling mode—Allows you to add assets to the schedule from their respective content edit pages.
To add assets directly from the bulk schedule pop-up:
- Open the bulk schedule to which you want to add assets. See Entering bulk schedules.
- From the Edit Schedule pop-up, click Add Item.
- Click , then search for assets you want to add to the schedule.
- After you have added the assets, click to close the content picker.
- Click Save Schedule.
To add assets to a bulk schedule from bulk-scheduling mode:
- Open the bulk schedule to which you want to add assets. See Entering bulk schedules.
- Create a new asset or open an existing asset.
- Add or modify the asset, and click Schedule. A scheduled version is added to the Version History widget.
- Once you are done scheduling, click Stop Scheduling in the bulk scheduling banner.
Viewing scheduled assets
As you build out bulk schedules, you may want to view the assets contained in them.
To view scheduled assets:
- Open the bulk schedule to which you want to view assets. See Entering bulk schedules.
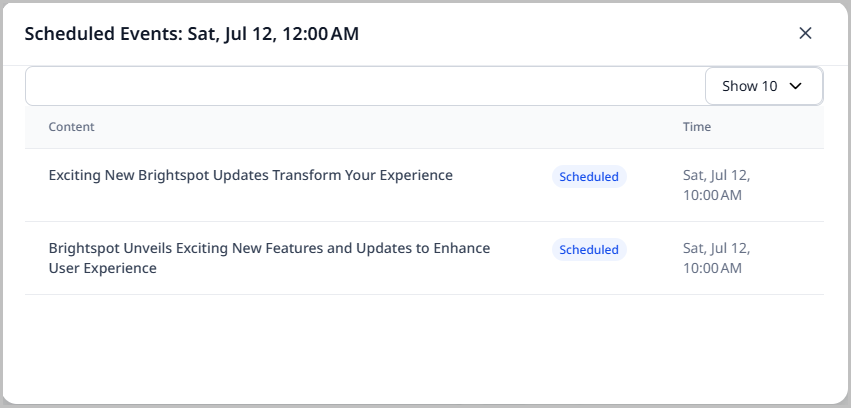
- Under Bulk Scheduled Items, view the assets that are included in the bulk schedule.
You can also find drafts and revisions included in a bulk schedule by filtering for assets of those statuses in search. See Search filters.
To edit assets included in a bulk schedule, click next to the asset's name. Once edits are made, click Schedule to add them to the bulk schedule.
Removing assets from bulk schedules
You can remove assets from bulk schedules.
To individually remove assets from a bulk schedule:
- Search for and open a scheduled asset. For details, see Viewing scheduled assets.
- In the editorial toolbar, click .
- Click .
The asset is removed from the schedule and returns to the content state it was in when scheduled. For details, see Content lifecycle.
Archiving or deleting scheduled assets
Scheduled assets must first be removed from the bulk schedule before archiving or deleting them. See Removing assets from bulk schedules. Once removed, the process of archiving and deleting an asset is the same as any other archive or deletion action. See Archiving and deleting assets.
Publishing bulk schedules
You can publish a bulk schedule once you have added assets to it.
To publish a bulk schedule:
- Enter the bulk schedule you want to publish. For details, see Entering bulk schedules.
- Under Trigger, open the date picker and select a date and time to publish the bulk schedule. If you want to publish the schedule immediately, click Now.
- Click Set.
- Click Save Schedule.
Brightspot publishes the bulk schedule at the date and time you selected.