Slack
With the Slack integration, you can do the following:
- Search for and import files from your Slack workspaces into Brightspot.
- Receive notifications from Brightspot to your Slack account.
This section describes how to configure the integration with Brightspot.
Including Slack in a build
The following table lists the dependencies to include in your build configuration.
| Artifact | Description |
|---|---|
com.psddev:slack | Supplies the core classes and settings for adding Slack workspaces to Brightspot. This artifact is inherited as a required dependency by the following artifacts, so you need to explicitly include it only if customizing the Slack integration. |
com.psddev:slack-notification | Adds support for delivering CMS notifications via Slack. |
com.psddev:slack-search | Adds Slack files as a federated search type. |
Runtime prerequisites
-
Developer configuration—
- Mandatory: None. The standard subclasses of
SlackApiRequestprovide methods for searching and downloading Slack files, and for sending notifications through Slack. - Optional: Developers can provide additional interactions, such as requesting specific data from alternative API endpoints with different scopes. Extend
SlackApiRequest, and use the provided methods such asdoApiGetRequestanddoApiPostRequest.
- Mandatory: None. The standard subclasses of
-
Ops configuration—Configure a redirect URL, client ID and secret, and bot tokens. For details, see Installing with OAuth.
-
CMS configuration—Configure the site interfacing with Slack. For details, see Configuration.
See also:
Configuration
This topic describes how to configure Brightspot for integration with Slack. The following procedure enables the following functionalities:
- Publishing notifications from Brightspot to subscribers using Slack.
- Searching for files in Slack from Brightspot.
After the configuration described in this topic is complete, refer to the following topics to complete setup of the functionalities above:
To configure integrated search and notifications with Slack:
-
From the Slack console, create a new app in the Slack API console. For details on this process, see Build apps with Slack's developer tools. After doing so, on the Basic Information page, retrieve the client ID and client secret, which you paste into Brightspot in step 7.
noteTo enable actionable notifications in Slack (available in v4.8), you must toggle on the Interactivity option located on the Interactivity & Shortcuts page of your Slack console. In addition, the Request URL must end in
/cms/slack-notification-response. - Click > Admin > Sites & Settings > Sites > Global.
-
Under Main, ensure that the Default Tool URL field is set.

-
Expand Integrations > Slack.
-
Under Workspaces, click Add Slack Workspace and select Create New.
-
In the Workspace Name field, enter a name for the workspace (typically the name of the Slack workspace you are integrating).
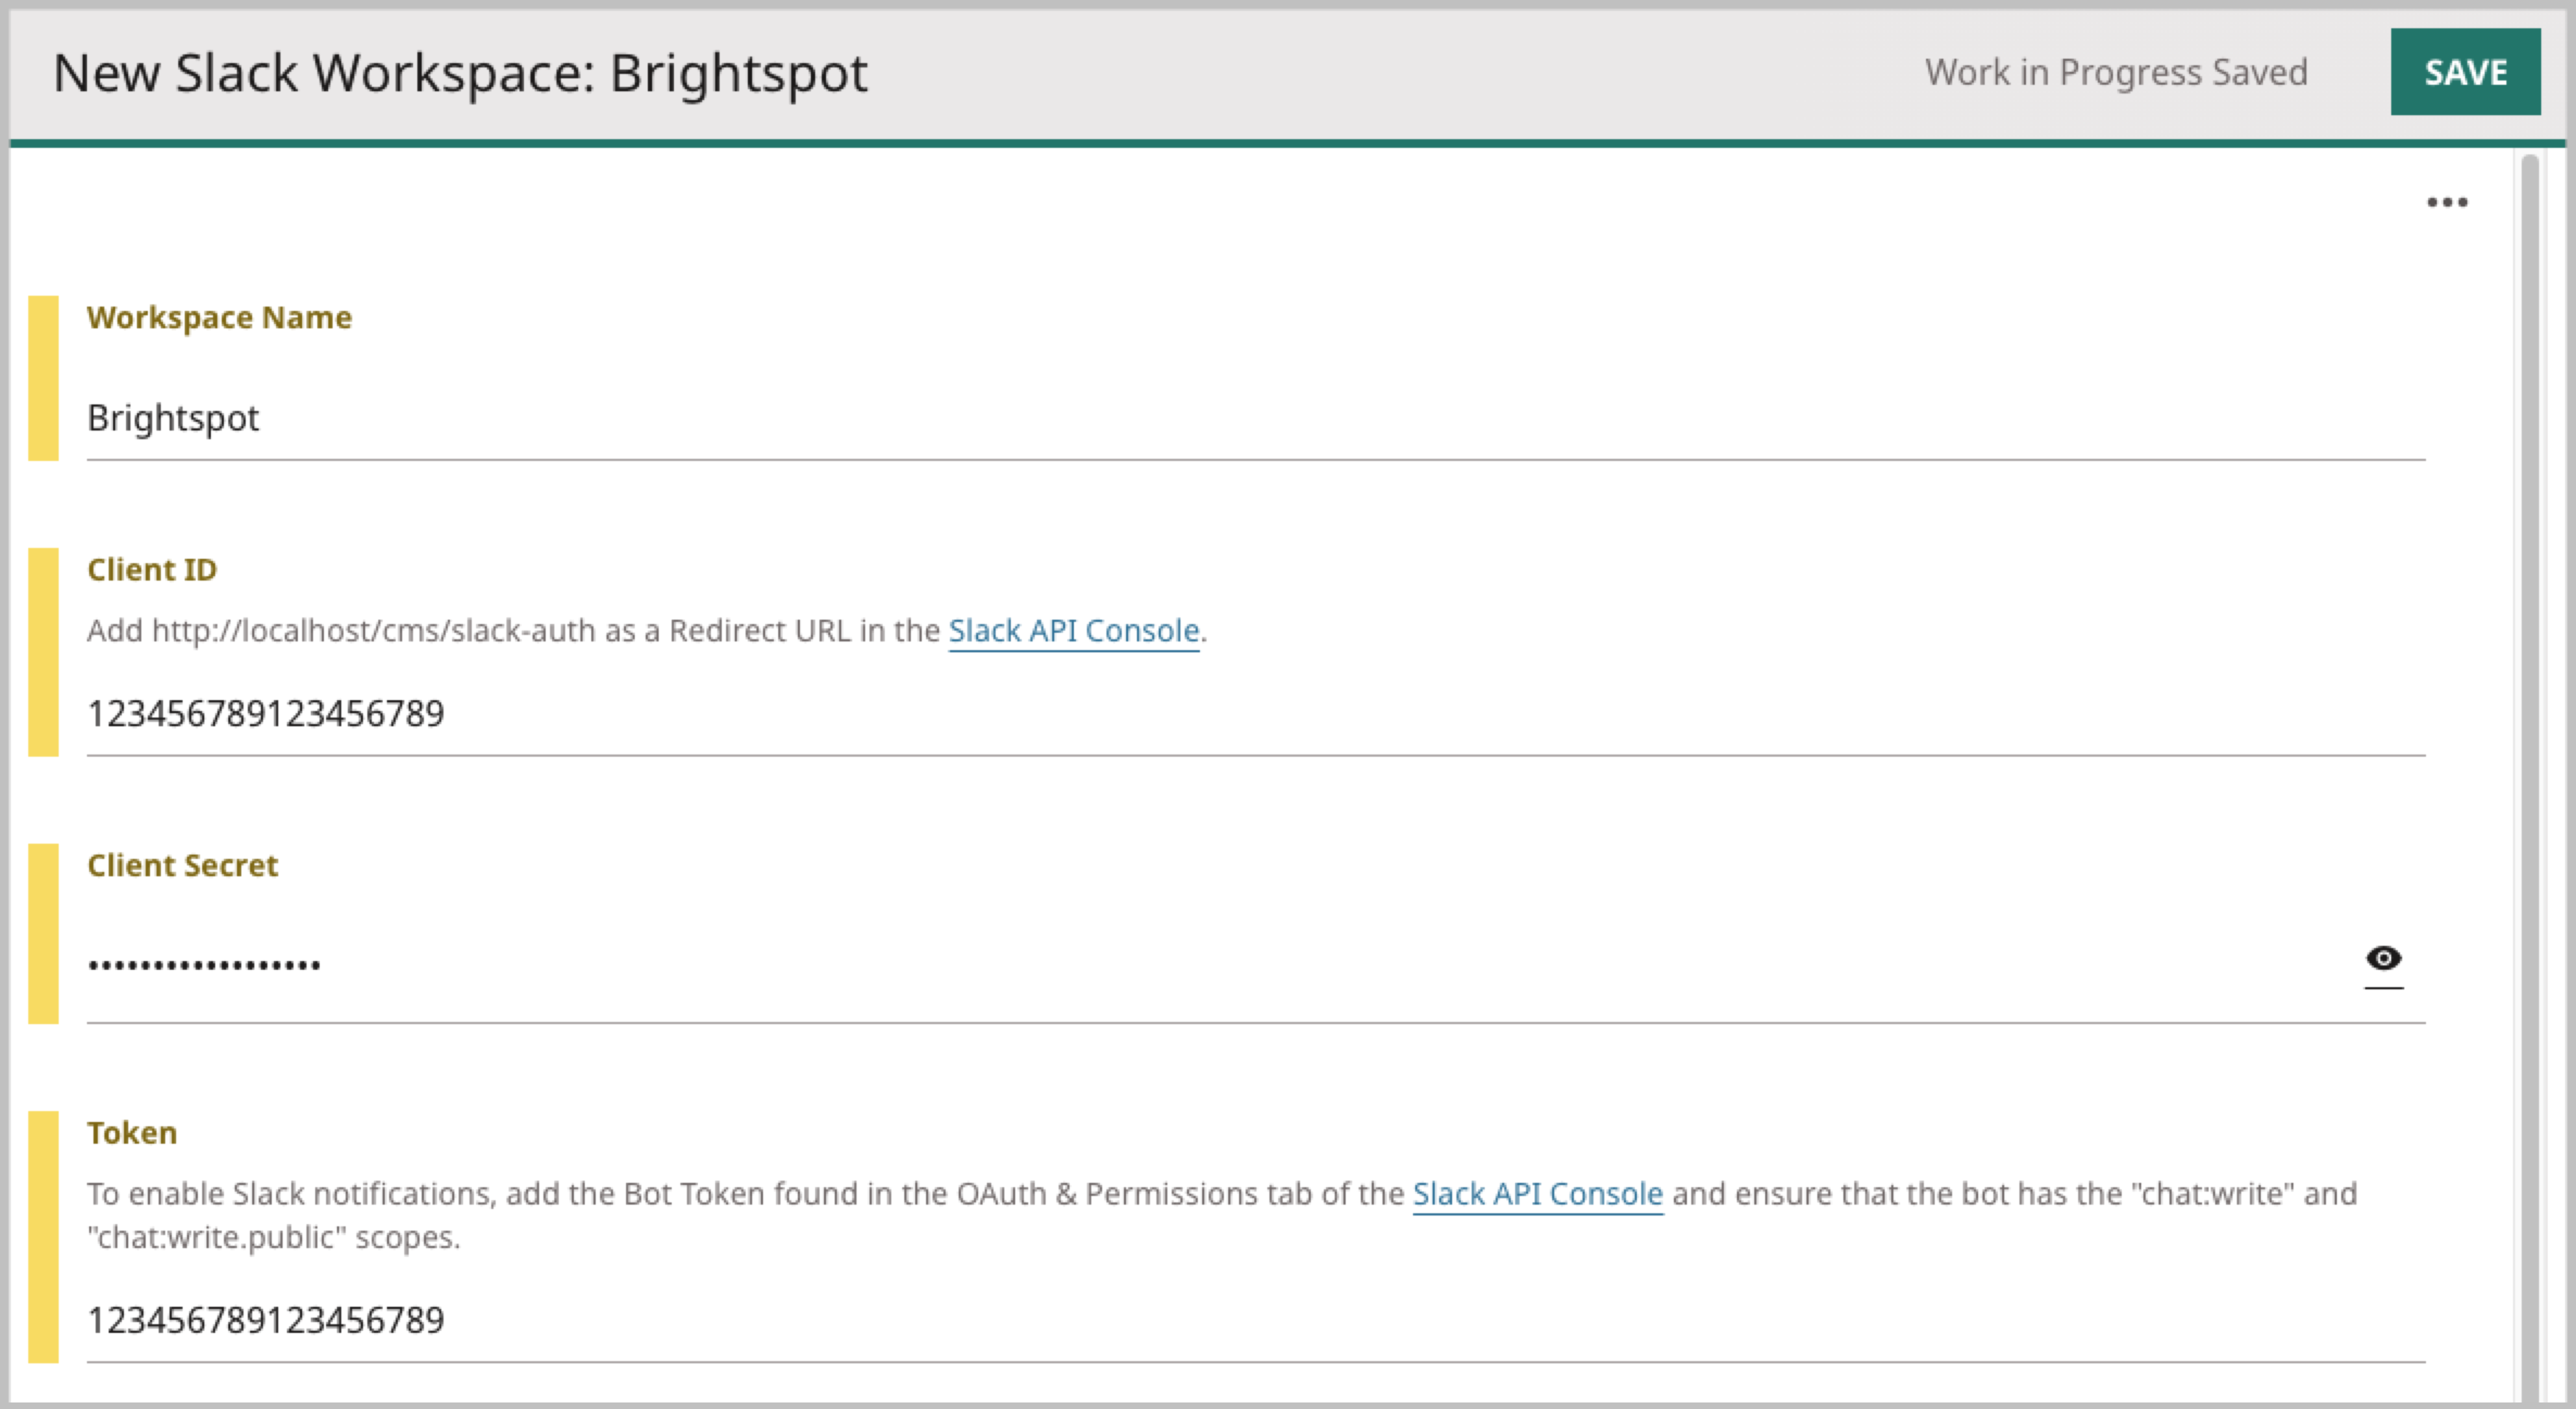
-
In the Client ID and Client Secret fields, paste the values you obtained in step 1. After doing so, copy the redirect URL located under the Client ID field and paste it in your Slack app's OAuth & Permissions section in the sidebar. In this section, ensure you have given the bot the following scopes:
-
For notifications—
chat:writeandchat:write.public. -
For search—
files:readandsearch:read.After doing so, install the bot to your Slack workspace and retrieve the Bot User OAuth Token.
-
-
In Brightspot, in the Token field, paste the token you retrieved in step 7.
-
Click Save.
-
Click Back.
-
In the Workspaces list, select the workspace you created.
-
Click Save.
See also:
Importing files from Slack
Depending on your version of Brightspot, you can search for and import files stored in Slack. Brightspot's search is the same as Slack's: you can find files whose name contains a search term, and you can find text files that contain a search term.
Brightspot can search for the files to which you have access; if you can find the file in Slack's search, you can also find it with Brightspot.
To search for files in Slack:
-
In the header, click in the search field. The search panel appears.
-
Under Global Filters, select Slack File.
-
If this is the first time you are searching for files in Slack, do the following:
- Under Slack Authentication, click Sign in with Slack. A list of permissions appears.
- Click Allow. A confirmation message appears in Brightspot.
- Click Close.
-
In the search text field, type a search term. Brightspot retrieves the matching files.
-
Click the file to view its metadata.
-
To import the file into Brightspot, click Import.
Configuring global filters for search
In the Global Filters widget, some filters are always visible, and some are in a collapsible widget. You can configure the filters appearing in that widget.
To configure placement of global filters:
-
In the Global Filters widget, click . The Show/Hide Filters pop-up displays.
-
Click the next to the field in the Hidden Filters column to move it into the Selected Filters column. Filters in the Selected Filters column display under the Global Filters widget on the CMS Search page.
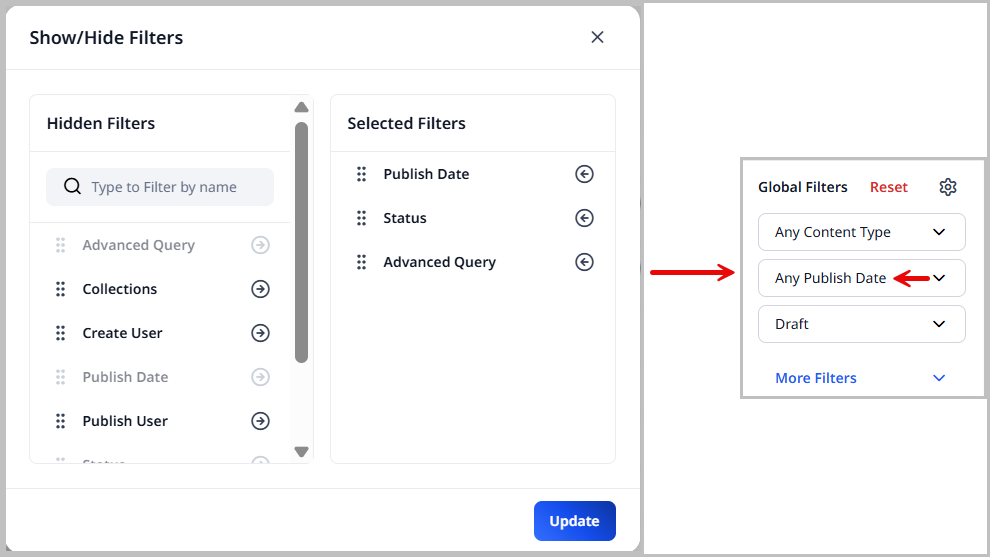
-
Click the next to a filter name in the Selected Filters column to move them to the Hidden Filters column. Filters in the Hidden Filters column are still available in the More Filters or Less Filters widgets.
-
Use the next to a filter to drag and drop it into the desired order. This is the order the filters are displayed in the Global Filters widget.
-
Click Update.
Configuring placement of content-type filters
In a content-type filters widget, some filters are always visible, and some are in a collapsible widget. You can configure the filters appearing in that widget.
To configure placement of content-type filters:
-
Under Global Filters, select the required content type. A content-type filters widget (such as Article Filters) appears.

-
In the content-type filters widget, click . A Select Fields widget (such as Select Article Fields) appears.
-
Click fields in the Selected Fields column to move them to the Hidden Fields column. These fields appear in a More Filters or Less Filters widget.
-
Click fields in the Hidden Fields column to move them to the Selected Fields column. These fields always appear under the content-type filter.
-
Click Update.