Adding custom <head> elements
Web pages have a <head> element that can contain the following child elements:
<link>—Provides links to external resources, such as CSS files.<meta>—Provides the page's metadata, such as character set, keywords, and viewport settings.<script>—Provides behavior, such as displaying a message after the page loads.<style>—Provides styling, such as fonts, colors, and spacing.
You can create customized child <head> elements, and add them to published assets based on various criteria. Examples include the following:
- If the asset's URL contains the word
evening-edition, add a CSS file that gives a softer color scheme. - If the asset's content type is Gallery, add a JavaScript file that includes zoom in and zoom out behavior.
Adding incorrect <head> elements can cause your site to malfunction. Ensure you test your custom <head> elements before actually deploying them to a live site.
To add custom head elements to assets:
-
Create and debug the custom
<head>elements you want to add. - Click > Admin > Sites & Settings.
-
In the Sites widget, select site to which you want to add the custom
<head>elements. -
From the Front-End tab, expand the Advanced cluster.
-
Click Add Custom Head Elements.
-
In the Internal Name field, enter a name for this customization.
-
Toggle on Disabled to disable this custom head element from use, but not delete the custom header.
-
Toggle on Disabled in Preview to disable the custom head element from rendering in the asset preview.
-
From the Request Matcher list, select Path Request Matcher.
-
Using the HTTP Methods, URL Pattern, and Content Types fields, design criteria that the asset must match to receive the custom
<head>elements. For example, the following criteria match articles whose URLs containevening-edition.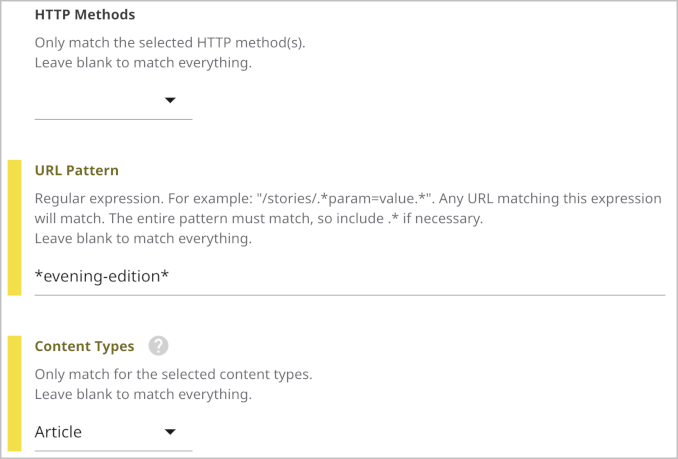
-
If an asset matches the filter you designed in step 8, and you do not want to add any additional
<head>elements, toggle on Stop Processing. -
Configure
<head>elements added to the web page by doing the following:- Under Elements, click .
- Select one of the available child elements.
- In the subsequent form, enter an Internal Name, and complete the form as necessary.
- Repeat steps a–c to configure more
<head>elements satisfying this rule.
-
Repeat steps 5–10 to design additional rules for adding custom
<head>elements. -
Click Save.
See also: