Editorial content reports
Editorial content reports provide an easy-to-configure way to review multiple snapshots of all available content in the CMS. This enables users to identify recently published content for promotion, identify content gaps, and review assets, ultimately improving the overall editorial workflow.
Custom Report Generation
While the editorial content reports feature can be utilized without any additional development, APIs are provided to further customize how reports are generated, stored, and/or presented. For details, see Editorial content report APIs.
Creating editorial content reports
To create, edit, and view editorial content reports, a user's role must have the following permissions:
- Permission Settings > UI > Manage Reports—A user can create and edit reports.
- Permission Settings > Areas > Reports—A user can view the Reports admin page.
Additionally, a task host must be set at the Global level (Sites & Settings > Global > CMS > Content Reporting.)
Reports are generated as downloadable CSV files; however, projects can add implementations that offer other download types.
To create an editorial content report:
- Click > Reports.
-
Enter a Name for the new report.
-
Enter a short Description about the report.
-
Retain the selected Data Provider.
-
Expand Data Supplier and select Content Query.
NoteThe Data Supplier field contains several options; however, currently the Content Query option presents the data in a usable format (CSV file). The other data supplier options can also be utilized when creating new data provider implementations in the future. To learn more about the APIs that can help with these additional configurations, see Editorial content report APIs
The Content Query report displays a listing of assets that meet the criteria you specify.
-
Expand Query and select Set.
-
From the Any Content Type field, click .
-
Create your query in the Edit Dynamic Query pop-up by doing the following:
- Select the filters you want to use to serve as the criteria for your report.
- Once you have selected all of the criteria for your query, click Done.
-
Under Display Fields, select the fields you want to display in the report for the assets that are returned. Click the checkboxes above the field groups to select all display fields in that field group.
-
Set your Auto-Run Report settings. See Setting up auto-run reports for more information on setting up a recurring report.
-
Click Save.
Running editorial content reports
- Click > Reports. .
- Select an existing editorial content report.
- In the upper-right corner, click Run Report.
The report generates a downloadable CSV file. Click Download CSV to download the report to your local storage where you can open and view using your application of choice. Developers have the option to implement other downloadable options. See Editorial content report APIs for information on configuring the other download types.
Setting up auto-run reports
As you create or edit an editorial content report, you have the option of making that report automatically run on a scheduled basis.
To set up a recurring schedule for a report:
- Click > Reports.
-
Create a new report by completing the instructions found at Creating editorial content reports, or select the name of a previously created report in the Reports widget.
-
Expand Auto-Run Report and select one of the following options:
- None—The report only runs once.
- Set—The report runs on a repeating schedule that you configure by using the Hour, Day, and Month cluster.
-
Click Save.
Recurrence settings for editorial content reports
Selecting Set in the Auto-Run Report field provides several options for you to create the recurring schedule for your report. You use the Hour, Day, and Month clusters to create the exact schedule you need.
Each cluster's settings work together. For instance, if you set the report to run Every Hour, Every Day, and Every Month, it will do just that.
Click each setting below to learn more about the recurrence options available.
By default, recurring reports are set to run every hour, every day, and every month.
Recurrence options
Hour
Use the Hour setting to specify the times during the day the report runs.
| Option | Description |
|---|---|
| At Certain Hours | Expand Hours and select the hours, on a 24-hour scale, that you would like the report to run. In the image below, the hours 6, 7, and 8 have been selected. This means that the report will run at 0600 hours, 0700 hours, and 0800 hours. 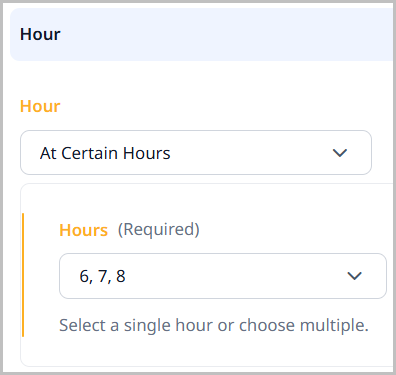 |
| Every Hour | The report runs at the top of every hour. This is the default setting in the Hour cluster. |
| Every Hour in Range | The report runs at the top of each hour, within the range you set. For instance, in the image below, the range is 4 and 16 which equates to 4:00 AM (0400) and 4:00 PM (1600). This means that every hour between 4:00 AM and 4:00 PM, this report will run.  |
| Every X Hours | The report runs at the interval you set, beginning on the hour you set each day. For instance, in the image below, the report is scheduled to begin running at 4:00 AM (0400) each day and then run every two hours after that. 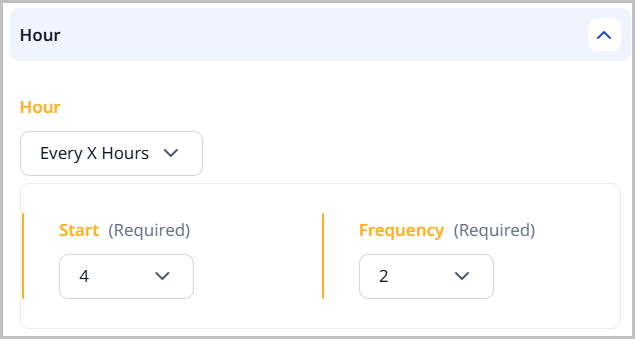 |
Day
Use the Day setting to specify on which days the report runs.
| Option | Description |
|---|---|
| Every Day | This setting runs the report every day. This is the default setting in the Day cluster. |
| Every X Days Of Month | This setting runs the report on a set frequency based on the day of the month the recurrence is started. Expand Start and select the day of the month (1–31) you want the report to begin running. Expand Frequency and select how often you want it to run. In the image below, the report is set to begin on the 10th day of the current month, and to run every four days after that.  |
| Every X Days Of Week | This setting runs the report on a set frequency based on the day of the week the recurrence is started. Expand Start and select the day of the week you want the report to begin running. Expand Frequency and select how often you want it to run. In the image below, the report is set to begin on the Friday of the current week and to run every four days after that. 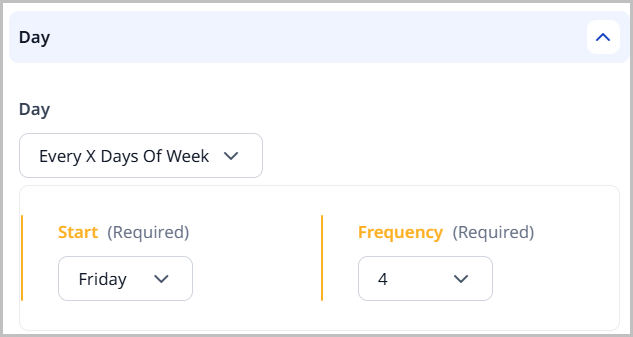 |
| Last Day Of Month | This setting runs the report on the last day of the month, beginning with the current month. |
| Last Weekday Of Month | This setting runs the report on the last weekday of the month, beginning with the current month. |
| Last X Of Month | This setting runs the report on the last specified day of the month, beginning with the current month. Expand Day and select the day of the week you want this report to run. In the image below, Day is set to Friday. This means that this report will run on every last Friday of the month. 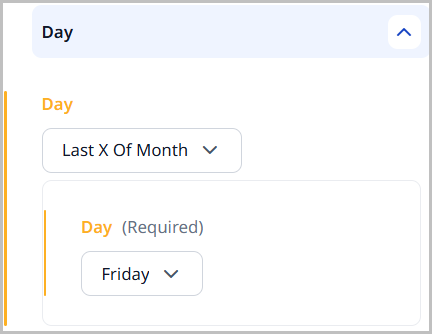 |
| Nearest Weekday to Xth Of Month | This setting runs the report on the nearest weekday to the day of the month that is specified. Expand Day and select the day of the month (1–31). In the image below, Day is set to 5. This means that this report will run on every weekday closest to the fifth of each month. If the fifth is a weekday, it will run; however, it will not run on Saturday or Sunday. 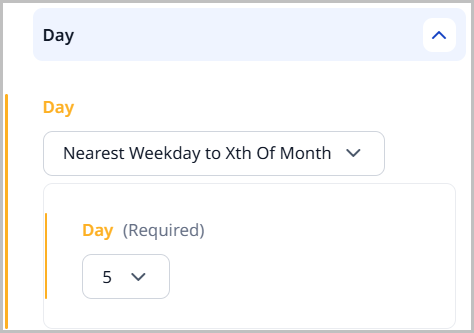 |
| On Certain Day Of Certain Week In Month | This setting runs the report on the specified day of the specified week of the specified month. Expand Week and select the week of the month you want this report to run. Expand Day and select the day of that week you want this report to run. If you select a combination that does not occur in a month, the report does not run in that month. In the image below, Week is set to Third and Day is set to Wednesday. This means that this report runs every third week of every month on that Wednesday. 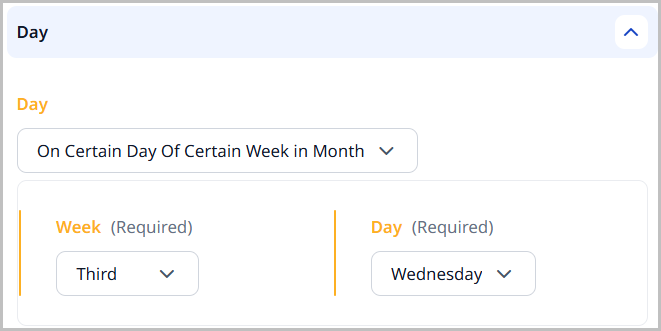 |
| On Certain Days Of Month | This setting runs the report on the days of the month that are specified. Expand Days and select the days of the month (1–31) that you want the report to run. You can select multiple dates. In the image below, you can see that this report will run on the 4th, 8th, 12th, and 20th of each month. 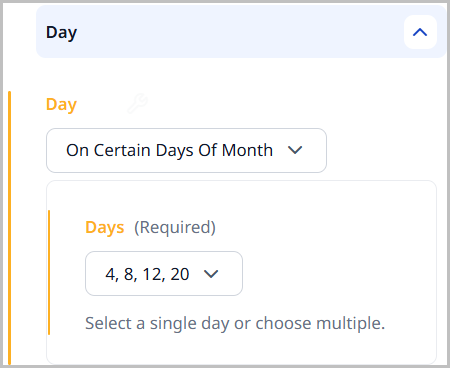 |
| On Certain Days Of Week | This setting runs the report on the days of the week specified. You can specify more than one day. Expand Days and select the days of the week you want the report to run. In the image below, this report is set to run on every Tuesday and Thursday of the month. 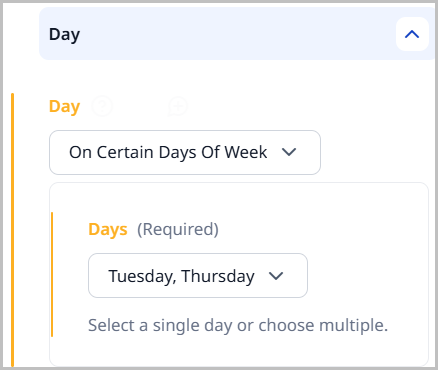 |
| X Days Before End Of Month | This setting runs the report on the specified days before the end of each month. Expand Days and select the number of days before the end of each month that you want this report to run. In the image below, the report is set to run five days before the end of each month. 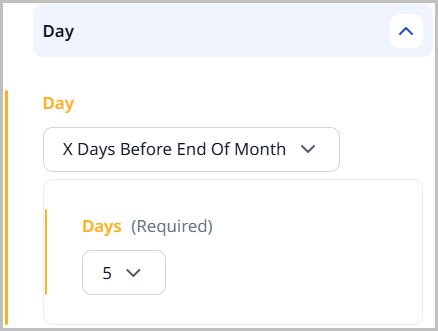 |
Month
Use the Month setting to specify the monthly recurrence options for the report.
| Option | Description |
|---|---|
| During Certain Months | This setting specifies that the report will run only during the months that are selected. Expand Months and select the months you would like this report to run. You can specify a single month or multiple months. In the image below, the report is scheduled to run every March, June, and October. 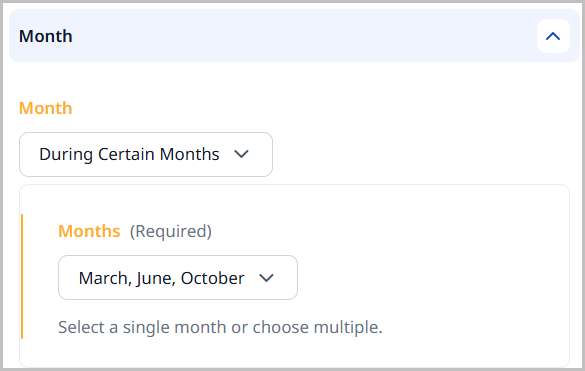 |
| Every Month | This setting specifies that the report will run every month. This is the default setting in the Month cluster. |
| Every Month In Range | This setting specifies that the report will run each month within the range of months specified. Expand Start and select the month to start running the report. Expand End and select the month to stop running the report. In the image below, the report is scheduled to run every month beginning in June and ending in August. 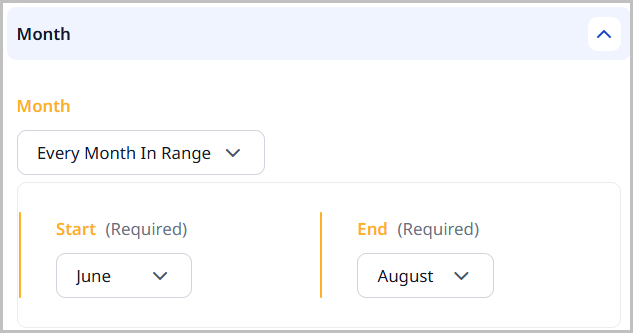 |
| Every X Months | This setting specifies that the report will run on a specified frequency based on the month selected. Expand Start and select the month to begin running the report. Expand Frequency and select how often you would like the report to run. In the image below, the report is scheduled to begin running in February and continue running every three months after that. 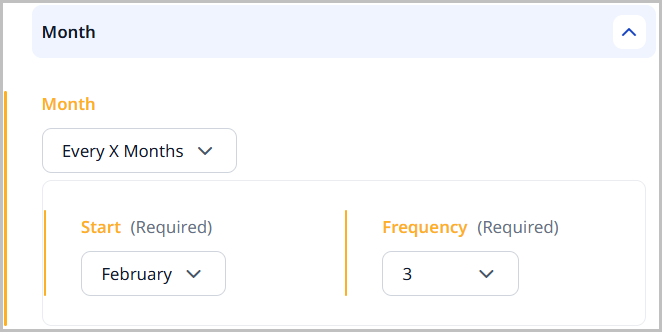 |
To illustrate how the clusters work together, a few samples are available below. Click the example heading to view what the setup would look like in Brightspot.
Example 1
- Runs at midnight (0000), 6:00 AM (0600), noon (1200), and 6:00 PM (1800).
- Every fifth day beginning on the first of the month.
- Every month.

Example 2
- Every hour.
- On the last day of the month.
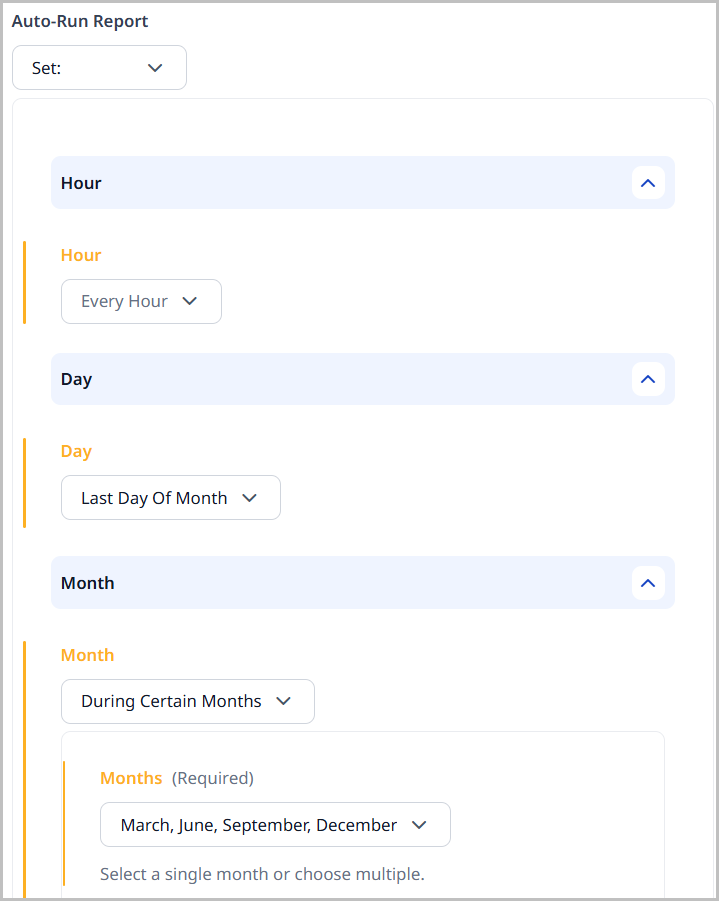
- Only in the months of March, June, September, December.
Example 3
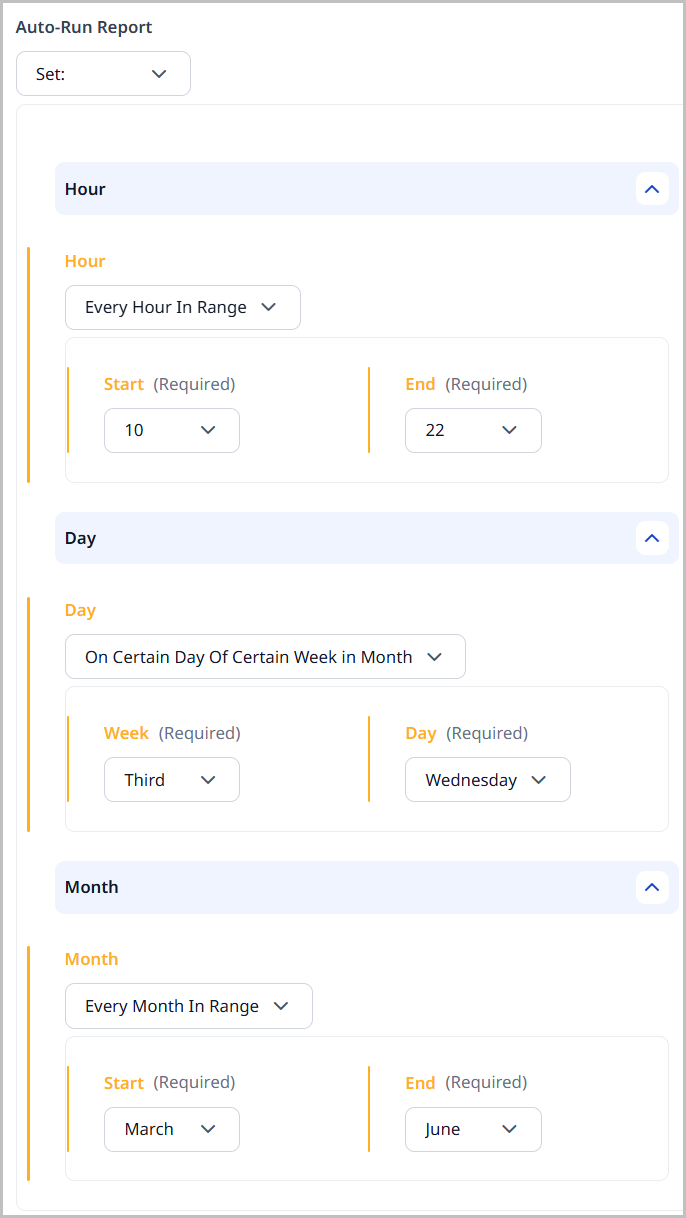
- Every hour between 10:00 AM (1000) and 10:00 PM (2200).
- Only on the Wednesday of the third week of the month.
- Every month beginning in March and ending in June.
Content Reports widget
The Content Reports widget shows what editorial content reports have been set up for your site. You can also download reports from this widget.

To configure the Content Reports widget:
-
Create or open a shared or one-off dashboard, and add the Content Reports widget.
-
Expand Preferred Download Formats and select the format in which you would like the editorial content report downloaded.
NoteThe list of Preferred Download Formats is ordered by priority. If the first format is unavailable, the second format will be the download option.
-
Click to add additional formats as available.
-
Click Save.
To use the Content Reports widget
- Click a report's name to navigate to the Edit Report page where you can make changes or run the report.
- Click to download a copy of the report from the run date and time shown in the widget.
Tutorial: Creating and auto-scheduling an editorial content report
Assume that you are a manager for a digital marketing agency, managing content for a client who wants to measure the effectiveness of a content marketing strategy over the course of a quarter. You want to analyze what content you have published over this time period and then use that data to inform conversations about content performance and trends, as well as to help you make data-driven decisions to improve your content strategy.
After finishing this tutorial, you will be able to create an automated editorial content report that keeps your team updated with the latest content performance insights without having to manually generate reports every time.
Context
Your digital marketing agency is working with a Software as a Service (SaaS) company that offers project management tools. The SaaS company wants to understand the impact of its content marketing efforts.
Objective
The goal of the editorial content report is to:
- Measure the performance of content produced over a quarter.
- Optimize future content strategies based on the insights from the report.
Prerequisites:
Your role requires certain permissions to view and create editorial content reports.
- You must have the Area > Reports permission.
- You must have the UI > Manage Reports permission.
1. Create an editorial content report
- Click > Reports.
-
In the Name field, enter
Published Articles. -
In the Description field, enter
Report to generate a list of published articles. -
Under the Data Provider field, retain Data Supplier.
-
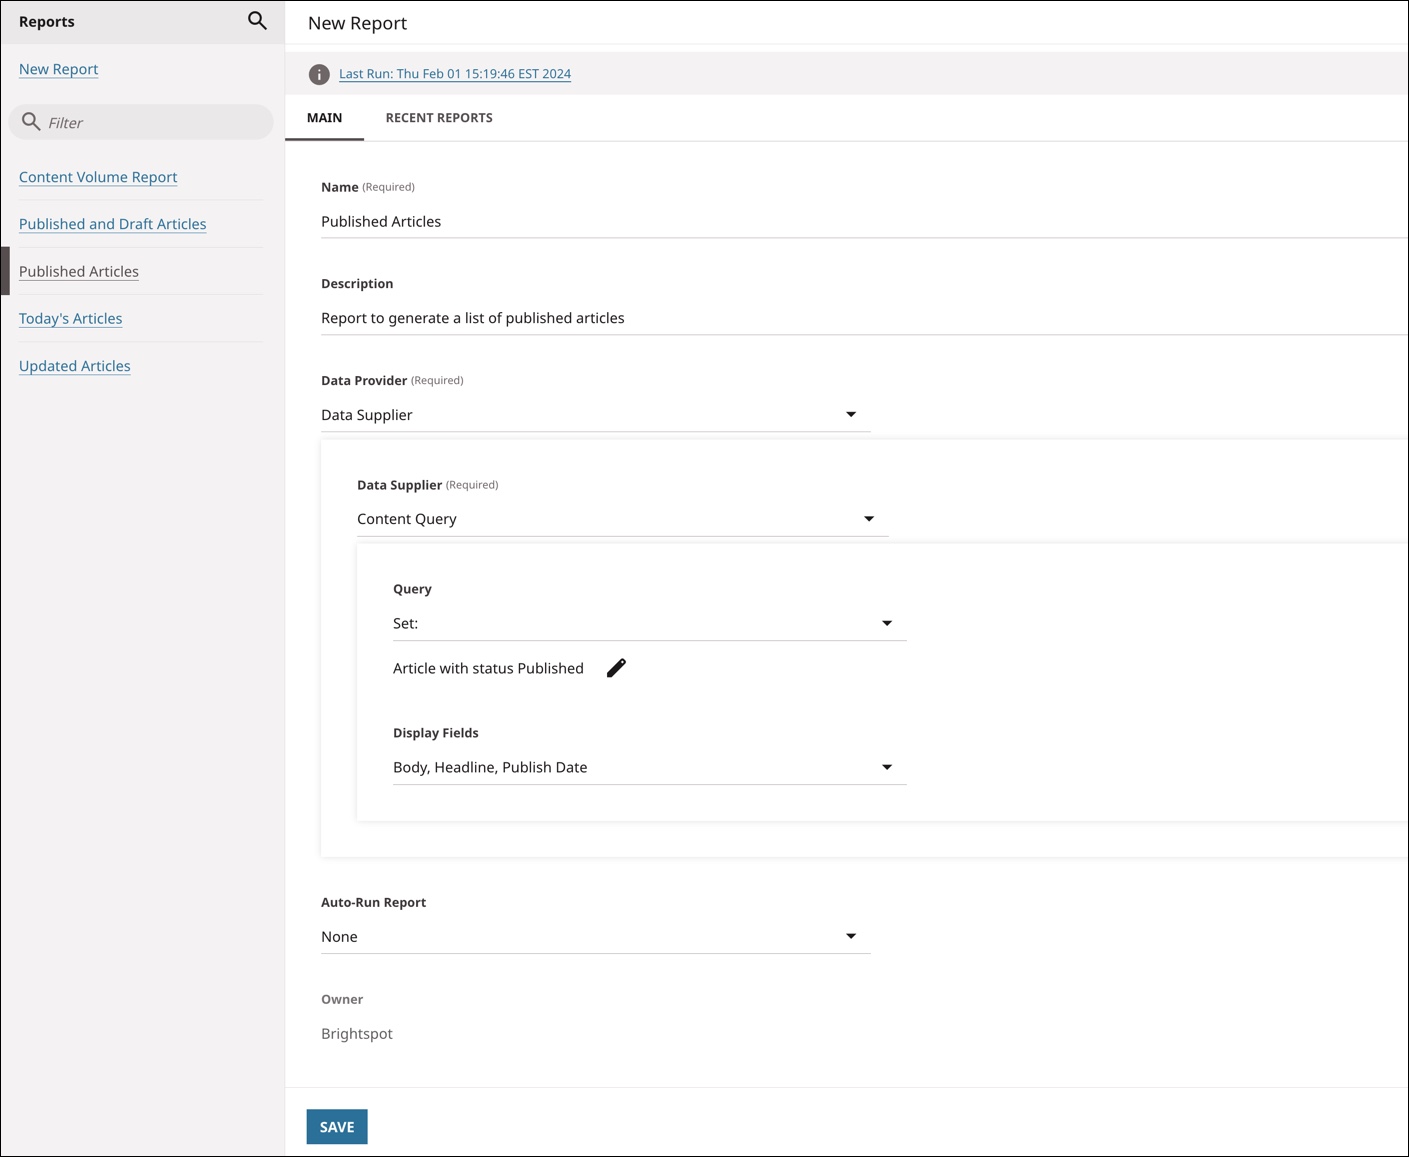
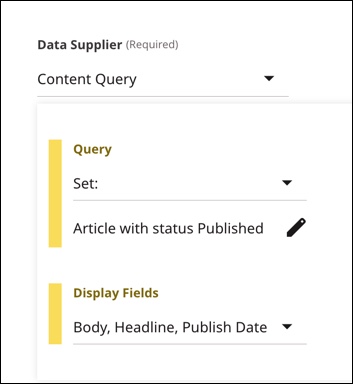
Under the Data Supplier field, retain Content Query. Your form should look similar to the following image.
-
Next to Any Content Type, click .
-
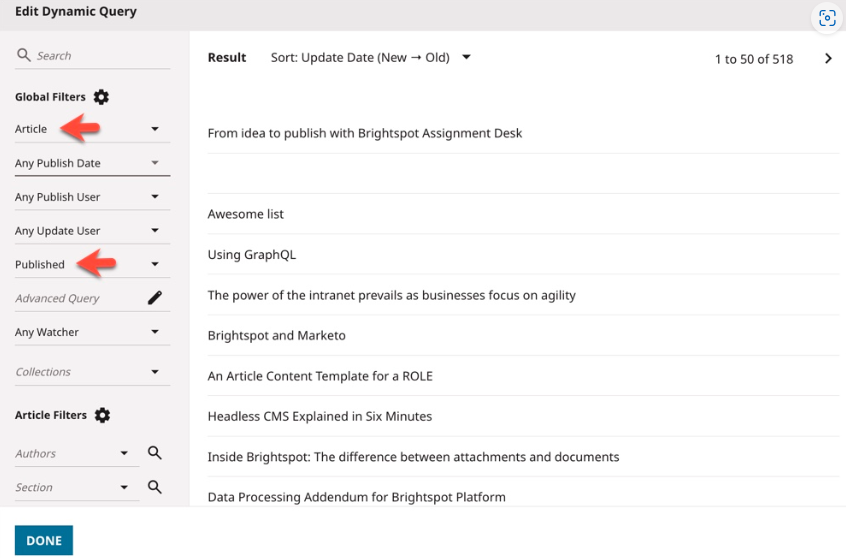
In the Edit Dynamic Query pop-up, create your query using the filters on the left by doing the following:
-
In the Any Content Type filter, select Article.
-
In the Any Status filter, select Published.
-
-
Once you have selected all of the criteria for your query, click Done.
-
Expand Display Fields and select the Body, Headline, and Publish Date fields from the drop-down to display in the report for the assets that it returns.
 Note
NoteOptionally you can click the checkboxes above the field groups to select all display fields in that field group.
-
Click Save.
2. Set up auto-run reports
As you create or edit an editorial content report, you have the option of making it automatically run on a scheduled basis. For this tutorial, you will set it so that it recurs weekly.
To set up a recurring schedule for a report:
-
Expand Auto-Run Report, and do the following:
-
Select Set:.
-
Expand the Day cluster and select Every X Days Of Week.
-
Under Start, select Monday.
-
Under Frequency, select 7.
This ensures the report runs automatically every week on Monday.
-
-
Click Save.
3. Configure the Content Reports widget
Now that you have set up an editorial content report and set it so that it recurs weekly, you will ensure that you can conveniently check the report on your dashboard. You will do this by configuring the Content Reports widget.
To configure the Content Reports widget:
-
Create or open an existing shared or one-off dashboard. For details, see Creating a shared dashboard or Creating a one-off dashboard.
-
Under Main Tab Columns, expand the dashboard column.
-
Under Widgets, click Add.
-
Select Content Reports Widget.
-
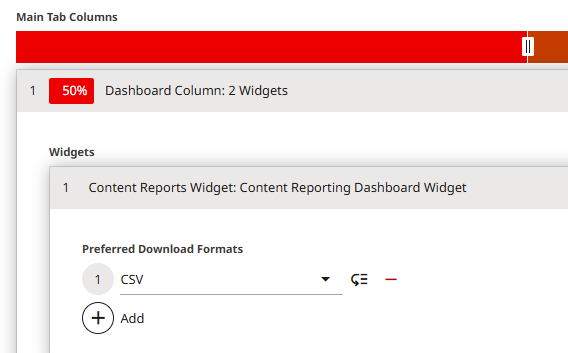
Under Preferred Download Formats, click Add.
-
Select CSV from the list.
-
Click Save.
-
4. Verify that the Content Reports widget is working as intended
Now that you have configured an editorial content report and have configured a dashboard to display the Content Reports widget, you will confirm that the widget is working as intended.
- Return to the dashboard.
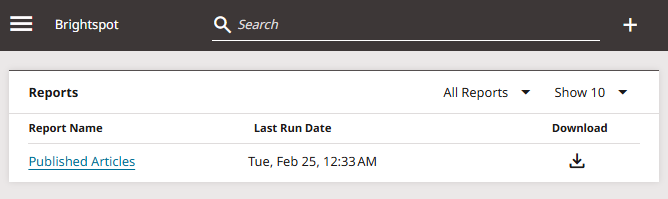
- Ensure that the Main tab on the dashboard displays the Content Reports widget with a list of all reports, including the
Published Articlesreport you made during this tutorial. - Click to download a copy of the
Published Articlesreport from the run date and time shown in the widget.
In this tutorial, you've learned to create an editorial content report and schedule it to recur every seven days that helps you see what you have published, which can help inform conversations about content performance and trends, and can help you make data-driven decisions to improve your content strategy.