Creating a footer
A footer is a consistent piece of content that appears at the bottom of each page in a site. Enterprise-grade footers typically include links to general resources, such as to privacy statements and contact forms.
Footers follow the rules of content hierarchy. If you define a footer at the global level, it flows to the site level, then the section level, and finally the asset level.
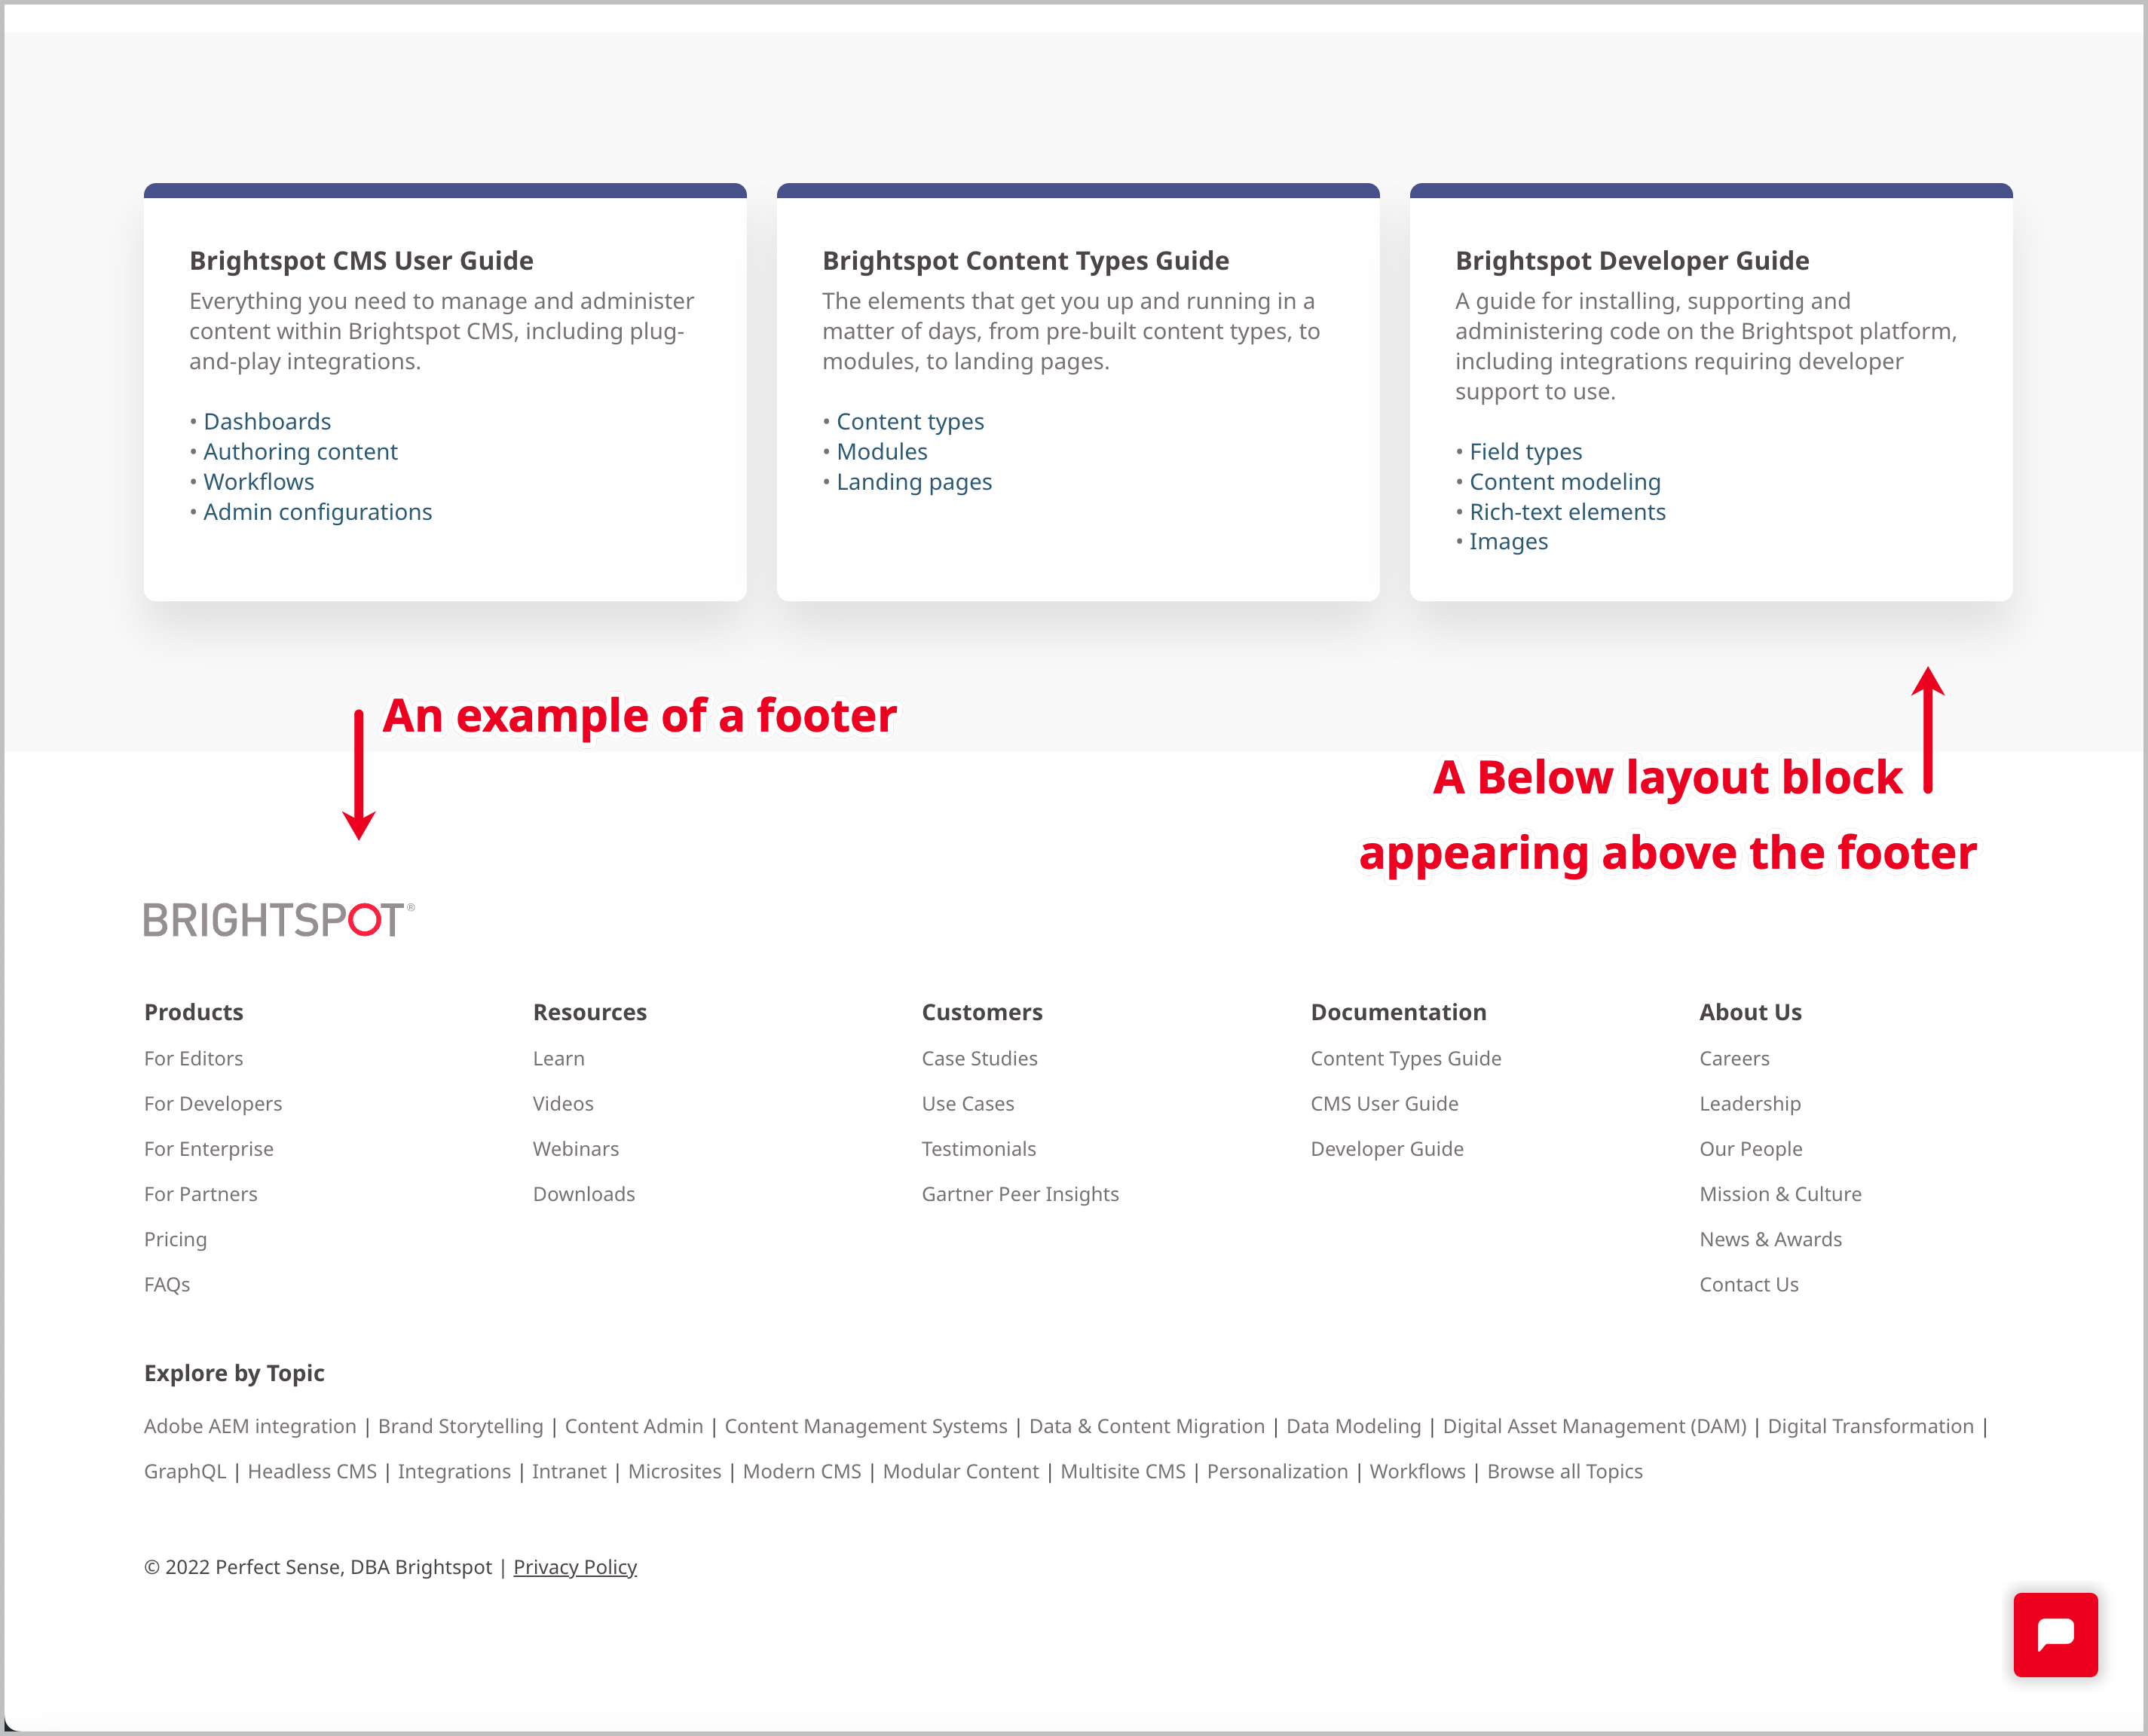
The following illustration shows how Brightspot renders a footer.
To create a footer:
- Click > Admin > Sites & Settings.
- Select the site for which you want to configure a footer.
- From the Front-End tab, expand the Layout cluster.
- Using the following table as a reference, complete the fields as needed.
- Click Save.
| Field | Description |
| Footer | Choose Select from the list, then, in the second list, choose Create New. Note This second dropdown list is also where you can select and apply an existing footer. |
| Internal Name | Enter an internal name for this asset. Brightspot uses this name internally, such as in the search panel and recent activity widget. This name is not visible to visitors to your site. |
| Description | Enter a description that describes this asset. This description is visible to the visitors to your site. |
| Logo | Select an existing logo to be displayed in the footer, or upload a new one. For details, see Image Logo. |
| Navigation | Select an existing navigation to be displayed in the footer, or create a new one. For details, see Creating a navigation. |
| Content | Enter the asset's content by selecting and configuring a module. The module is visible to the visitors to your site. For more information, see Modules. |
| Copyright/Disclaimer | Enter text to serve as a disclaimer in the footer. Alternatively, you can enter a year to serve as a copyright stamp. If entering a year, you can add $YYYY as a date token, which Brightspot will replace with the current year. |