Image editing
With Brightspot's image editor, you can resize images, apply filters, rotate or flip, adjust brightness and contrast, as well as view source data, any image recognition results, and more. Brightspot applies these changes to the front-end display of the image without ever altering the original image file that was uploaded.
Setting focus points
An image's focus point is the ideal vertical and horizontal center for an image. The image editor in Brightspot allows users to set a default focus point that all image sizes, used on the front end of the site, will be centered around. Additionally, a focus point can be set for a specific group of images that share similar aspect ratios. Brightspot provides Landscape, Portrait, and Square groups by default, but these groups may be customized as needed.
To set a focus point:
- Search for and open an image.
- In the File field, under the image, click . Brightspot displays the recommended focus point.
- Click the image to set a new focus point.
Editing images
To edit images:
- Search for and open an image in the content edit page.
- In the File field, under the image, click to open the image editor.
- Referring to the controls below, edit the image.
| Control | Description |
|---|---|
| Rotates image counter-clockwise. | |
| Rotates image clockwise. | |
| Flips image horizontally. | |
| Flips image vertically. | |
| Brightness | Changes the image's brightness. |
| Contrast | Changes the image's contrast. |
| Invert | Inverts colors on original image, such as black appearing as white. |
| Sepia | Applies a sepia filter to the original image. |
| Grayscale | Applies a grayscale filter to the original image. |
| Reset | Displays image as it was added to Brightspot. |
Cropping images
To crop an image:
- Search for and open an image.
- In the File field, under the image, click to open the image editor.
- Navigate to the Sizes tab.
- Select one of the previews from the list on the left.
- On the right, click and drag the handles to adjust the crop as necessary. Click Reset if you need to reset the crop.
- Click Done to close the image editor.
Viewing additional image data
You can view information about an image, such as its metadata, resized versions, and recognition results.
To view additional image information:
- Search for and open an image.
- In the File field, under the image, click .
- Select one of the following from the list:
- Source Data—View image metadata, like dimensions, file type, etc.
- Resized Images—Preview the image in different sizes.
- Recognition Results—See tags returned by an image recognition provider (only displays if you have integrated with a recognition service).
- Original Image—View the original image in a new tab. Allows you to save the image or view its URL address.
Viewing image info from preview to edit
Some image data is also available in the preview pane, if preview to edit has been enabled for your site and asset. See Enabling preview to edit.
Hovering your mouse over an image in the preview pane displays a small pop-up that shows:
- Image height and width
- The name of the crop/size used to render the image
- Image aspect ratio
Contextual image editing
Contextual editing allows you to take image assets within Brightspot and give them a unique appearance for specific assets without modifying the original image asset. In order to use contextual image editing, the @ToolUi.ContextualImageEditing annotation must be applied to the field, and changes are required to be made to the appropriate view model to apply the metadata override; therefore, this feature requires assistance from a developer to enable.
Contextual image editing is not available for .svg files.
 |  |
|---|
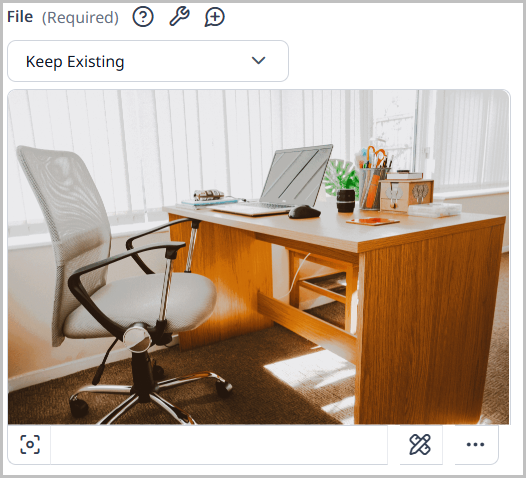
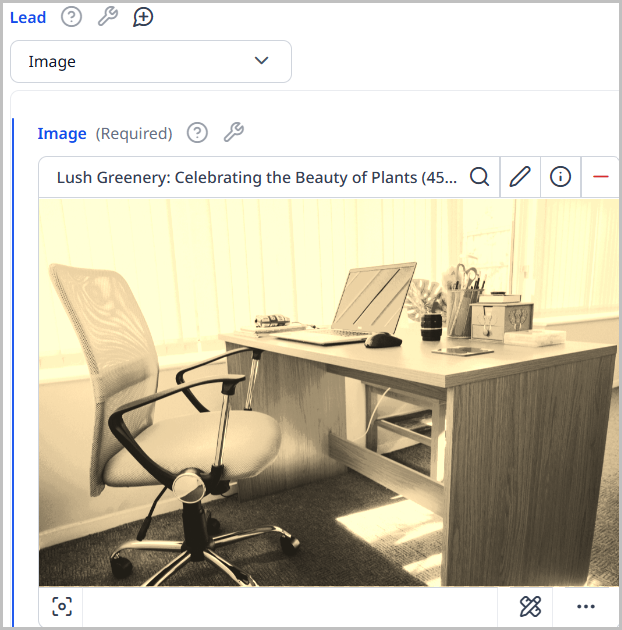
In the table above, there are two versions of the same image. The original image is on the left, while the one with contextual edits is on the right. The image on the left is the image that is stored in Brightspot as an image asset. This image asset can be used and reused as it appears on the left. Any changes you make to that image automatically cascade to every asset using it.
The image on the right is that same image asset placed in the Lead field within an article. Within this article, the image has had contextual edits applied. This image displays with the sepia effect only in this article. Anywhere else this image is used, it looks like the original on the left. Furthermore, any changes to the original image do not cascade to this image in the article.
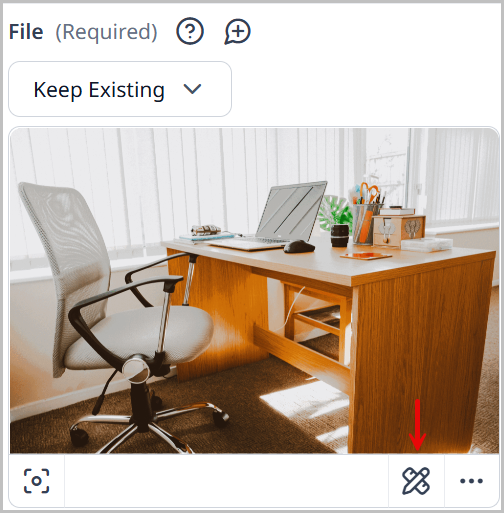
To contextually edit an image in an asset:
-
After adding an image to an asset in Brightspot, click to open the image editor.
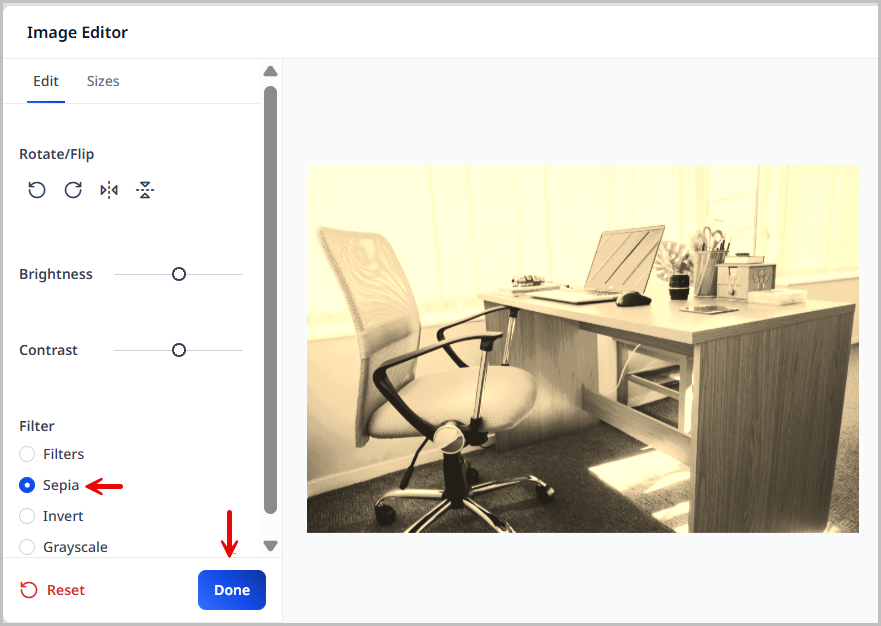
-
In the image editor, add any effects, edits, etc. to the image that you want to display within the asset where the image is placed.
-
When finished, click Done to be returned to the original asset where you added this image.
-
Complete your site's workflow and publish the asset.
When published, the asset that contains this image will display it with the edits you made, but not affect the original image asset.
Image search
Brightspot maintains a list of keywords associated with each image. Referring to the following example, the associated keywords may be tomato, vine, and red.
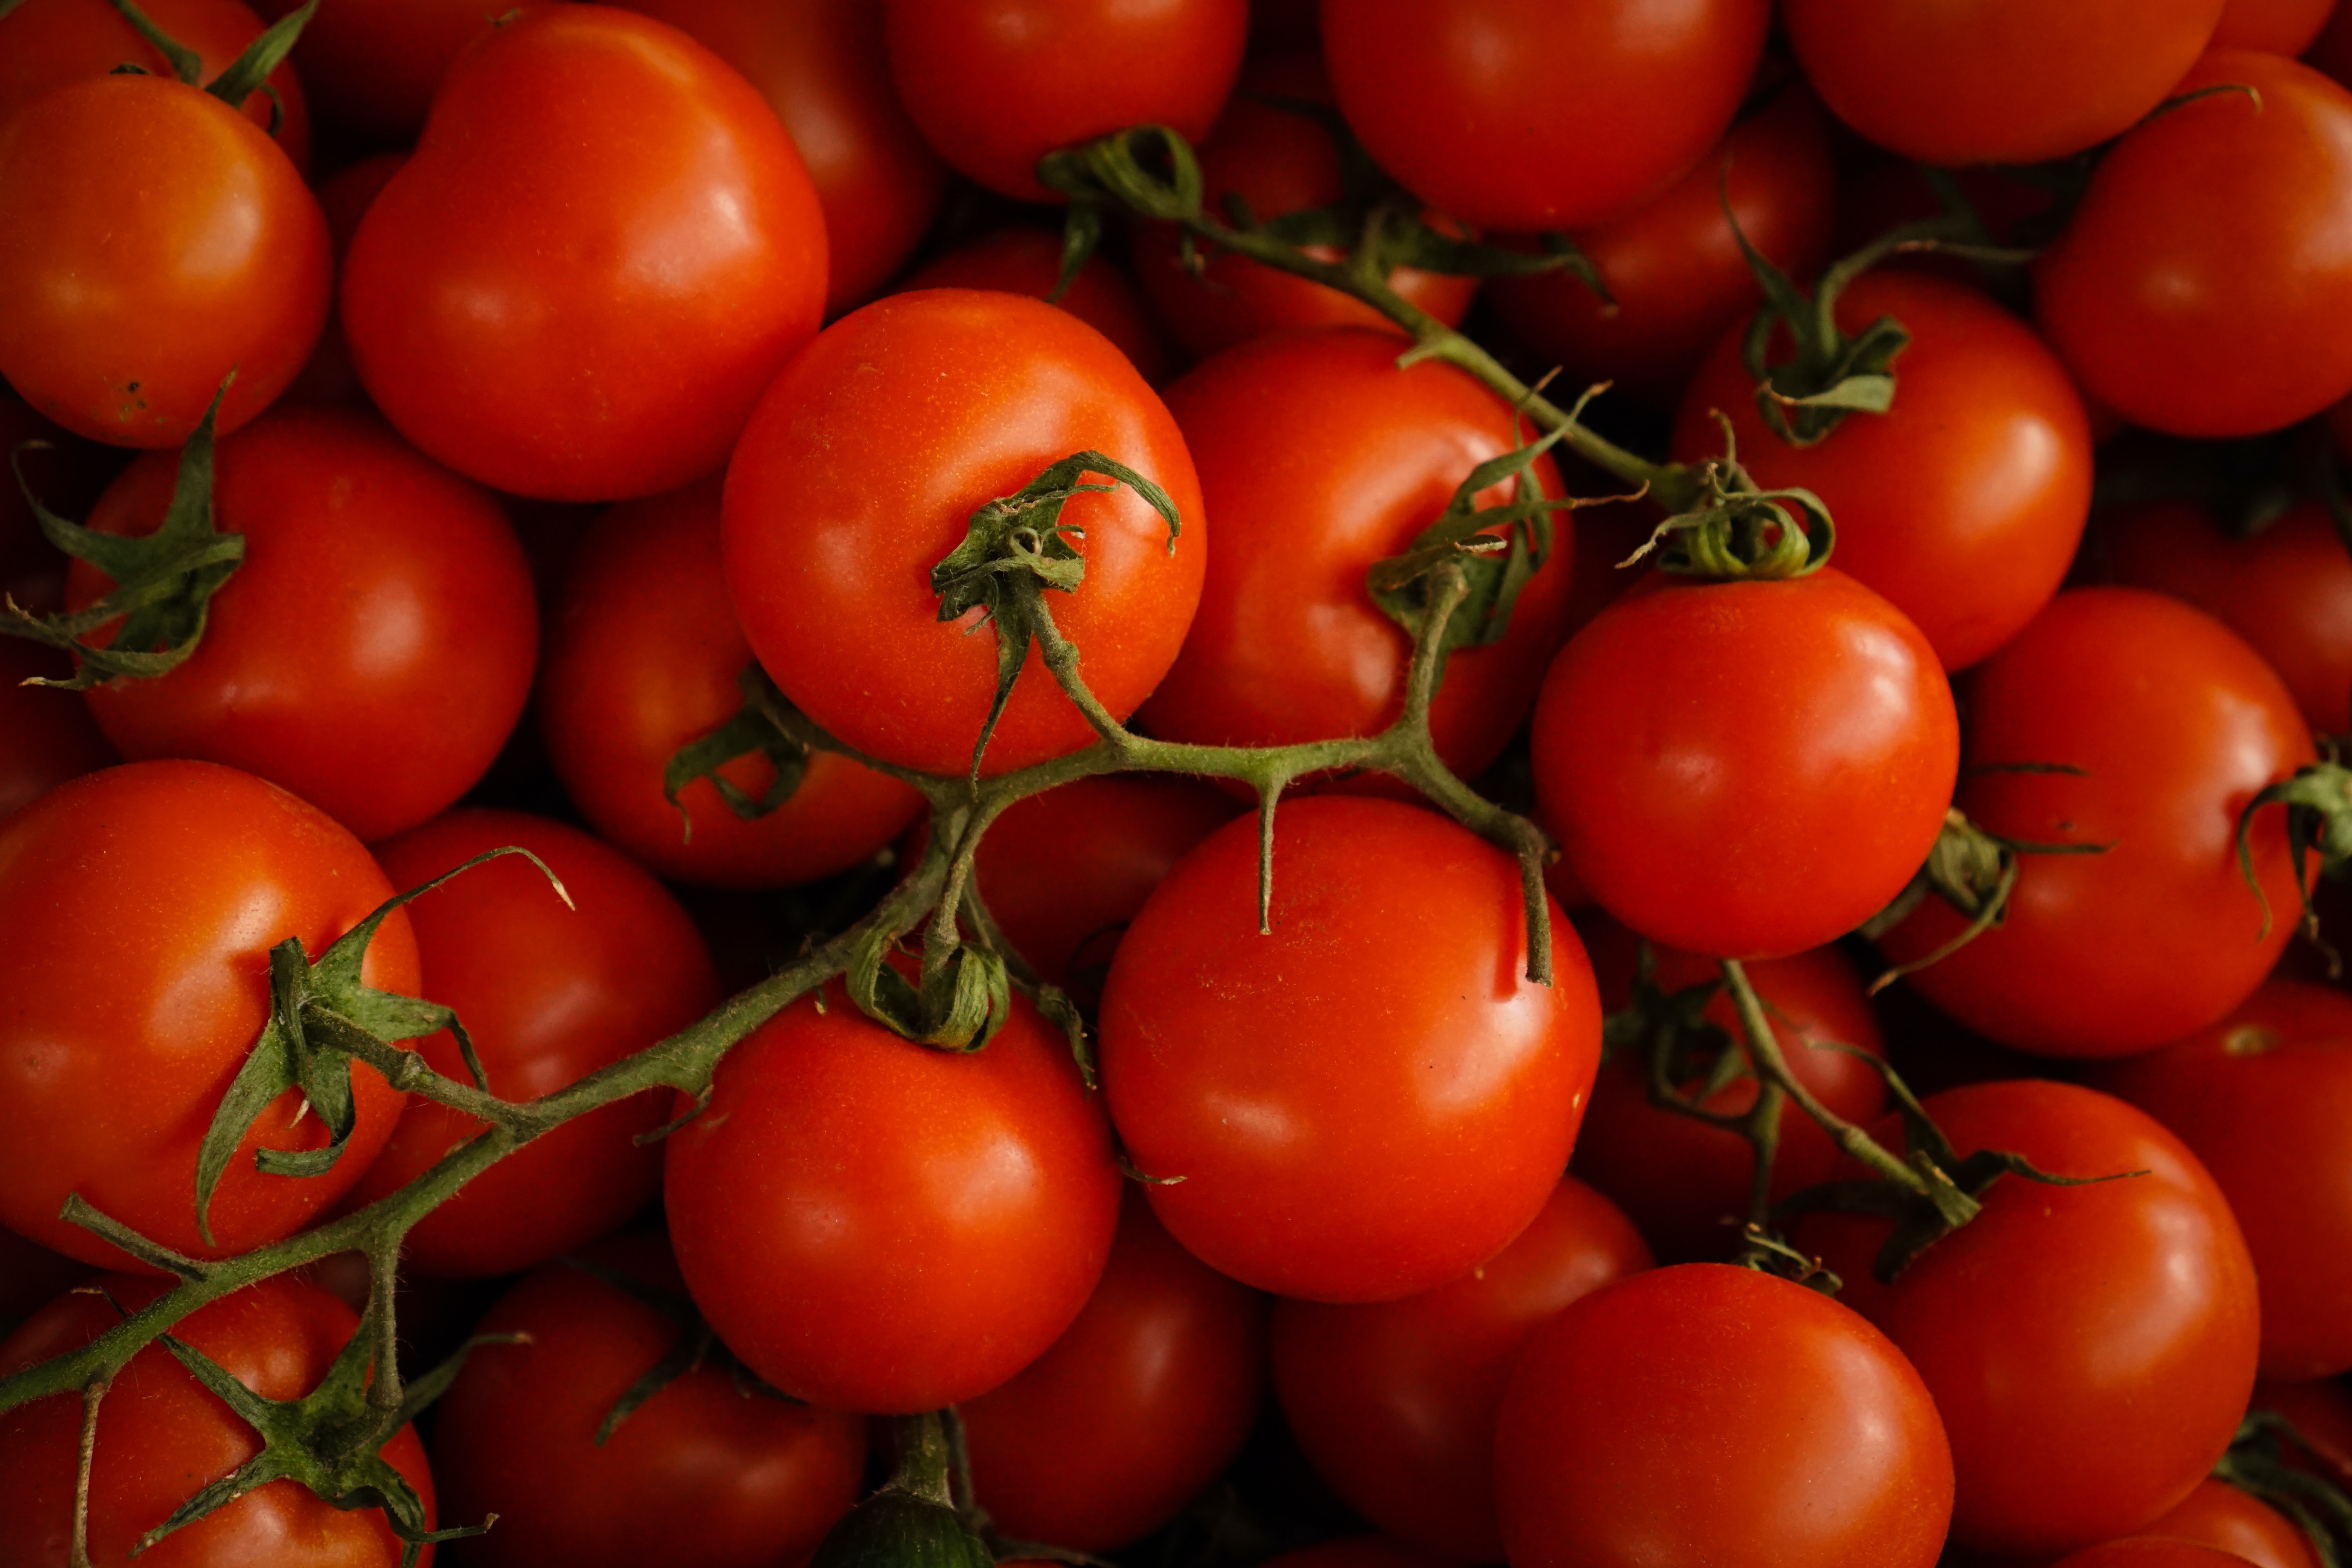
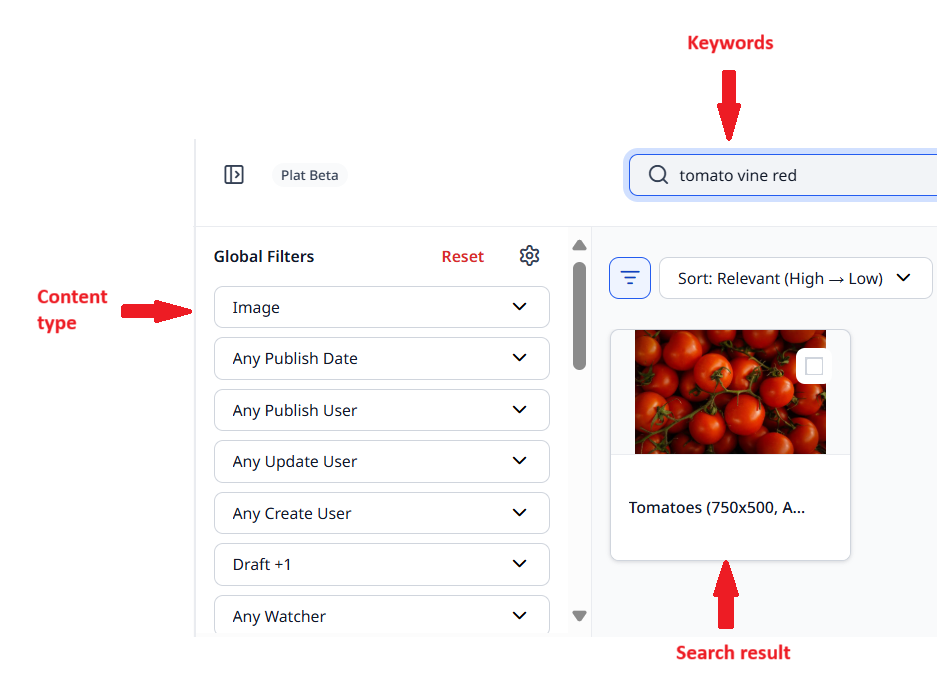
When an editor searches on those keywords, Brightspot retrieves the corresponding image. For example, an editor is writing a blog post about the health benefits of tomatoes. The editor may want to include the previous graphic as a lead image. To find that image, the editor enters the terms tomato, vine, and red in the search panel. Brightspot returns the above image (and any other images with those keywords).
You can manually associate keywords with an image. You can also have a service automatically generate keywords as described in Amazon Rekognition.
How Brightspot delivers images
When you upload an image to Brightspot, the image remains in its original form without any cropping or resizing. When a visitor views one of your pages that contains the image, Brightspot does the following:
- Determines the context required for the page.
- Crops, resizes, and otherwise modifies the image as required by the context.
- Delivers the modified image to the visitor's web browser.
- Saves a copy of the modified image for subsequent visits to the page.
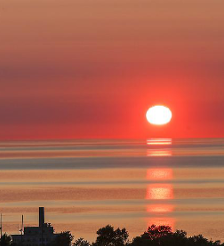
When cropping an image to a specific size, Brightspot crops around the original image's center. In the following example, the image to the left is 594 × 370 pixels, and the sunset is to the far right. In some contexts, Brightspot needs to deliver the image cropped to 224 × 246. Because the default crop is around the image's center, the sunset is lost.
| Original Image | Cropped Image |
|---|---|
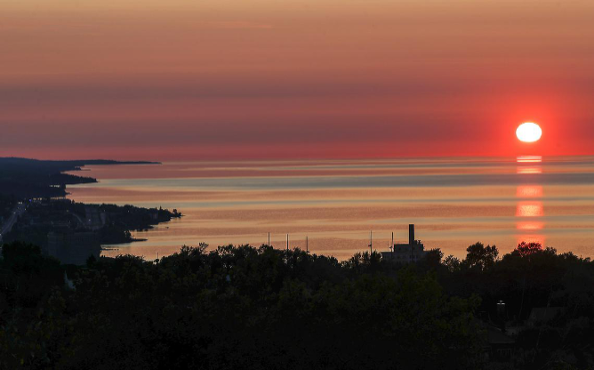 | 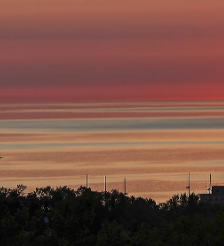 |
To prevent such situations, you can set a focus point inside an image. Brightspot then crops the original image around the focus point. For example, if you place the focus point on the sunset, Brightspot applies the 224 × 246 crop around the sunset, keeping the sunset as close to the center as possible.
Preventing blurry images
To avoid blurry images in your published content, upload to Brightspot the largest, highest resolution image possible—ideally three times the size of the image's largest version. For example, if a blogger's image ranges from 100 × 100 (avatar) to 600 × 600 (bio page) on your site, upload an original image that is 1800 × 1800.
Blurry images are a frustrating aspect of electronic publishing: the image you add to Brightspot is crisp and clear, yet seems blurry or jagged on a published page. Almost every blurred image is the result of adding or changing pixels in the original image somewhere along a graphic's timeline.
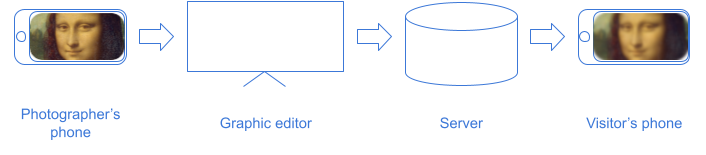
The previous illustration follows a graphic's typical timeline. A photographer captures the image; a graphic editor modifies the image and uploads it to the server; the server prepares the image for distribution; and the visitor's phone displays the image. Each of these stations along the timeline (graphic editor, server, visitor's phone) can modify the pixels in the original image, resulting in the blurries. The modifications that cause the worst blurries are enlarging an image, increasing an image's resolution, and reducing color depth.
See also:
- Does the quality decrease when you display a low resolution image on a high resolution screen?
- Comparison gallery of image scaling algorithms
Using large images
An enlarged image has more pixels than its original. For example, if an original image is 100 × 100, and the enlarged image is 300 × 300, there are an additional 90,000 − 10,000 = 80,000 pixels that need to be filled in. Ideally, the new pixels contain colors that maintain the contrast between two previously adjacent pixels. The following example illustrates what happens when enlarging an original image with smooth color transitions.
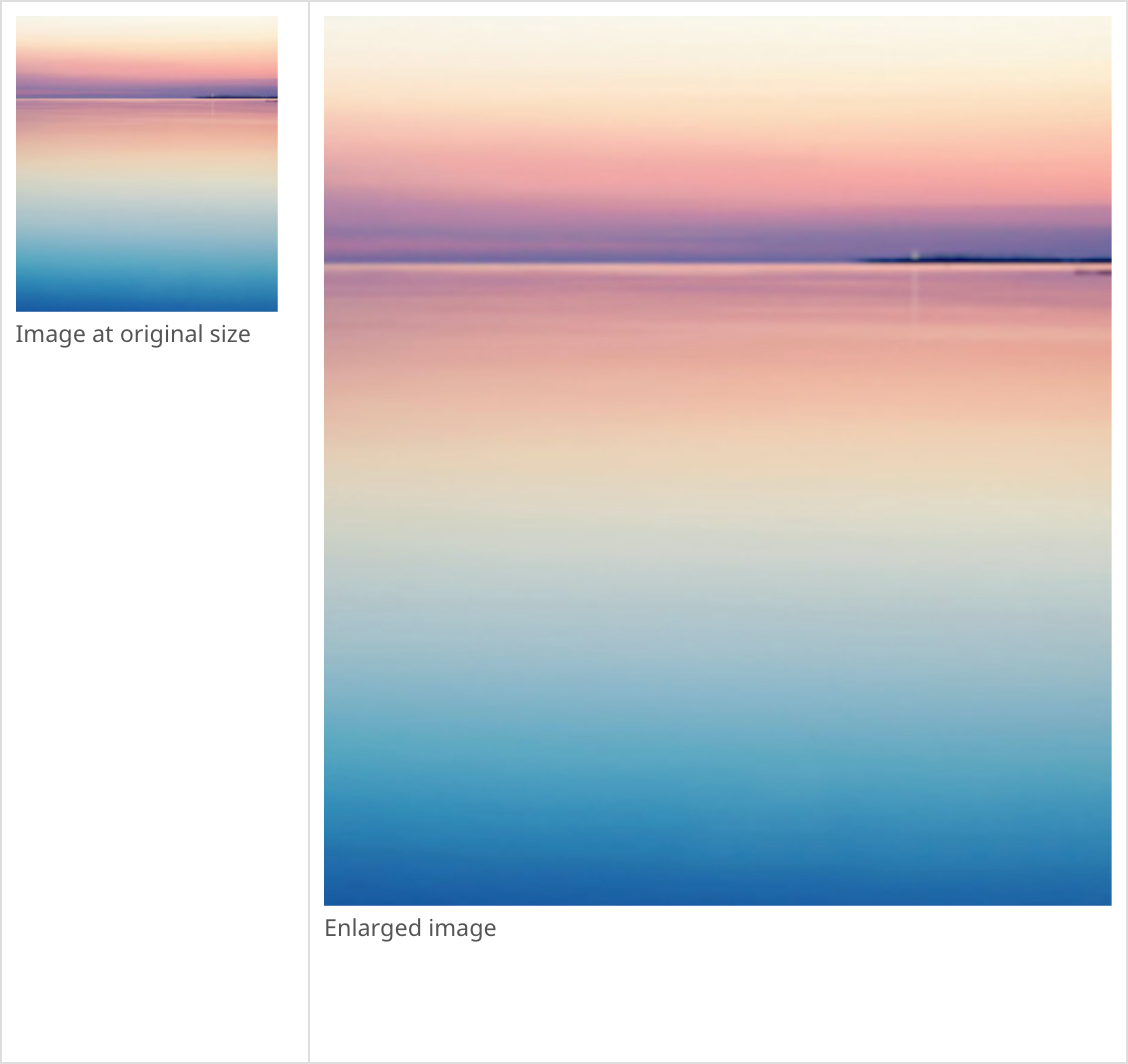
In the previous example, there is a smooth transition from one color to another in the original image, so filling in the new pixels to maintain the smoothness is easy. The new pixels have colors similar to the original pixels. The blurries are there but barely perceptible.
The following example illustrates the damage done to an enlarged image when the original has many areas of high contrast.
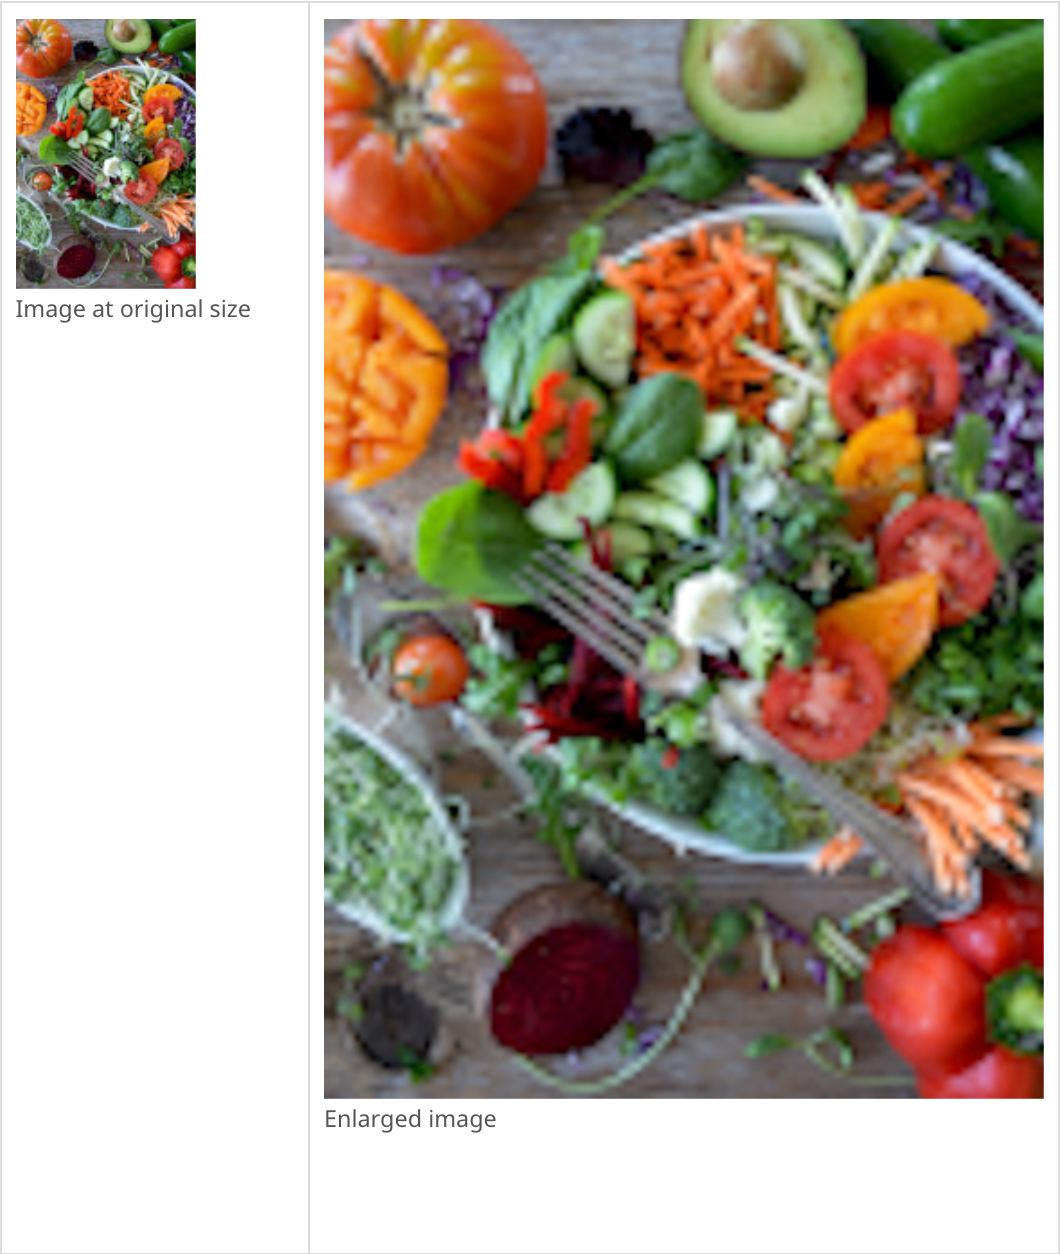
In the previous original image, the fork's teeth are an alternating contrast between gray and black, and for the enlarged image Brightspot needs to fill the new pixels with the colors that best maintain that contrast—as well as the contrast with the surrounding vegetables. The results are mediocre: any algorithm used to maintain the contrast inevitably produces results that the human eye perceives as blurry.
The best strategy for avoiding the blurries on enlarged images is to use a large image in the first place. Otherwise, use an original image with smooth transitions from one color to another.
Matching color depth
Color depth refers to the number of colors available to use in an image. Many years ago, computer monitors and graphics cards supported 8-bit colors, allowing for only 512 colors in an image. Today, the vast majority of monitors and graphics cards support 24-bit colors, allowing for 16 million (actually 16,777,216) colors. As a result, older monitors convert a 24-bit image by finding the closest one from the available 512.
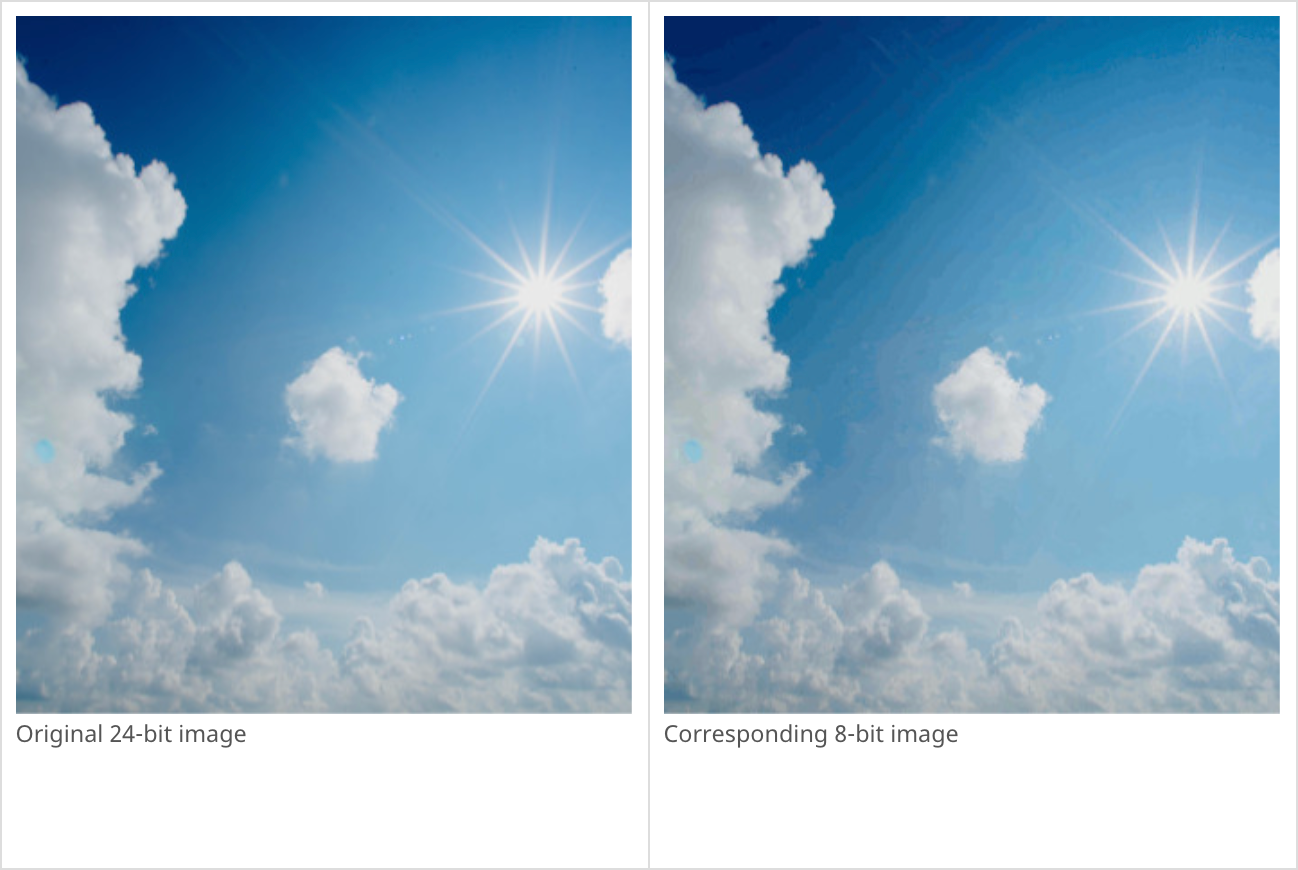
In the previous example, the colors span from the white sun to the dark blue sky, and the enormous 16-million-color palette means any shade of blue is available to make the appearance of a smooth transition. In the 8-bit image there are only 512 colors available, severely limiting the available shades of blue. The device selects the closest available color, resulting in waves of shading.
If your visitors use older monitors, consider uploading to Brightspot images created with 8-bit color depth.