Creating a shared dashboard
A shared dashboard can be shared to other sites, roles, or users. Once created, any other site, role, or user can reuse
To create a shared dashboard:
-
Click > Admin > Dashboards.
-
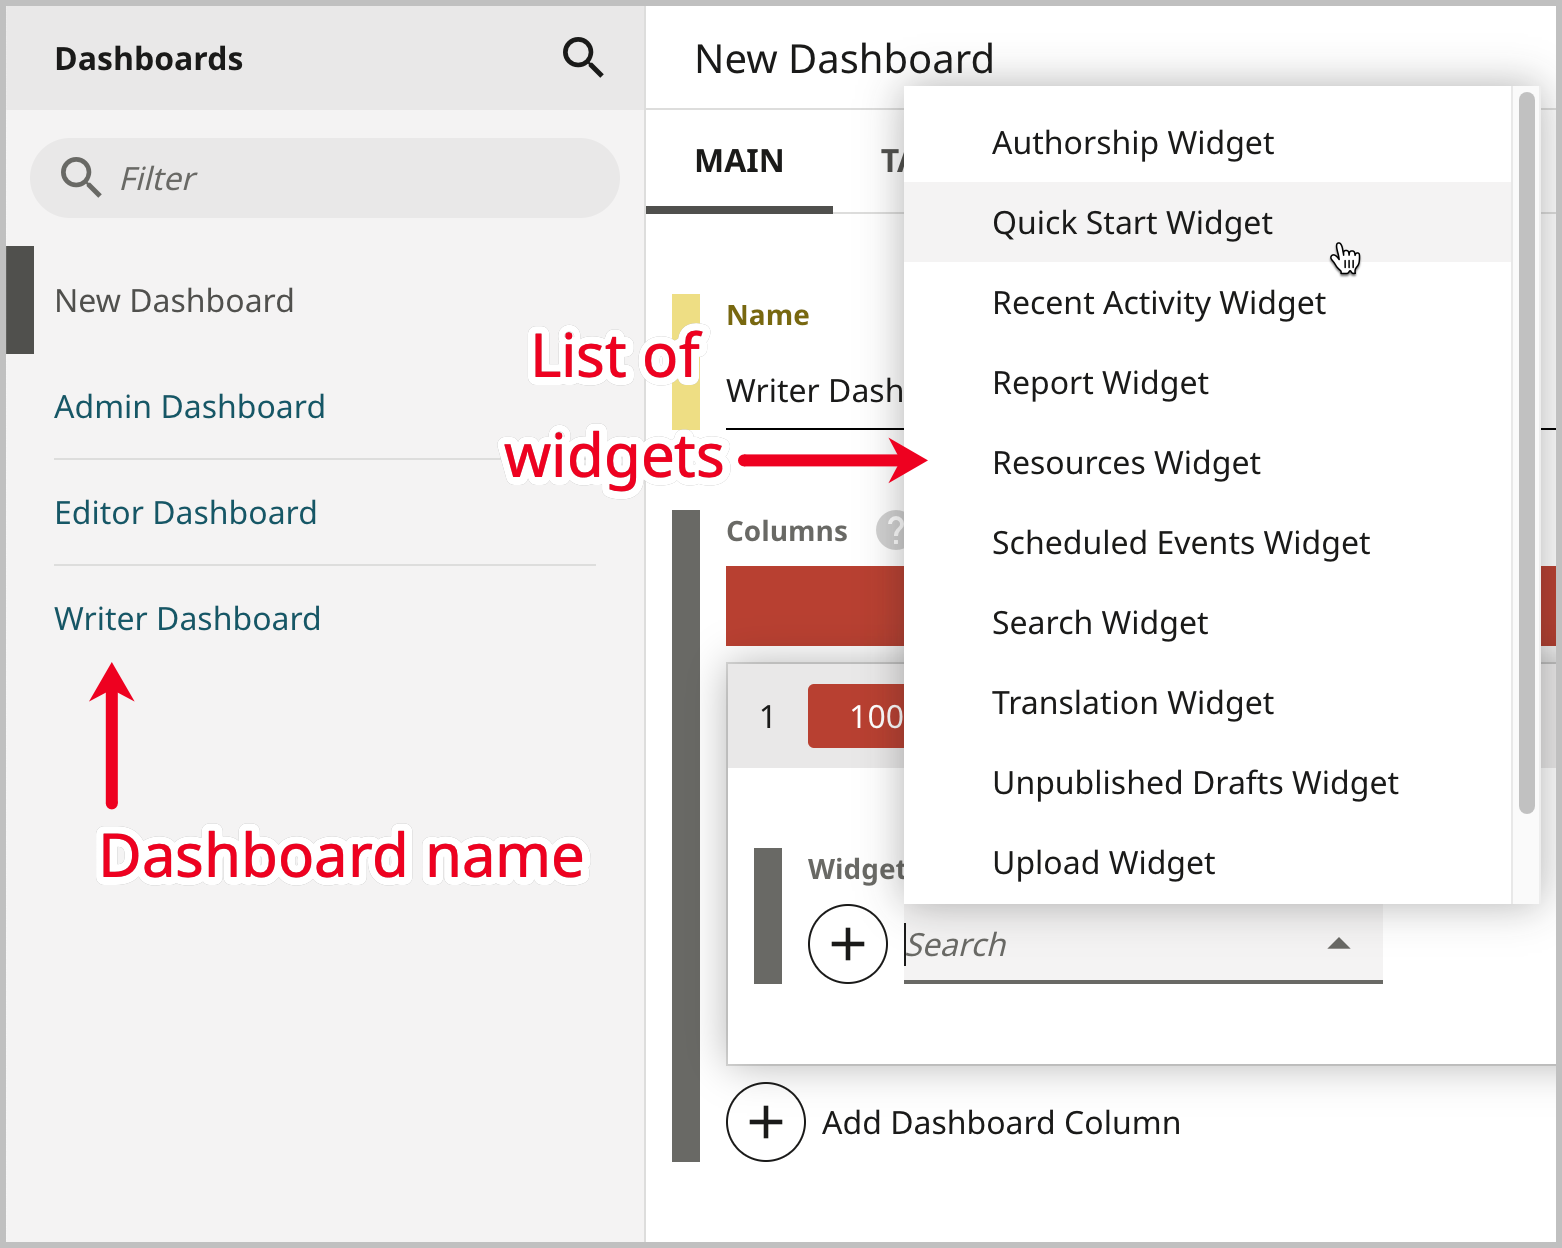
From the Dashboard or Default Dashboard list, select New Dashboard.
-
Enter a name for the dashboard. This name is used internally to reference this dashboard.
-
Add columns to the dashboard by doing the following:
-
Click to add a dashboard column.
-
From the Widgets list, select a widget to include in the dashboard column. For a list of available widgets, see Standard dashboard and widgets.
-
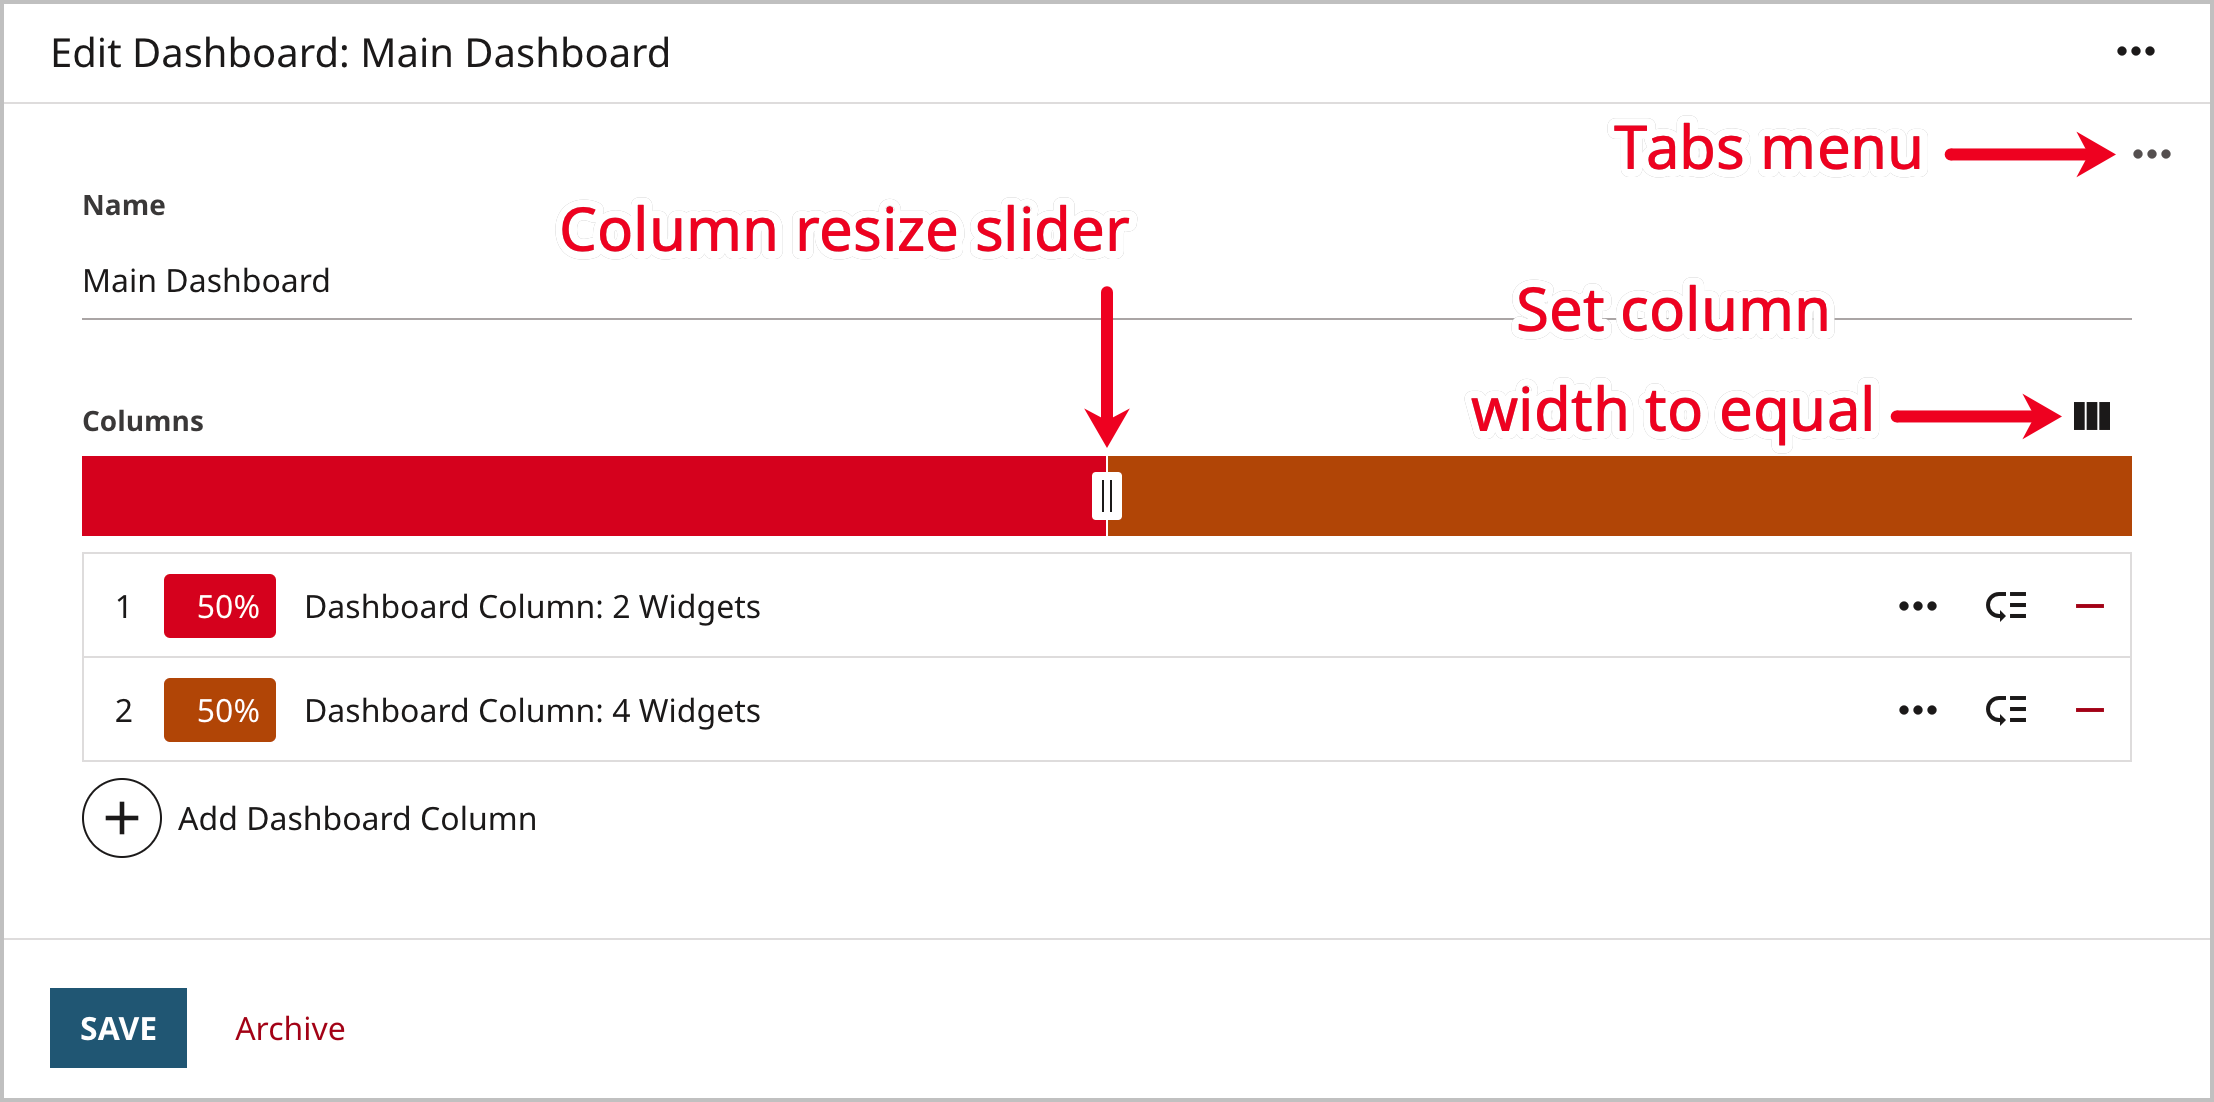
Resize the columns by dragging the resize button, or click to set all the column widths to be equal.
-
Repeat steps a–c to add more columns and widgets to the dashboard.
-
-
Add tabs to the dashboard by doing the following:
-
Click > Tabs.
-
Under Tabs, click .
-
Enter a name for the dashboard tab.
-
Click to add a dashboard column.
-
From the Widgets list, select a widget to include in the dashboard column. For a list of available widgets, see Standard dashboard and widgets.
-
Resize the columns by dragging the resize button, or click to set all the column widths to be equal.
-
Repeat steps b–f to add more tabs to the dashboard.
-
-
Click Save.